How To Fix Fish Finder Transducer Bracket Bending?
A bent transducer bracket can throw off your entire fish finder setup. You might notice blank spots on your screen. Or maybe your readings look scattered and unreliable.
This problem happens more often than you think. Boat impacts, rough water, and even simple wear cause brackets to bend over time.
The good news is you can fix this yourself. You don’t need to be a boat mechanic to solve this issue.
In a Nutshell
- Check the alignment first. Your transducer should sit in line with the hull bottom. This simple check prevents most bending problems before they start.
- Loosen the bolts to adjust. If the angle looks off, loosen the bracket bolts and reposition the transducer. Lower the tail slightly for better readings.
- Inspect all hardware carefully. Look closely at screws, clips, and the bracket itself. Bent hardware often causes ongoing issues even after adjustment.
- Watch for air bubbles. Misalignment can trap air near the transducer face. This interferes with your readings and signal quality.
- Fix small cracks with glue. Epoxy or super glue works well for broken plastic clips. This is often enough to get you back on the water.
- Replace when damage is severe. If the bracket is badly cracked or twisted, swap it out for a new one. Metal brackets tend to hold up better than plastic over time.
Understanding Transducer Bracket Bending and Its Causes
A bent transducer bracket happens when physical force pushes the bracket out of shape. This bending creates misalignment between your transducer and the boat hull. When misaligned, the transducer sends signals at the wrong angle.
Several things cause bracket bending. Impact damage ranks first on the list. Hitting underwater stumps, rocks, or shallow debris can crack the bracket or bend its mounting points. Even minor collisions add up over time. The bracket ears, which hold the transducer, break easily during these impacts.
Water pressure also plays a role. As your boat moves through water, pressure builds against the transducer. If the bracket lacks proper support, this pressure bends it gradually. Plastic brackets suffer more from pressure damage than metal ones.
Installation mistakes cause bending too. If you mount the transducer at the wrong angle, stress concentrates on certain bracket points. The bracket then bends under normal water pressure. Improper bolt tightness makes this worse. Loose bolts let the bracket shift and flex. Tight bolts create stress points that eventually crack.
Temperature changes affect bracket materials. Plastic expands and contracts with water temperature shifts. This movement weakens the bracket over time. Repeated expansion and contraction eventually causes cracks and bends.
Cable routing problems contribute as well. If the cable pulls too hard on the bracket, it creates tension. This tension bends the bracket slowly. Poor cable management during installation sets this problem in motion.
Understanding these causes helps you prevent bending before it starts. Most bracket damage comes from either impact or improper installation. Knowing what damages your bracket lets you take protective steps. You can position your transducer correctly from the beginning. You can also avoid shallow water and debris when possible.
Signs Your Bracket Alignment Is Affecting Fish Finder Performance
Your fish finder’s performance drops when the bracket bends out of alignment. You’ll notice several warning signs before the problem gets worse.
Weak or missing sonar signals appear first. Your screen shows blank spots or gaps where fish should appear. This happens because the transducer points in the wrong direction after bending.
Inconsistent depth readings are another red flag. The display jumps between different numbers instead of staying steady. A bent bracket angles the transducer incorrectly, so it reads water depth at odd angles rather than straight down.
Air bubbles on the screen show up as interference patterns or noise. When the bracket bends, the transducer tilts away from the hull bottom. This creates pockets of air around the transducer face, which blocks sonar signals from working properly.
Loss of bottom tracking means your fish finder can’t maintain a clear picture of the lake or ocean floor. The device struggles to keep up with depth changes as you move the boat. A misaligned bracket causes this frustration.
Dead zones in your sonar view appear as dark or empty areas on your display. These zones expand as bracket bending gets worse. You’ll miss fish hiding in certain spots because the sonar can’t reach those areas.
Difficulty locking onto targets makes it hard to track moving fish. The transducer sends signals at the wrong angle, so returning echoes don’t register properly.
Pay attention to these signs early. Catching bracket misalignment quickly prevents expensive damage to your entire fish finder system. Check your transducer alignment regularly to keep your sonar working at full strength.
Step-by-Step Guide to Realigning a Bent Bracket
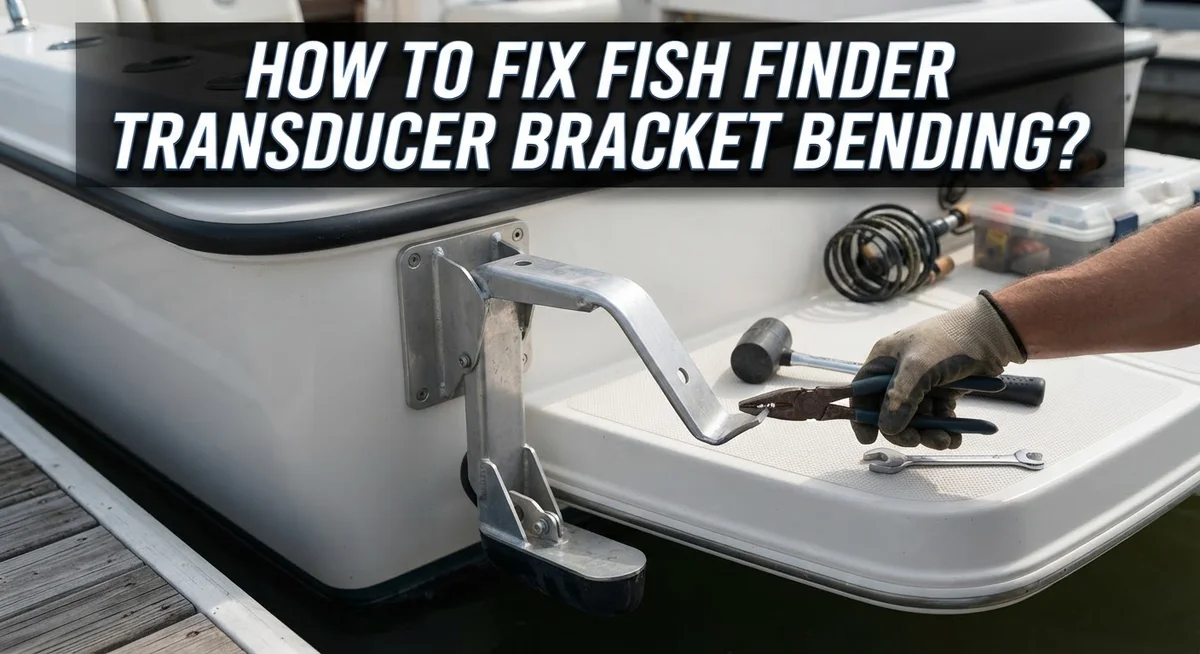
Start by gathering your tools. You’ll need a wrench or socket set, a screwdriver, and possibly a small hammer. Work in a clean, dry space where you can see the bracket clearly.
First, remove the transducer from the water. Locate all bolts connecting the bracket to your boat’s hull or mounting surface. Loosen each bolt gradually. Don’t remove them completely yet. This gives you room to adjust the bracket’s angle and position.
Next, inspect the bracket closely. Look for visible cracks, twists, or permanent bends. Run your fingers along the entire surface. Metal brackets show damage more obviously than plastic ones. If you spot severe damage, the bracket likely needs replacement.
Now comes the realignment step. Gently push or pull the bracket to bring the transducer back into line with your hull’s bottom. The transducer face should sit parallel to the water surface. Small adjustments make a big difference in performance.
Tighten the bolts gradually. Work in a cross pattern, like tightening a car wheel. This prevents uneven pressure that could bend the bracket again. Tighten each bolt a little, then move to the opposite one. Keep the transducer positioned correctly as you work.
Finally, double check the alignment. The transducer should hang straight down with no tilting or angling. Verify the cable routes smoothly without kinks. Lower the transducer back into the water slowly. Watch for any unusual sounds or resistance.
Test your fish finder immediately. Check that sonar signals return clearly. If readings look normal, your realignment worked successfully.
Inspecting Hardware and Repairing Minor Damage
Start by turning off your fish finder and removing the transducer from the water. Safety comes first when working with electrical equipment.
Inspect the bracket closely for visible damage. Look at the mounting points where bolts connect to your boat. Check for cracks, twists, or areas where the metal or plastic appears permanently deformed. Run your fingers along the bracket surfaces to feel for sharp edges or stress points.
Pay special attention to the bracket’s corners and joints. These areas experience the most stress during impact or rough water conditions. If you see hairline cracks in plastic brackets, they may worsen over time.
Examine all hardware thoroughly. Verify that bolts are tight and haven’t loosened from vibration. Loose bolts allow the bracket to shift and bend further. Check if any bolts are bent or corroded, as damaged fasteners won’t hold properly.
Look at the transducer itself. Make sure the cable isn’t pinched or kinked where it enters the bracket. Damaged cables can affect your sonar signal quality.
For minor bending, try loosening the mounting bolts slightly. Gently reposition the bracket so the transducer hangs straight down. Retighten bolts in a cross pattern to distribute pressure evenly.
If you find broken plastic clips or small cracks, these can be repaired with epoxy or super glue. Clean the area first and follow the adhesive instructions carefully.
Severe damage requires replacement. If the bracket shows major twists, deep cracks, or permanent deformation, install a new bracket instead. Attempting to force a severely bent bracket back into shape can cause further damage to your transducer or mounting system.
Best Practices for Proper Transducer Positioning
Proper transducer positioning prevents bracket bending before problems start. Your transducer should hang straight down and align with your boat’s hull bottom. This alignment is critical for accurate sonar readings.
Start by loosening the bracket bolts slightly. This gives you room to adjust the transducer angle without forcing components. Move the transducer until it sits parallel to your hull. The “tail” of the transducer should point downward at a 90 degree angle to the water surface.
Check that the transducer doesn’t tilt left or right. Tilting causes sound waves to bounce away from your boat instead of reflecting back. This creates dead zones and weak signals on your display.
Position the transducer at the correct depth. It should sit just below your hull’s waterline. Too shallow and air bubbles interfere with readings. Too deep and you miss surface fish.
Verify the bracket sits flush against your mounting surface. Gaps between the bracket and hull allow water to create air pockets. These bubbles block sonar signals and cause false readings.
Tighten all bolts gradually in a cross pattern. Work from opposite corners like tightening a car wheel. This prevents uneven pressure that bends the bracket.
Inspect your setup regularly, especially after running through shallow areas or hitting obstacles. Check that bolts haven’t loosened from vibration and water movement.
Keep the cable routing smooth and straight. Twisted cables put stress on the bracket and transducer connection. Secure cables away from moving parts and sharp edges.
Test your fish finder after positioning adjustments. Verify you see consistent bottom readings and no interference patterns. Proper positioning saves you from costly repairs later.
Common Mistakes to Avoid During Repair and Installation
Mistakes happen during repair and installation. Learning what to avoid saves you time and money.
Don’t force bent brackets back into shape. Many people try to hammer or bend brackets by hand. This causes additional damage to the metal or plastic. You’ll crack joints and weaken the structure further. Instead, replace severely damaged brackets entirely.
Avoid skipping the inspection step. Some boaters rush through repairs without checking all hardware carefully. You might miss small cracks in the bracket or transducer housing. These tiny issues grow into bigger problems later. Always examine corners, joints, and mounting points before you start repairs.
Never ignore cable routing during installation. Twisted or pinched cables create signal problems that feel like bracket issues. Route your cable smoothly and straight from the transducer to your fish finder unit. Avoid sharp bends or kinks in the line.
Don’t overtighten bolts when reassembling. People think tighter bolts mean better performance. This actually warps the bracket and stresses the transducer. Tighten bolts gradually in a cross pattern, just like car wheels. Stop when you feel firm resistance.
Avoid placing your transducer at incorrect angles. The bracket should position it straight down and in line with your hull bottom. Angled or tilted transducers cause signal interference and performance drops.
Never assume air bubbles mean bracket failure. Sometimes poor positioning traps air around the transducer face. This creates blind spots that look like hardware damage. Reposition first before replacing parts.
Finally, don’t skip testing after repairs. Turn on your fish finder immediately and check for dark areas or dead zones on your display. This confirms your repair worked correctly.
Troubleshooting Persistent Alignment or Signal Issues
When your fish finder shows confusing signals or the screen displays inconsistent readings, alignment problems often hide behind the scenes. A bent bracket causes the transducer to point in the wrong direction, so your device receives scrambled information from the water below.
Start by checking if your transducer sits level with the hull bottom. Use a straightedge or level tool to verify this positioning. If the transducer angles upward or downward, bracket bending is likely the culprit. Look at the mounting surface where the bracket connects to your boat. Any gaps or uneven contact points signal misalignment issues.
Next, examine whether your fish finder displays false readings or weak signals. These symptoms often point to angle problems rather than equipment failure. The transducer works best when positioned perpendicular to the water surface. Even slight tilting reduces signal strength and creates unreliable depth readings.
Air bubbles frequently accompany alignment issues. When the bracket bends, water turbulence flows around the transducer incorrectly. This creates bubble interference that disrupts your sonar signal. You might notice the display showing phantom fish or erratic depth changes.
Loosen the mounting bolts slightly and adjust the transducer angle downward. Lower the tail end gradually until the device hangs straight down. This simple adjustment often resolves persistent signal problems without requiring replacement.
Check your cable routing too. Tight or twisted cables can pull the bracket out of alignment. Ensure your cable runs smoothly from the transducer to your fish finder unit.
Test your equipment immediately after making these adjustments. Watch for consistent readings and stable signals. Proper alignment eliminates most signal problems you’re experiencing.
When to Replace the Bracket or Transducer Entirely
A bent bracket or damaged transducer sometimes cannot be fixed through simple adjustments. You need to know when replacement makes sense instead of continued repair attempts.
Severe bending that prevents proper alignment signals replacement time. If your bracket won’t hold the transducer level no matter how much you adjust it, the structural integrity is compromised. A permanently bent bracket cannot position your transducer correctly, which means your fish finder will never work properly again.
Cracks or breaks in the bracket material also warrant replacement. Small cracks may seem minor, but they spread over time as your boat bounces through waves. Water seeps into these cracks and causes rust or corrosion that weakens the entire structure.
Check if your transducer’s plastic ears are broken or missing. These ears hold the transducer in place within the bracket. Without them, the transducer shifts during operation and produces unreliable readings. Replacement becomes necessary when these components fail.
Multiple impact damages suggest you should replace both bracket and transducer. If your transducer has hit obstacles several times, internal damage may exist even if external cracks aren’t visible. A new setup ensures reliable performance.
Consider your boat’s age and usage patterns too. Older brackets made from plastic deteriorate faster than metal alternatives. If you’re constantly repairing the same bracket, replacement prevents repeated frustration.
The cable connection also matters. If replacement is needed, inspect whether your current cable still works or needs replacement too. A damaged cable won’t transmit signals properly even with a new bracket and transducer installed.
Budget time for proper installation when you choose replacement. This prevents future bending issues and ensures your fish finder operates at full capability.
Final Thoughts
Fixing a bent transducer bracket does not need to feel hard. Most problems come from simple misalignment. A few small adjustments often solve the issue.
Start with the basics. Loosen the bolts and check your transducer angle. Make sure it sits in line with your hull bottom.
This one step prevents many future headaches. Proper positioning stops bending problems before they start. Boaters who skip this step often face repeat issues.
Inspect your hardware often. Bent screws or cracked ears mean deeper damage. Catching these early saves you time and money.
Small repairs work for small problems. Broken plastic clips can often be fixed with epoxy or super glue. This gives your bracket extra strength without buying new parts.
But some damage goes beyond quick fixes. Severely bent brackets or cracked transducers usually need full replacement. Trying to force a broken piece back into shape rarely works long term.
Think about switching to metal brackets if you keep facing bending issues. Metal handles impact and stress better than plastic. This choice can reduce future repairs significantly.
Testing matters just as much as fixing. Always check your fish finder after any adjustment. This confirms your repair actually solved the problem.
Patience makes a real difference here. Rushing through repairs often leads to repeat damage. Taking your time protects your equipment and your fishing trips.
Fish finder problems feel frustrating, but they are usually fixable. With careful inspection and the right approach, you can keep your transducer working well for seasons to come.
Your fishing experience depends on accurate readings. Protecting your bracket and transducer keeps your equipment reliable on every trip.
Frequently Asked Questions
Why does my fish finder transducer bracket keep bending?
Transducer brackets bend for several reasons. Impact damage from hitting underwater objects like logs or rocks causes the most common problems. Two piece bracket designs are more prone to alignment issues than single piece models. Poor installation positioning also stresses the bracket over time. When your transducer sits at the wrong angle relative to your hull, the bracket bears extra pressure. Water pressure and vibration from your boat engine can worsen existing weak points.
How do I know if my bracket is bent?
Inspect your bracket visually first. Look for obvious cracks, warping, or misalignment. Check if your transducer sits level with your hull bottom. A bent bracket usually causes your transducer to angle incorrectly. Your fish finder screen will show weak or confusing signals if alignment is off. Air bubbles around your transducer also indicate positioning problems. Loosen your mounting bolts slightly and see if the transducer moves easily into a better position. If it resists or won’t align properly, your bracket is likely bent.
Can I straighten a bent bracket myself?
Small bends sometimes respond to careful adjustment. Loosen your bracket bolts and gently reposition the transducer. Lower the transducer’s tail slightly for optimal positioning. Tighten the bolts gradually while checking alignment. However, severe bending usually requires replacement. If your bracket has cracks or the plastic ears are broken, straightening won’t work. Metal brackets resist bending better than plastic ones if you experience repeated damage.
What should I do if my bracket won’t stay aligned?
Verify all your hardware is tight and undamaged. Check your cable routing to ensure it isn’t pulling the transducer at odd angles. Inspect mounting bolts for corrosion or looseness. Test your fish finder immediately after making adjustments. If problems persist, your bracket may be too damaged to repair.

Hi, I’m Minnie Cole, the creator of The Output Lab — a space where I share my passion for all things tech. I spend my days exploring the latest gadgets, devices, and electronics on Amazon, putting them through real-world testing so you don’t have to.