How To Fix Smart Telescope Motorized Mount Gear Slipping?
Do you hear a strange grinding noise when your smart telescope slews to a new target? Your motorized mount might have a gear slipping problem.
This issue happens when the internal gears stop meshing correctly. It often shows up in the declination axis first.
Gear slipping can turn a fun night of stargazing into a frustrating experience. Your telescope may jerk, stall, or completely miss its target.
In a Nutshell
- Find the noise source. Grinding sounds usually point to the declination axis. This is where gears often lose contact with each other.
- Adjust the worm gear. Use small allen bolts to fix the pressure. Loosen one bolt slightly and tighten the other to restore smooth contact.
- Tilt the polar axis. This simple step gives you clear access to the adjustment points. You need this space to see what you are doing.
- Test before you move the mount. Always check the gear engagement distance first. This helps you avoid causing more damage.
- Inspect the housing. A cracked housing cannot hold gears in place correctly. Look for physical damage if adjustments do not work.
- Test the motor. Use the directional keys after your fix. This confirms the motor function is smooth and quiet again.
Understanding Gear Slipping in Motorized Mounts
Gear slipping in motorized mounts happens when the internal gears lose proper contact with each other. This breaks the connection between your motor and the telescope’s movement system.
What causes this problem? Several factors lead to gear slipping. Wear and tear from years of use is the most common cause. Over time, gear teeth flatten and lose their sharp edges. Improper engagement happens when gears sit too far apart. Misalignment occurs when the gear assembly shifts out of position.
Where does it happen most? The declination axis experiences gear slipping more frequently than other parts. This axis controls up and down telescope movement. You will hear a distinctive grinding noise when slipping occurs on this axis.
How does slipping affect your telescope? Your mount may stall during movement. The telescope stops responding to commands. Sometimes the motor runs but the telescope does not move at all. Other times it moves in jerky motions instead of smooth sweeps.
Understanding backlash Backlash is the gap between meshing gears. Small gaps are normal and necessary for smooth operation. Excessive gaps cause slipping. The worm gear (the spiral shaped gear) meshes with a larger gear wheel. When this connection fails, power transfer stops completely.
Why act quickly? Ignoring gear slipping causes more damage. Continued grinding wears down teeth faster. Metal particles circulate through the gear housing. This contamination damages other components nearby.
The fix involves adjustment Most gear slipping problems respond to simple adjustments. You realign the gears or change the pressure between them. Some cases require replacing worn components entirely.
Understanding these basics helps you diagnose the issue accurately. You can then decide if adjustment or replacement is necessary.
Signs and Symptoms of Worm Gear Misalignment
When your motorized mount grinds or stutters during movement, specific signs tell you the worm gear is misaligned. Learning to spot these symptoms helps you fix the problem before serious damage occurs.
Grinding or squeaking sounds are the most obvious warning signs. You’ll hear these noises when the mount slews toward a new target. The sound comes from gears that no longer fit together smoothly. Pay attention to which axis makes the noise. The declination axis produces grinding sounds more often than the right ascension axis.
Uneven mount movement is another key indicator. Your telescope may move smoothly for a few seconds, then suddenly stall or jerk. This stuttering motion means the gears are slipping in and out of proper contact. You might also notice the mount hesitates before responding to directional commands.
Visible backlash occurs when you manually move the telescope tube. Push gently on the telescope. If it moves slightly before the gears engage, you have excessive backlash. This gap between meshing gears signals misalignment problems.
Motor resistance changes reveal internal issues too. The motor may sound strained or work harder than usual. You’ll feel this if you manually move the mount during powered operation. The motor should turn smoothly without extra effort.
Vibration during operation suggests gear teeth are not making full contact. You may feel vibration through the mount’s base or hand controller. This vibration worsens over time as teeth wear down.
Tracking errors appear when your telescope drifts away from targets. Proper alignment keeps your mount centered on celestial objects. Misaligned gears cause the mount to lose tracking accuracy.
Check your mount’s housing for cracks too. A cracked housing cannot hold gears in their correct positions, which causes all these symptoms to appear together. Catching these signs early prevents expensive damage to your entire gear assembly.
Tools and Preparation Before You Begin
Before you start fixing your motorized mount, gather the right tools and prepare your workspace properly. This preparation step saves time and prevents mistakes during the repair.
Gather your basic tools first. You will need a set of allen wrenches in various sizes, since most adjustment bolts use these keys. A small flashlight or headlamp helps you see inside the mount housing clearly. Keep a clean cloth nearby to wipe away dust and old lubricant. Have a notebook ready to document which bolts you adjust and by how much.
Get a screwdriver set ready. Some mounts use Phillips or flathead screws to access the gear assembly. A multi tool works well if you have limited space in your workspace.
Prepare your work area. Find a flat, stable surface where your telescope mount will not tip over. A workbench with good lighting is ideal. Make sure you have enough room to tilt the mount and access the polar axis without strain.
Understand your mount’s manual. Before touching anything, review the specific adjustment points for your model. Different mounts have different designs, and knowing where the worm gear adjustment bolts sit saves frustration.
Clear your workspace of obstacles. Remove other equipment, cables, and clutter. You need free movement to safely tilt and rotate your mount during repairs.
Protect your telescope tube. If your telescope is still attached, secure it properly or remove it temporarily. A falling tube during repair causes expensive damage.
Have lubricant available. Check what type of grease or oil your mount requires. Some mounts need specific lubricants to function correctly after adjustments.
Take photos before you start. Photograph the current position of adjustment bolts and the overall assembly. These reference images help you remember the original configuration if needed.
Step-by-Step Guide to Adjusting Worm Gear Mesh
The worm gear mesh adjustment is where most telescope owners find success fixing slipping problems. This process involves changing how tightly the worm gear presses against the driven gear.
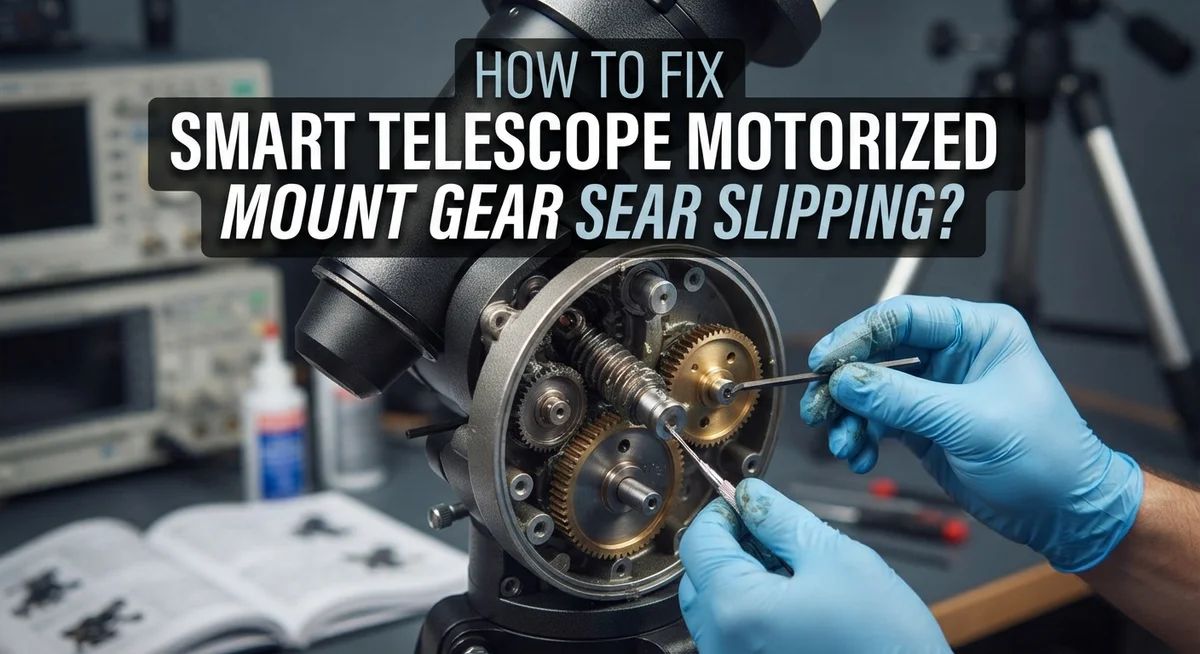
Start by locating the adjustment bolts on your mount’s gear housing. Most motorized mounts have two allen bolts positioned on opposite sides of the worm gear assembly. One bolt pushes the gear closer to the worm, while the other pulls it away. This opposing arrangement lets you fine tune the pressure without removing parts.
Before making any adjustments, manually rotate your telescope tube slowly. Feel how much resistance you encounter. This baseline helps you recognize when meshing improves. Now loosen one adjustment bolt by turning it counterclockwise about one quarter turn. This reduces pressure on one side of the gear.
Next, tighten the opposite bolt by turning it clockwise one quarter turn. This increases pressure on the other side. The goal is to move the gear slightly closer to the worm without crushing it. Too much pressure causes the motor to strain. Too little pressure brings back the slipping.
After each adjustment, test the engagement distance by rotating the tube again. You should feel smoother resistance than before. Use your mount’s directional keys to run the motor through a full slew cycle. Listen carefully for grinding sounds. Grinding means the gears are fighting each other, so back off the pressure slightly.
Make small adjustments in quarter turn increments. Patience matters here. Large adjustments can damage your gears or burn out the motor. If you hear grinding after tightening, immediately loosen that bolt by half a turn. Your goal is smooth, quiet operation with no slipping sounds.
Once the meshing feels right, rotate the tube manually one more time to confirm the improvement stays consistent through the full range of motion.
Testing and Verifying Gear Engagement After Repair
After you finish adjusting your telescope mount’s gears, you need to verify everything works correctly before using it for observations. This testing phase prevents damage and confirms your repair actually solved the slipping problem.
Start with manual rotation tests. Manually turn your telescope tube in all directions slowly and smoothly. Listen for grinding or squeaking sounds that indicate improper meshing. The movement should feel consistent without sudden resistance or loose spots. If you still hear noise, stop and readjust the worm gear pressure before proceeding.
Test the motor function next. Power on your mount and use the directional control keys to move the telescope in both axes. Move slowly at first to observe how the gears engage. Watch for smooth, predictable motion without jerking or stalling. The motor should respond immediately to commands without delay.
Check tracking accuracy carefully. Point your telescope at a bright star or planet and let the mount track it for several minutes. A properly repaired mount will keep the target centered without drifting. Drifting indicates incomplete gear engagement or remaining misalignment issues.
Verify consistent pressure throughout movement. Move your telescope across the entire sky range in both directions. Motor resistance should feel uniform whether you’re moving north, south, east, or west. Uneven resistance suggests the gears are not meshing equally across the full range.
Inspect for unusual vibrations. Feel the mount housing while it operates. Excessive vibration means gear teeth still aren’t making full contact. Smooth operation indicates successful repair.
Document your results. Record how the mount performs after adjustment. Note any remaining noise, resistance changes, or tracking errors. This information helps if you need to make additional fine tuning adjustments later or troubleshoot future issues.
Common Mistakes to Avoid During Adjustment
When you adjust your telescope’s motorized mount gears, several mistakes can make things worse instead of better. Understanding what to avoid saves you time and prevents damage.
Overtightening the worm gear is the most common error. Many people think tighter pressure means better grip. This actually forces gears together too hard. The motor then works overtime. Grinding noises get louder. You may crack the housing or burn out the motor. Adjust in small quarter turn increments only.
Skipping the engagement test is another big mistake. After each adjustment, you must manually rotate your telescope tube to feel how the gears mesh. Some people make changes and immediately power on the motor. This skips the crucial step of checking if gears actually fit together properly. Test by hand first. Then test with the motor.
Adjusting both bolts at the same time confuses your results. Your mount has two adjustment bolts that work opposite each other. Loosen one while tightening the other to change pressure. If you adjust both simultaneously, you won’t know which change fixed the problem. You also risk creating new misalignment issues. Change one bolt. Test. Then adjust the other if needed.
Ignoring the polar axis tilt is a setup mistake. You need to tilt your mount’s polar axis to reach adjustment points easily. Skipping this step makes access difficult. You may accidentally bump other components. You might apply uneven pressure while adjusting.
Failing to check your housing for cracks wastes your effort. A cracked gear housing cannot hold proper pressure no matter how well you adjust the bolts. Inspect the housing carefully before starting. If you find cracks, gear replacement becomes necessary.
Take your time with each step. Small, deliberate adjustments prevent frustration and equipment damage.
Troubleshooting Persistent Slipping and Grinding Issues
Persistent slipping and grinding issues need immediate attention. These problems mean your gears aren’t meshing properly, and continuing to use your mount can cause more damage.
Start by identifying the exact problem. Grinding noise tells you gears are rubbing incorrectly. Slipping means the motor turns but your telescope doesn’t move. Both issues come from the same root cause: improper gear contact.
Check your mount’s housing first. Look for cracks or damage around the gear compartment. A cracked housing prevents gears from staying in proper alignment. If you find cracks, you may need to replace the entire gear assembly instead of adjusting it.
If the housing looks intact, the worm gear pressure needs adjustment. Your mount has two allen bolts that control how tightly the gears mesh. Loosen one bolt slightly while tightening the other. This changes the pressure between gears. Make quarter turn adjustments only. Test after each change.
Tilt your polar axis to access these bolts easily. Most adjustment points hide until you angle the mount correctly. Your instruction manual shows the exact position needed.
After adjusting, manually rotate your telescope tube through its full range. Listen for grinding sounds. Feel for smooth, consistent resistance. The motion should feel firm but not tight.
If grinding persists after several adjustments, stop immediately. Continuing will wear gears faster. Your motor may also be failing. Some mounts let you replace just the motor assembly without replacing everything.
Test motor function using your directional control keys. Move the telescope in all four directions. Watch for smooth, steady movement. If the motor sounds strained or stutters, gear pressure might still be too tight.
Persistent issues sometimes require professional service. A technician can measure gear wear and determine if replacement is your only option. Don’t force adjustments beyond what feels natural, as this creates new problems.
Final Thoughts
Fixing gear slipping in your smart telescope mount takes patience. You do not need to rush the process.
Small adjustments make a big difference. A tiny turn of the allen bolt can change gear pressure completely. Always test after each small change.
Remember that grinding noise means something is wrong. Never ignore this sound during slewing or tracking. Stop and check your gear meshing right away.
The worm gear pressure balance matters most. Too loose causes slipping. Too tight causes grinding and wear. You want that middle ground where gears mesh smoothly.
Manual testing remains your best friend throughout this process. Turn the tube by hand before you trust the motor. This simple check saves you from bigger problems later.
Housing integrity plays a bigger role than most people realize. A cracked housing will cause repeated slipping no matter how well you adjust the gears. Check this first if problems keep coming back.
Sometimes gears wear down beyond repair. This happens after years of use or rough handling. If adjustment does not work anymore, you may need a replacement gear or motor assembly.
Not every mount problem has a home fix. If your telescope still slips after multiple adjustment attempts, manual operation works as a backup. You can still enjoy stargazing while you plan a proper repair or replacement.
Keep your adjustment tools handy for future checks. Gear mounts drift out of alignment over time with regular use. A quick seasonal check keeps your smart telescope performing well.
Your patience during this process pays off with smoother tracking and quieter operation. Take your time with each bolt adjustment. Test thoroughly before you call the job done.
With careful attention to these steps, your motorized mount should serve you well for many observing sessions ahead.
Frequently Asked Questions
What causes gear slipping in my motorized telescope mount?
Gear slipping happens when your worm gear stops meshing properly with the main gear. This occurs due to wear over time, improper engagement distance, or misalignment of the gear assembly. You might hear a grinding noise during slewing, which signals that gears are rubbing incorrectly rather than meshing smoothly.
How do I adjust the worm gear pressure?
Your mount has two adjustment bolts that work in opposite directions. Loosen one bolt slightly while tightening the other to change the pressure between gears. Test the engagement distance manually before operating the motor. Tilt your polar axis to access these bolts easily. Make small adjustments and test after each change.
Why does my mount make grinding noises?
Grinding indicates improper gear meshing. Stop using the motor immediately and check your mount’s housing for cracks. If the housing looks intact, your worm gear pressure needs adjustment. After adjusting, manually rotate your telescope tube through its full range to verify smooth movement in all directions.
Can I fix worn out gears myself?
If gears are severely worn, they may need replacement. Some mounts allow you to swap out the gear or motor assembly. However, not every slipping problem has a home fix. If adjustments don’t resolve the issue after several attempts, manual operation becomes your backup option until professional service is available.
How do I test if my fix worked?
Use your directional control keys to move the telescope in all four directions. Listen for grinding sounds and feel for smooth operation. The mount should respond without noise or hesitation. Smooth, quiet tracking confirms your adjustment was successful.

Hi, I’m Minnie Cole, the creator of The Output Lab — a space where I share my passion for all things tech. I spend my days exploring the latest gadgets, devices, and electronics on Amazon, putting them through real-world testing so you don’t have to.