How To Fix Heated Gloves Battery Pocket Zipper Snapping?
Winter rides feel amazing until your battery pocket zipper snaps. You reach for warmth, but the zipper fights back. That small metal piece can ruin your whole day outdoors.
Heated gloves depend on secure battery pockets. When zippers break, batteries slip out or fall loose. This creates a frustrating cycle of stopping and adjusting your gear.
Many glove owners face this exact problem. The constant bending and stretching wears down zipper teeth fast. Cold weather makes plastic and metal parts more brittle too.
This guide walks you through simple fixes for snapped zippers. You will learn why zippers break in the first place. We cover quick repairs you can do at home today.
In a Nutshell
- Inspect the zipper first. Look closely at the teeth and slider to spot where the snap happened.
- Small pliers can often realign bent teeth or tighten a loose slider. This works for minor snaps.
- If the slider is broken, replacing it is usually cheaper than buying new gloves.
- A fabric patch or strong stitching can close small tears near the zipper edge.
- Safety pins or Velcro strips offer a quick temporary fix when you need your gloves right away.
- Regular cleaning and gentle handling prevent future snapping. Avoid forcing a stuck zipper.
- Store your gloves flat instead of crumpled. This keeps the zipper track straight and reduces stress on the teeth.
- When in doubt, a local tailor or gear repair shop can handle tricky fixes safely.
Why Battery Pocket Zippers Snap or Fail on Heated Gloves
Battery pocket zippers fail for several common reasons. Moisture and cold weather create the perfect storm for zipper damage. Water freezes inside the slider mechanism, then expands and warps the metal teeth or plastic components.
Heavy battery weight puts constant stress on the zipper. Lithium batteries are dense, and every time you open and close that pocket, the zipper bears extra load. This repeated strain weakens the slider over time.
Dirt and salt buildup clog zipper tracks during winter use. Road salt, snow residue, and lint get trapped inside the mechanism. This friction makes the slider stick, and forcing it causes teeth to bend or break.
Improper storage damages zippers before you even wear your gloves. Crumpling gloves into a bag or pocket bends the zipper slider out of shape. The slider loses its grip on the teeth, making it skip and jam.
Manufacturing defects sometimes cause premature failure. A few gloves leave the factory with weak sliders or misaligned teeth. These fail quickly even with careful use.
Aggressive handling accelerates zipper breakdown. Yanking the slider hard, forcing it when it’s stuck, or pulling at odd angles all cause damage. The slider teeth can snap, or the pull tab can tear away from the slider itself.
Temperature swings create expansion and contraction problems. Moving from freezing outdoor conditions to warm indoor air makes metal parts expand and contract. This constant movement loosens components and creates gaps where the slider loses contact with the teeth.
Understanding these failure causes helps you prevent future problems. Gentle handling, regular cleaning, and proper storage all extend zipper life significantly.
Tools and Materials Needed for the Repair
Here’s what you need to have on hand before you start fixing your heated glove zipper.
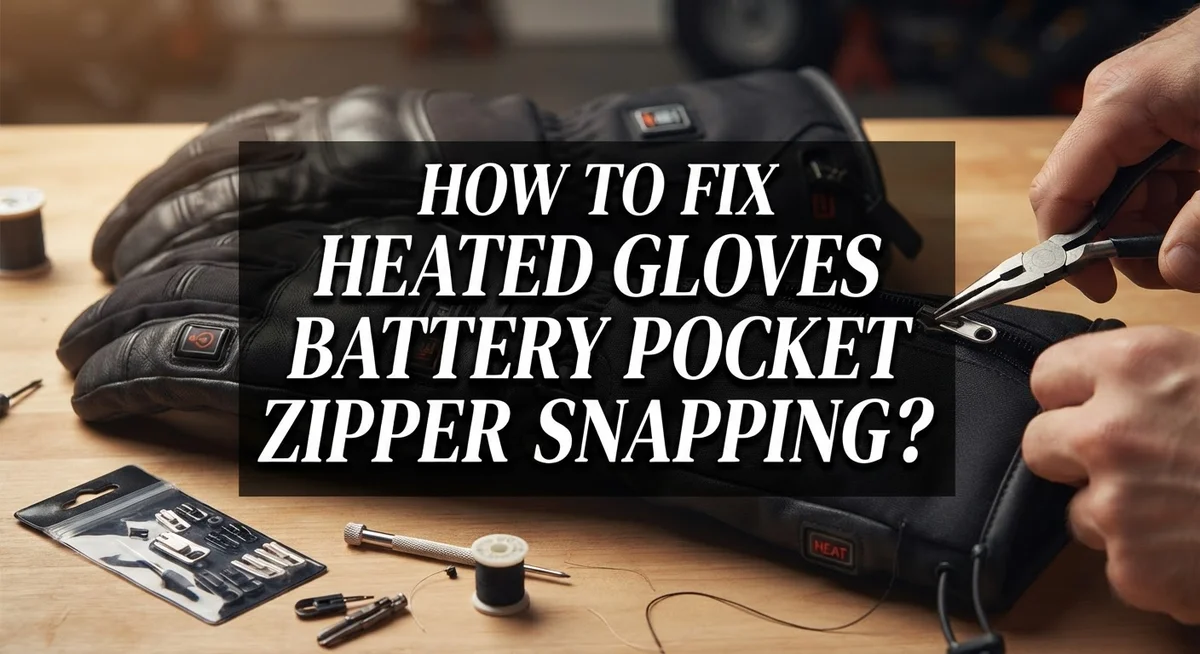
Basic hand tools make up the foundation of any zipper repair. Small pliers help you straighten bent zipper teeth or adjust a loose slider. A flathead screwdriver works well for prying open stubborn slider components. Keep needle nose pliers nearby for precise adjustments on tight spaces.
Sewing supplies are essential for this job. You will need a needle that fits standard thread. Choose thread that matches your glove color for invisible repairs. A thimble protects your finger when pushing the needle through tough fabric. Scissors cut thread cleanly without fraying.
Fabric materials support the repair process. A small fabric patch works great for reinforcing torn areas near the zipper. Consider keeping spare nylon or polyester fabric that matches your gloves. Strong thread designed for outdoor gear holds better than regular thread.
Cleaning supplies prepare your zipper for repair. A soft brush removes dirt and salt buildup from zipper tracks. Warm water and mild soap clean the area thoroughly. A dry cloth prevents moisture damage during work.
Optional but helpful items make repairs easier. A magnifying glass lets you see small zipper teeth clearly. A work surface like a cutting mat protects your table. Good lighting helps you spot damage you might otherwise miss.
Safety items protect you during repairs. Wear an apron to keep glue or thread off your clothes. Wash your hands after handling metal tools. Keep a first aid kit nearby just in case.
Gather these items before starting your repair. Having everything ready means you finish faster and do better work.
Step-by-Step Guide to Fixing a Snapped Zipper Slider
Start by examining your zipper slider closely. The slider is the metal or plastic piece that moves up and down the zipper track. Look for visible damage like bent metal, cracks, or misalignment.
Gently pull the slider away from the zipper teeth. If it moves freely without catching, the slider itself may be fine. The problem might be dirt or debris stuck in the tracks instead.
Use a small brush or old toothbrush to clean out the zipper area thoroughly. Remove salt, lint, and any buildup from winter use. Brush in both directions along the entire track length.
Apply a small amount of lubricant to the cleaned zipper. Graphite powder or silicone spray works well for this step. Move the slider up and down several times to distribute the lubricant evenly.
Test the slider again after cleaning and lubricating. Sometimes this simple process fixes the snapping issue completely. The slider may have been stuck rather than truly broken.
If the slider still catches or won’t move smoothly, inspect it for permanent damage. Look at the metal guides on the slider’s sides. Bent guides prevent proper engagement with zipper teeth.
Use small pliers to carefully straighten any bent metal guides. Work slowly and make tiny adjustments. Aggressive bending can cause the metal to crack or break further.
Test the slider movement again after any adjustments. It should glide smoothly without resistance or noise.
If the slider remains damaged after straightening attempts, replacement becomes your next option. A new slider costs much less than replacing your entire gloves. Professional repair shops can install replacement sliders quickly and properly.
How to Repair or Replace a Broken Zipper Pull
A broken zipper pull makes your heated gloves unusable, but repair is often simple and quick. The pull is the small tab you grip to open and close the zipper. When it snaps off or breaks, you lose the ability to access your battery pocket easily.
Identifying the problem comes first. Look at whether the pull itself broke away from the slider, or if the slider mechanism failed. A missing pull means you can’t grip anything to move the zipper. A damaged slider means the entire mechanism needs attention.
For a missing pull, you have straightforward options. Thread a small piece of cord, fabric strip, or paracord through the hole where the original pull attached. Tie it securely with a knot that won’t slip through. This creates a new grip point instantly.
Creating a temporary pull works well for quick fixes. Cut a small rectangle from sturdy fabric like nylon or canvas. Fold it in half and thread the loop through the slider hole. Stitch or glue it firmly in place. This holds up through multiple seasons of use.
For a more permanent solution, consider replacing the slider entirely. Remove the old slider by carefully cutting the zipper stitches holding it. Insert a new slider onto the zipper teeth. Stitch it securely with heavy duty thread using small, tight stitches.
Testing your repair matters before you rely on it. Zip and unzip the pocket several times. Make sure the pull doesn’t slip or break under normal use. Check that your battery sits securely inside without falling out.
These repairs take under thirty minutes and restore full function to your gloves.
Fixing Misaligned or Stuck Zipper Teeth
When zipper teeth become misaligned, your heated glove battery pocket won’t close properly. This problem happens when the slider pulls teeth out of their proper position. You’ll notice the teeth no longer line up on both sides of the zipper track.
Start by examining where the teeth have shifted. Look closely at both sides of the zipper to identify which teeth are bent or twisted. Sometimes teeth separate from the tape holding them in place. Mark these problem areas with a small piece of tape so you don’t forget them during repair.
Gently work the slider backward along the zipper very slowly. Move it inch by inch rather than forcing it quickly. This careful approach helps you spot exactly where the teeth resist movement. Stop when you feel significant resistance to avoid causing more damage.
Use a small flathead tool to carefully realign bent teeth back into their proper position. Work on one tooth at a time, bending it gently back toward the center line. Test the slider after each adjustment to see if movement improves.
If teeth have separated from the fabric tape, you may need to use fabric glue or stitching to reattach them. Apply small amounts of appropriate adhesive to the base of the tooth. Hold it in place for several minutes until it sets properly.
Once teeth are realigned, apply lubricant again to help the slider move smoothly. Test the full range of motion several times before considering the repair complete.
If teeth remain severely bent or broken, replacement of the entire zipper slider becomes necessary. This more involved repair restores full functionality to your battery pocket.
Tips to Prevent Future Zipper Damage on Heated Gloves
Preventing zipper damage on your heated gloves battery pocket keeps them functional for years. The key is understanding what causes problems in the first place.
Moisture and salt buildup damage zippers faster than anything else. After wearing your gloves in wet or snowy conditions, dry the battery pocket area completely. Use a soft cloth to wipe away any moisture before storing them. This simple step stops rust and corrosion from forming on metal zipper parts.
Store your gloves properly to avoid unnecessary stress on the zipper. Don’t fold them with the battery pocket zipper pulled tight. Instead, leave it slightly open or fully closed in a relaxed position. Tension on the slider while stored causes premature wear.
Be gentle when opening and closing the battery pocket zipper. Rushing or forcing the slider creates bent teeth and damaged guides. Move slowly and listen for any resistance. If you feel catching, stop and check what’s wrong before continuing.
Keep the zipper clean regularly. Dirt and lint accumulate inside the zipper track over time. Use a small brush monthly to remove debris. This prevents the slider from working harder than necessary.
Apply protective lubricant occasionally. A light coat of zipper lubricant every few months keeps everything moving smoothly. This reduces friction and extends the zipper’s lifespan significantly.
Avoid extreme temperature changes with your gloves. Rapid heating and cooling can cause metal parts to expand and contract unevenly. Store them at room temperature when not in use.
These prevention steps take minimal effort but deliver major results. Your battery pocket zipper stays reliable and functional when you treat it with care and attention.
Common Mistakes to Avoid During the Repair
Many people rush through zipper repairs and create bigger problems. Understanding what NOT to do saves you time and money.
Never force the slider when it feels stuck. Pushing hard can bend teeth further or separate them from the fabric tape completely. Instead, stop immediately and apply lubricant first. Let it sit for a few minutes before trying again.
Avoid using harsh chemicals or abrasive materials on your zipper. Bleach, strong solvents, and rough scrubbing damage both the slider and teeth. Stick with mild soap and water for cleaning. Dry thoroughly afterward.
Don’t ignore small problems thinking they’ll fix themselves. A slightly misaligned tooth becomes a completely jammed zipper within days. Address issues as soon as you notice them.
Resist the urge to replace the entire zipper when only the slider needs fixing. This creates unnecessary work and may damage surrounding fabric. Try slider replacement first since it’s simpler and faster.
Never apply excessive lubricant thinking more helps. Too much grease attracts dirt and salt particles. These buildup faster and make the problem worse. Use small amounts and wipe away excess with a clean cloth.
Avoid yanking or jerking the zipper pull hard. Sudden movements can snap the pull or misalign teeth instantly. Move slowly and steadily in one direction.
Don’t store your gloves in extreme heat or cold after repair. Temperature swings can undo your work by causing materials to expand and contract. Keep them in a cool, dry place instead.
Skip using makeshift tools like keys or coins to force stuck sliders. These scratch and damage the slider surface. Use proper flathead screwdrivers or specialized zipper tools only.
Troubleshooting Persistent Zipper Issues
When your heated glove battery pocket zipper keeps snapping despite your repair efforts, you’re dealing with a deeper structural problem. The zipper mechanism itself may have fundamental damage that simple fixes won’t resolve.
Identify the snap point first. Does the zipper snap at the same location every time? This pattern tells you whether the problem is the slider, the teeth, or the fabric tape itself. Mark this spot with a pen so you can examine it closely under good lighting.
Check if the fabric tape holding the zipper teeth has torn or separated from the glove material. When this happens, the entire zipper assembly becomes unstable and fails repeatedly. The teeth lose their anchor points, causing the slider to jump off track during use.
Inspect the slider mechanism carefully. A damaged slider won’t grip the teeth properly, causing the zipper to separate or snap. Look for cracks, bent metal parts, or worn internal components. If the slider is visibly damaged, it needs replacement rather than repair.
Test the zipper with gentle, slow movements. Persistent snapping often means the slider is too worn to function reliably. Each time it snaps, the damage worsens, making the problem worse.
Consider the glove’s age and use. Heated gloves with heavy use eventually wear out their zippers beyond practical repair. If you’ve already attempted multiple fixes, the zipper system may have reached the end of its lifespan.
At this point, you have two realistic options. You can replace the entire zipper assembly if you’re comfortable with basic sewing, or you can accept that the battery pocket needs alternative closure methods like velcro or buttons instead.
Final Thoughts
Fixing a snapping zipper on your heated gloves battery pocket doesn’t need to feel overwhelming. Most problems come from small issues like dirt, misalignment, or a worn slider.
You now have the knowledge to spot these problems early. A quick inspection often saves you from bigger repairs later.
Remember that prevention works better than repair. Cleaning your zipper often and storing your gloves properly will extend their life significantly.
Small habits make a real difference. Gentle handling and regular checks keep your battery pocket zipper working smoothly all season.
If you notice snapping, don’t panic. Follow the troubleshooting steps you learned and identify the root cause before attempting any fix.
Sometimes the fix is simple, like realigning the slider or cleaning out debris. Other times, you might need a new slider or professional repair.
Either way, acting quickly stops small problems from becoming bigger ones. Ignoring a snapping zipper usually leads to complete failure over time.
Your heated gloves are an investment in comfort during cold weather. Taking care of the battery pocket zipper protects that investment.
A little maintenance goes a long way. Spend a few minutes each month checking your zipper’s condition and cleanliness.
This simple habit keeps your gloves working when you need them most. Cold hands are never fun, especially when your heating system fails due to a broken zipper.
Trust the process you’ve learned here. Patience and careful handling solve most zipper issues without needing expensive replacements.
Your gloves deserve proper care, and now you know exactly how to give it to them. Stay warm, stay prepared, and keep that zipper working smoothly through every cold season ahead.
Frequently Asked Questions
Why does my zipper snap only at one specific spot?
A zipper that snaps at the same location every time tells you something important. That spot likely has damage to either the fabric tape or the teeth alignment. The fabric holding the zipper teeth may have torn or pulled away from the glove material at that exact point.
Check if the glove material has separated from the zipper tape. You can gently pull the fabric back into place if it’s loose. Sometimes realigning the fabric solves the snapping problem completely.
Can I fix a snapping zipper without replacing the entire zipper?
Yes, most snapping problems don’t require a full replacement. The issue usually involves just the slider or a small section of teeth. A bent or worn slider won’t grip the teeth properly, causing separation.
Clean the slider first and remove any debris. If it’s bent, you may be able to gently reshape it. Often this simple fix stops the snapping entirely and saves you time and effort.
How do I know when my zipper is beyond repair?
If your heated gloves have heavy use over many years, the zipper eventually wears out. Test it with slow, gentle movements to assess the damage. When the teeth are broken in multiple spots or the slider is severely damaged, replacement becomes necessary.
However, most snapping issues happen before this point. Acting quickly on small problems prevents them from spreading. Catch issues early and you’ll extend your glove’s lifespan significantly.
What’s the best way to prevent future zipper snaps?
Store your gloves in normal temperatures, not extreme heat or cold. Keep the zipper clean and dry between uses. Use slow, controlled movements when opening and closing the battery pocket.
Regular maintenance prevents most problems before they start. Check your zipper monthly during winter months when you use the gloves most.

Hi, I’m Minnie Cole, the creator of The Output Lab — a space where I share my passion for all things tech. I spend my days exploring the latest gadgets, devices, and electronics on Amazon, putting them through real-world testing so you don’t have to.