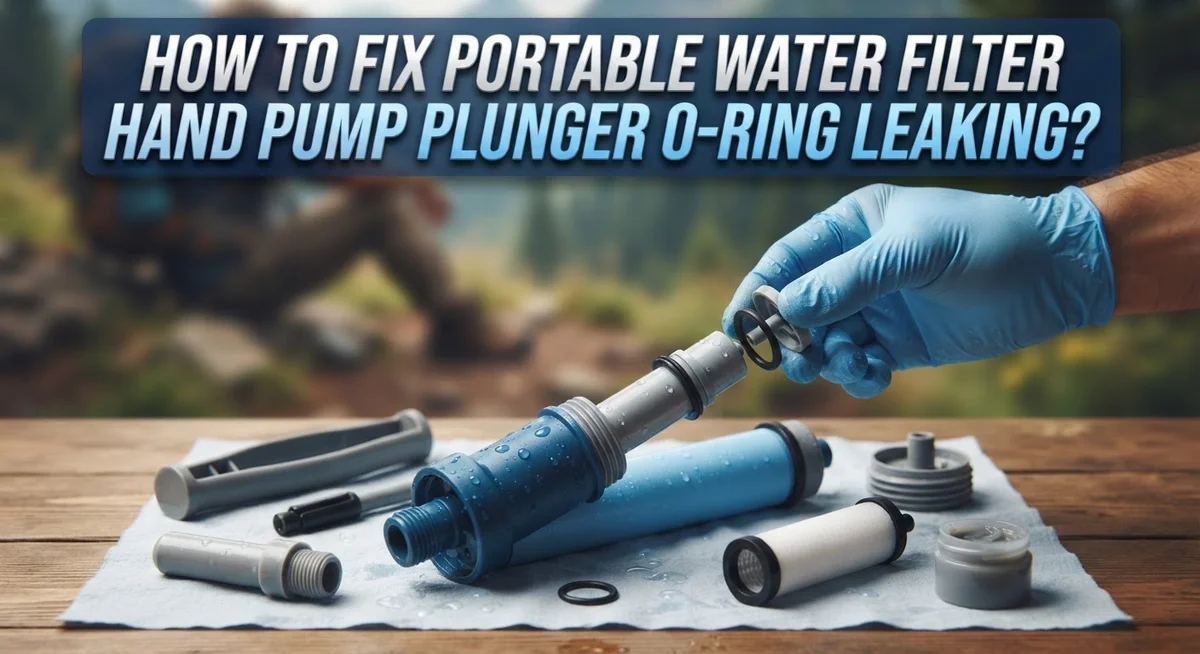
How To Fix Portable Water Filter Hand Pump Plunger O-Ring Leaking?
Is your portable water filter leaking at the plunger? You are not alone. This is one of the most common problems hikers and campers face.
The good news? You can fix it yourself. Most leaks happen because of a damaged or poorly seated O-ring.
Water clings to the plunger shaft when the seal breaks down. This causes drips every time you pump. It can turn a simple task into a messy chore.
In a Nutshell
- Depressurize first. Always turn off the water supply and release pressure before you touch the housing. This step keeps you safe and dry.
- Inspect the O-ring closely. Look for cracks, debris, or swelling. A damaged ring simply cannot create a good seal anymore.
- Clean everything thoroughly. Wipe down the O-ring and its groove. Dirt and grime often cause leaks just as much as damage does.
- Try the freezer trick. If your O-ring looks swollen, place it in the freezer for about three hours. This often shrinks it back to size.
- Lubricate before reassembly. Use a food-grade silicone grease on the ring. This ensures a smooth fit and helps prevent future cracks.
- Seat it properly. Make sure the O-ring sits flat in its groove. An improperly seated ring is a very common mistake that causes new leaks.
Why the Plunger O-Ring Leaks in the First Place
Your portable water filter hand pump leaks at the plunger because the O-ring seal fails. This small rubber ring sits inside the pump housing and keeps water from escaping around the plunger shaft. When it breaks down, water drips out instead of staying contained.
O-rings wear out for several reasons. Constant friction from pumping action gradually degrades the rubber material over time. The seal rubs against the plunger shaft thousands of times, and this friction creates tiny tears and cracks in the ring’s surface.
Debris and dirt also damage O-rings. Sand particles, mineral deposits, or sediment can lodge in the seating groove where the ring sits. These particles act like tiny knives, cutting into the rubber and creating leak points.
Swelling is another common culprit. Your O-ring can expand when exposed to certain water conditions or stored in warm environments. An expanded ring no longer fits snugly in its groove, so water seeps past the seal.
Improper installation causes leaks too. If the O-ring twists during reassembly or sits unevenly in its groove, it cannot create a watertight seal. Even a slight misalignment breaks the seal’s effectiveness.
Age and UV exposure gradually harden O-rings, making them brittle and prone to cracking. Rubber loses flexibility over time, especially if your pump sits in direct sunlight or extreme heat.
Finally, inadequate lubrication increases friction and accelerates wear. A dry O-ring experiences more stress during each pump stroke, leading to faster deterioration and premature failure.
Understanding these causes helps you prevent future leaks and maintain your pump properly.
Tools and Supplies You’ll Need
Before you start fixing your portable water filter hand pump, gather the right tools and supplies. Having everything ready makes the job faster and prevents frustration.
You will need a filter wrench or adjustable wrench to loosen the housing. This tool lets you safely remove the filter canister without damaging the threads. A wrench designed for your specific filter model works best.
Get a soft cloth or lint-free rag for cleaning. This removes dirt, debris, and old lubricant from the O-ring and its seating groove. Avoid paper towels since they leave fibers behind.
You need a replacement O-ring or spare O-ring kit. Even if you plan to reuse your current ring, having a backup prevents delays if the old one is too damaged. Check your filter manual to find the correct size and material type.
Food-grade silicone grease is essential for lubrication. This type of grease works safely with drinking water and creates a smooth seal. Regular grease or petroleum-based products can contaminate your water, so choose carefully.
A small brush or soft toothbrush helps clean tight spaces in the groove where the O-ring sits. Debris hiding in these areas causes leaks even after you install a new ring.
Consider getting a small flashlight or headlamp. Good lighting lets you inspect the O-ring closely for cracks and damage. You will spot problems much easier with proper visibility.
Finally, have a clean towel or absorbent cloth nearby to catch water during disassembly. This keeps your workspace dry and prevents slips.
Collecting these items takes just minutes. You will feel confident and prepared once everything sits in front of you.
Step-by-Step: Disassembling the Pump Safely
Start by gathering your tools before you touch anything. You will need a filter wrench or adjustable wrench to open the housing. Have a soft cloth ready to wipe away water. A small brush helps clean tight spaces. Keep a flashlight nearby so you can see inside the pump clearly.
Position your pump over a sink or bucket. Water will spill out during disassembly, so prepare for this. Lay out a clean towel to catch drips and keep your workspace dry.
Locate the main housing cap or filter head. This is where the plunger connects to the pump body. Grip it firmly with your wrench. Turn slowly and steadily counterclockwise. Do not rush this step or you may strip the threads.
Once the cap loosens, unscrew it by hand. Remove it completely and set it aside on your towel. You will see the plunger shaft and the O-ring housing underneath.
Look at the plunger assembly carefully. Note how the O-ring sits in its groove. Take a mental picture or snap a photo with your phone. This helps you remember the correct position during reassembly.
Gently pull the plunger straight up and out of the housing. Move it slowly to avoid splashing water everywhere. Some water may still cling to the shaft, which is normal.
Examine the housing opening where the O-ring lives. You can now see the groove clearly. Check for debris, sand, or mineral buildup inside this channel. A small brush works well to loosen stuck particles.
Keep all parts organized on your towel in the order you removed them. This prevents confusion when you reassemble the pump later.
Inspecting the O-Ring and Seating Groove for Damage
When you remove the plunger assembly, you get a clear view of the O-ring and its seating groove. This inspection step matters because it shows you exactly what caused the leak.
Look at the O-ring surface first. Search for visible cracks, splits, or tears in the rubber material. Even tiny cracks allow water to escape past the seal. Run your finger gently over the entire ring to feel for rough spots or damage you might miss with your eyes alone.
Check for discoloration or unusual texture. A healthy O-ring feels smooth and flexible. If it feels hard, brittle, or sticky, damage has occurred. Discoloration often signals chemical exposure or age-related breakdown.
Now inspect the seating groove itself. This is the channel where the O-ring sits inside the housing. Look for dirt, debris, or mineral buildup along the groove walls. Even small particles prevent the O-ring from sealing properly. Sediment and rust particles are common culprits in water filter systems.
Examine the groove surface for scratches or gouges. Deep scratches create gaps where water sneaks through. Run your finger along the groove to feel for rough edges or burrs that might have damaged the O-ring.
Check if the O-ring sits evenly in the groove. Twisted or bunched sections indicate improper seating. The ring should lie flat and centered along its entire length.
Look for signs of expansion. An oversized O-ring that’s too snug in the groove suggests swelling from water exposure or storage conditions. This expanded ring loses its ability to seal effectively.
Document what you find. Take mental notes of any damage, debris location, or seating issues. This information guides your cleaning and repair steps next.
Cleaning, Lubricating, and Reinstalling the O-Ring
Once you’ve inspected the O-ring and identified the problem, cleaning comes next. Start by removing any debris stuck in the seating groove. Use your soft brush to gently sweep away dirt, mineral deposits, or dried filter material that prevents proper seating.
Rinse the O-ring under clean running water. Pat it dry with your lint-free cloth. Never use paper towels because they leave fibers behind. Check the groove one more time to ensure it’s completely clean and dry.
If your O-ring appears expanded or swollen, place it in a freezer for about three hours. Cold temperatures shrink expanded rubber back to its original size. This simple step often restores the seal without needing a replacement.
Now apply food-grade silicone grease to the O-ring. Use just a thin coat. The lubricant reduces friction and helps the O-ring slide into the groove smoothly. It also keeps the rubber flexible and prevents cracking.
Reinstall the O-ring by carefully pressing it into the seating groove. Make sure it sits evenly all the way around. Push gently but firmly to confirm proper seating. The O-ring should not twist or bunch up.
Before reassembling everything, add a second O-ring under the plunger cap if your pump design allows it. This extra O-ring acts like a squeegee, wiping water from the plunger shaft as it moves up and down. This prevents water from clinging to the shaft and leaking out.
Double check that both O-rings are seated correctly before you screw the housing back together. Proper installation ensures your seal works and stops the leak.
Fixing an Expanded O-Ring Without Replacing It
An expanded O-ring loses its ability to seal properly. The rubber stretches and no longer fits snugly in the groove. You can often fix this without buying a replacement.
Freezing shrinks the O-ring back to size. Place the expanded O-ring in your freezer for approximately three hours. Cold temperatures cause rubber to contract naturally. Remove it and let it return to room temperature before reinstalling. This simple method works well for mild expansion.
While the O-ring freezes, clean the seating groove thoroughly. Debris trapped in the groove prevents proper seating. Use a soft brush or cloth to remove any dirt, mineral deposits, or old grease. Wipe the groove completely dry.
Food-grade silicone grease is essential for success. Apply a thin, even coat to the O-ring after it thaws. This lubricant helps the O-ring sit correctly in the groove. It also prevents future sticking and cracking.
Press the O-ring firmly into the groove by hand. Start at one point and work your way around. Make sure it sits evenly without twists or folds. An improperly seated O-ring will leak even if it’s the right size.
Check the plunger shaft for damage or corrosion. A rough shaft can damage the O-ring during use. If you see pitting or scratches, sand the shaft lightly with fine grit sandpaper.
Before reassembling, verify the O-ring sits flush in the groove all the way around. Press gently to confirm. If expansion was severe and freezing didn’t help, replacement becomes necessary. Most expanded O-rings respond well to this freezer method, saving you time and money.
Common Mistakes That Cause Leaks to Return
Leaks often return because people skip critical steps during reassembly. Understanding these mistakes helps you fix the problem permanently.
The biggest error is rushing reassembly without checking O-ring placement. Many users press the O-ring into the groove and immediately reinstall the plunger. The O-ring shifts during assembly, leaving gaps where water escapes. Always rotate the plunger slowly while pushing it down. This helps the O-ring settle evenly in its groove.
Another common mistake is forgetting to lubricate before reinstalling. A dry O-ring doesn’t slide smoothly into position. It bunches up or folds over instead of sitting flat. This creates weak spots where leaks develop. Apply lubricant generously, then wipe away excess before assembly.
Contamination in the seating groove causes recurring leaks. Dust, mineral deposits, or old grease residue prevent the O-ring from sealing properly. You must clean the groove thoroughly with a soft cloth. Even tiny particles create channels for water to escape.
People also fail to depressurize the system before opening the housing. Internal pressure forces water past a partially seated O-ring. Always turn off the water supply and press the plunger several times to release pressure.
Ignoring signs of O-ring damage leads to repeated failures. A cracked or severely deformed O-ring cannot seal, no matter how carefully you install it. Replace it if freezing doesn’t restore its shape.
Finally, many users forget the second O-ring under the plunger cap. This extra seal “squeegees” water from the plunger shaft, preventing leaks at the cap. Check your pump’s design to see if this feature applies to your model.
Troubleshooting Persistent Leaks After Reassembly
When your pump still leaks after you’ve reassembled everything, the problem usually points to improper seating or hidden contamination. The O-ring must sit completely flush in its groove with no gaps or twists.
Start by checking if the O-ring actually moved during reassembly. Gently press around the entire groove with your finger to feel for any spots where the O-ring sits higher or lower than others. Even a small section that’s not fully seated will cause water to escape along the plunger shaft.
Next, inspect the seating groove itself under good light. Debris often hides in grooves and prevents the O-ring from making full contact. Use a clean, dry cloth to wipe the groove thoroughly. If mineral deposits or old grease residue remain, dampen the cloth slightly and clean again until the groove looks pristine.
Verify the plunger shaft has no damage. Corrosion, scratches, or pits on the shaft create pathways for water to leak past the O-ring. If you spot damage, the shaft may need replacement.
Check that you applied lubricant correctly. The food-grade silicone grease should form a thin, even coating on the O-ring. Too much grease can prevent proper seating, while too little leaves dry spots that cause leaks.
Finally, confirm you’re using the correct O-ring size for your specific pump model. An O-ring that’s too small won’t seal the groove properly. If you’ve done all these steps and leaks persist, the O-ring itself may be damaged beyond repair and needs replacement.
Final Thoughts
Fixing a leaking O-ring is a simple task once you understand the process. Most leaks happen because of small, avoidable mistakes. With patience and the right steps, you can solve this problem yourself.
Always start by depressurizing your system. This single step prevents most accidents during disassembly. Skipping it often leads to frustration and mess.
Take your time when inspecting the O-ring and its groove. A clean, undamaged O-ring seated correctly will almost always stop the leak. Rushing this step causes most repeat failures.
Remember that lubrication matters just as much as fit. A dry O-ring wears out faster and seals poorly. Food-grade grease keeps it flexible and helps it slide into place smoothly.
If your O-ring has expanded, freezing it works well as a temporary fix. This trick buys you time without needing a replacement right away. Still, keep an eye on it for future wear.
Your pump’s performance depends on small parts working together. A tiny O-ring might seem unimportant, but it controls the entire seal. Treat it with care during every repair.
Testing your pump after reassembly is just as important as the repair itself. Run water through the system slowly at first. Watch closely for any signs of dripping or seepage.
Regular maintenance prevents most leaks before they start. Check your O-ring and groove every few months, especially if you use your filter often. This simple habit saves you time and effort later.
With the right approach, fixing a leaking plunger O-ring becomes a quick task. You do not need special tools or advanced skills, just attention to detail. Follow these steps, and your portable water filter will work reliably again.
Frequently Asked Questions
Why does water leak from my plunger shaft?
Water leaks from the plunger shaft when the O-ring seal fails. The O-ring sits in a groove and keeps water from running down the shaft. When the O-ring cracks, expands, or sits improperly, water clings to the shaft and drips out.
Debris or dried grease in the groove also prevents the O-ring from sealing correctly. Check the groove carefully before reinstalling the O-ring.
Can I reuse my old O-ring?
Yes, you can reuse an O-ring if it has no visible damage. Look for cracks, tears, or permanent deformation. Clean it thoroughly with fresh water and dry it completely.
If your O-ring expanded, place it in a freezer for about three hours. Cold temperatures shrink expanded O-rings back to their original size. This works as a quick fix before reinstalling.
What lubricant should I use?
Use food-grade silicone grease only. This lubricant is safe for drinking water systems and helps the O-ring slide into its groove smoothly.
Apply a thin layer to the O-ring before reinstalling it. Avoid petroleum-based greases or oils, as these damage the O-ring material and contaminate your water.
How do I know if my O-ring is damaged?
Inspect your O-ring under bright light. Look for cracks, splits, or flat spots. Check if it feels sticky or hard instead of flexible.
Permanent deformation means replacement is necessary. Slight discoloration is normal, but any visible damage requires a new O-ring to restore proper sealing.
Should I add an extra O-ring under the plunger cap?
Yes, adding a second O-ring under the plunger cap acts as a squeegee. It wipes water from the plunger shaft as you pump, preventing water from dripping down the shaft and leaking out.
This simple addition stops many leaks before they become problems.

Hi, I’m Minnie Cole, the creator of The Output Lab — a space where I share my passion for all things tech. I spend my days exploring the latest gadgets, devices, and electronics on Amazon, putting them through real-world testing so you don’t have to.