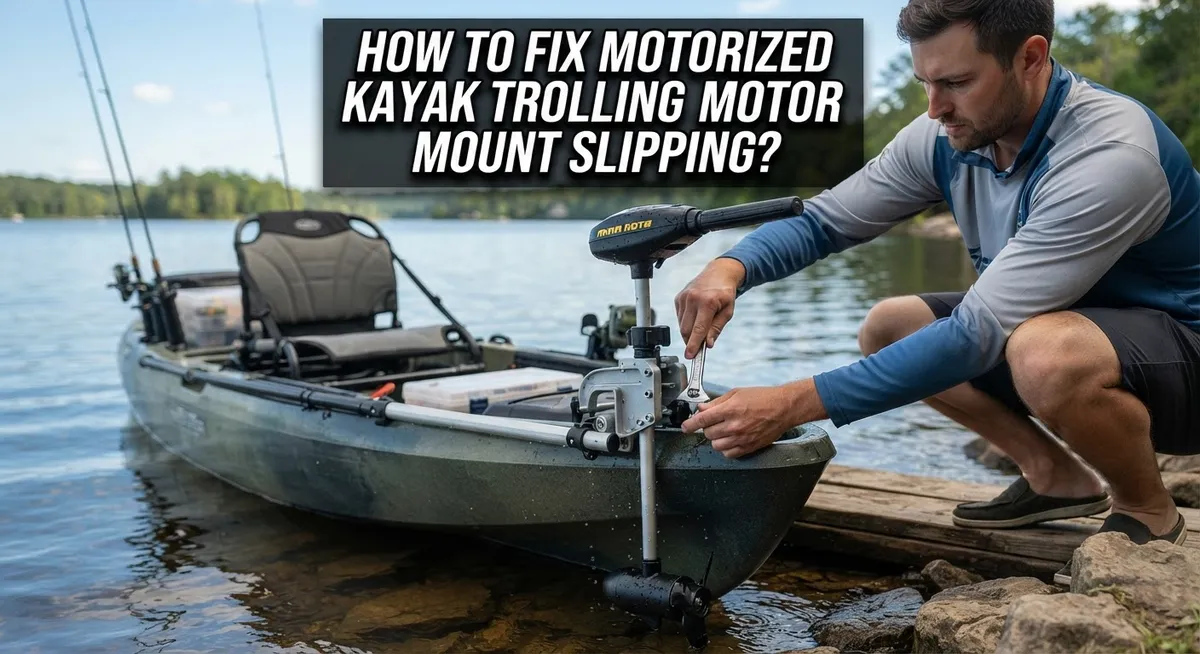
How To Fix Motorized Kayak Trolling Motor Mount Slipping?
Picture this. You are miles from shore, your line is tight, and suddenly your trolling motor tilts sideways. That sinking feeling in your stomach matches the sinking feeling of your mount giving way.
A slipping trolling motor mount is more than annoying. It can throw off your kayak balance and even ruin your fishing trip.
The good news is that this problem has clear causes and simple fixes. Loose fasteners, weak brackets, and constant vibration are usually to blame.
In this guide, we break down why your mount keeps slipping. We cover the most common mistakes kayakers make with their setups.
You will learn how to tighten your mount properly and which materials hold up best on the water. We also explain how motor placement affects your kayak’s balance.
By the end, you will know exactly how to stop the slipping for good. Your motor will stay put, your kayak will stay level, and you can focus on what matters most: catching fish.
Let’s get your mount secured and your confidence back on the water.
In a Nutshell
-
Loose fasteners are the top cause of mount slipping. Check bolts and screws before every trip.
-
Vibration from the water loosens even tight fittings over time. Regular checks stop this problem early.
-
Tighten knobs and bolts firmly. Under tightening is a common mistake that leads to constant slipping.
-
Add washers to your mount. They spread the load and grip the kayak surface better.
-
Swap plastic brackets for metal ones. Metal handles pressure and movement much better than plastic.
-
Match your motor’s thrust rating to your kayak. This keeps the mount stable and prevents extra strain.
-
Watch your motor placement. Side mounted motors can tilt your kayak and add stress to the mount.
Fixing a slipping mount is simple once you know these points. Small changes make a big difference on the water.
Why Trolling Motor Mounts Slip on Kayaks
Your trolling motor mount slips for several clear reasons. Understanding these causes helps you fix the problem quickly and keep it fixed.
Loose fasteners are the main culprit. Bolts, screws, and knobs naturally loosen over time. Water vibration and motor movement shake these fasteners loose, even if you tightened them before your last trip. The constant motion of paddling and motor operation creates vibration that works against tight connections.
Inadequate bracket design also causes slipping. Plastic brackets bend and flex under pressure. They cannot grip your kayak securely the way metal brackets do. Plastic simply lacks the rigidity needed for reliable mounting on moving water.
Vibration from the water is relentless. When your motor runs, it creates vibrations that travel through the mount into your kayak. These vibrations loosen fasteners gradually. Each time you tighten something, vibration works to undo your effort.
Improper motor placement adds stress to your mount. Side mounted motors create uneven weight distribution. This imbalance strains the bracket and fasteners. The kayak tilts slightly, putting extra pressure on one side of the mount.
Under tightening is a common mistake people make. Many kayakers tighten fasteners just enough to feel snug. This is not tight enough for water use. Your motor needs firm, solid tightening to stay in place.
Load distribution issues occur when washers are missing. Bolts pressing directly on plastic or soft materials can slip. Washers spread the load across a wider area. This grip prevents movement and slipping.
Each of these factors works alone or together to cause mount slipping. Addressing all of them keeps your mount secure and your motor stable throughout your time on the water.
Signs Your Motor Mount Is Slipping
Your trolling motor mount sends clear warning signs before it fails completely. Recognizing these signals early helps you fix problems before they become dangerous on the water.
The most obvious sign is visible movement when you touch the motor. Push gently on the motor head while it sits idle. If it shifts side to side or tilts forward and backward, your mount is slipping. This movement grows worse once the motor runs and creates vibration.
Listen for unusual sounds during operation. A clicking or rattling noise means fasteners are loose and moving against each other. The sound gets louder as vibration increases. This is your kayak telling you something needs attention right away.
Watch for inconsistent motor positioning. Your motor should point straight ahead every time you use it. If the angle changes between trips or drifts during use, the mount is not holding firm. A drifting motor makes steering difficult and wastes battery power.
Check the bracket and fasteners regularly. Look for bent metal, cracked plastic, or missing bolts. Fasteners that stick out unevenly or sit at odd angles indicate slipping has already started.
Notice kayak handling changes. A slipping side mount tilts your kayak to one side. The boat feels unbalanced or pulls in one direction. Rear mounts that slip cause the stern to sit lower than normal.
Feel excessive vibration through the kayak hull. A secure mount transmits only minor vibration. Constant shaking or buzzing means the mount is moving and needs tightening immediately.
These signs appear before major damage occurs. Address them quickly to keep your motor secure and your kayak stable.
Step-by-Step Guide to Tightening and Securing Your Mount
Start by gathering the right tools. You’ll need an adjustable wrench, socket set, screwdriver set, and a level surface to work on. Place your kayak on a stable stand or two sawhorses so you can access the mount from all angles without strain.
Locate every fastener on your mount system. This includes bolts, screws, and knobs connecting the motor to the bracket and the bracket to your kayak. Write down their locations so you don’t miss any during tightening.
Begin tightening from the base of the mount. Work upward toward the motor itself. Use steady, firm pressure rather than forcing fasteners. Over tightening can strip threads or crack plastic components, so apply pressure until you feel solid resistance, then give one more quarter turn.
Check each fastener twice. Go around the entire mount a second time to ensure everything stays tight. Vibration from water movement will continue testing your work, so this double check catches any fasteners that shifted during initial tightening.
Inspect the bracket where it connects to your kayak. This connection point bears all the motor’s weight, so it needs special attention. Tighten these fasteners last and most carefully.
Rock the motor gently by hand. It should not move side to side or front to back. Any movement means you missed a fastener or tightened something insufficiently.
Test your kayak on land first. Push the motor in different directions. Listen for any clicking or creaking sounds that signal loose connections. Only take your kayak to water after confirming everything feels solid and secure.
Choosing the Right Bracket Material and Hardware
The material you choose for your bracket makes a huge difference in mount stability. Aluminum and stainless steel brackets outperform plastic options because they resist bending under water vibration and motor weight.
Plastic brackets flex too much. When your motor runs, vibration travels through the plastic and causes constant micro movements. These tiny shifts add up fast, and your mount starts slipping within weeks. Metal brackets stay rigid, keeping your motor firmly in place.
Stainless steel is your best choice for saltwater kayaking. It resists rust and corrosion far better than standard aluminum. If you fish in freshwater, aluminum works well and costs less. Both metals handle the repeated stress of trolling without permanent damage.
Your hardware matters just as much as the bracket itself. Use bolts and screws made from stainless steel or coated steel. Cheap fasteners rust quickly and lose grip strength. Rusty bolts slip easily because corrosion reduces friction between the bolt and bracket.
Washers are essential hardware you should never skip. They spread the load across a wider area and prevent bolts from sinking into softer materials. Use washers under both the bolt head and the nut for maximum grip.
Nuts should be lock nuts or have thread locker applied. Standard nuts vibrate loose over time. Lock nuts have a nylon insert that grips the bolt and stays tight. This simple upgrade stops most slipping problems immediately.
Match your fastener size to your bracket thickness. Undersized bolts bend under load. Oversized bolts crack the bracket. Your bracket instructions list the correct sizes. Buy quality fasteners from hardware stores that serve marine applications.
Balancing Motor Placement to Prevent Kayak Lean
Motor placement on your kayak directly affects how the boat sits in the water. A motor mounted too far to one side creates lean, which makes paddling harder and reduces stability.
Center your motor as much as possible. Most kayak designs allow mounting near the midline. This distributes weight evenly across the hull. Your kayak sits level, and you maintain better control.
Side mounting is sometimes necessary on narrower kayaks. If you must mount to the side, balance matters even more. Place your weight on the opposite side when operating. This counteracts the motor’s pull and keeps your kayak level.
Check your kayak’s weight capacity before adding any motor. The motor itself plus the mount system adds significant load. Exceeding capacity causes the kayak to sit lower in water and lean regardless of placement.
Test your setup on calm water first. Notice how your kayak responds. Does it tilt left or right? Does the bow or stern dip too low? These observations tell you if repositioning helps.
Lighter motors create less lean than heavy ones. A smaller motor might solve balance issues without moving your mount. Consider your actual speed needs versus stability requirements.
Inspect your mount connection points regularly. Loose fasteners allow the motor to shift side to side, which worsens lean. Tighten everything before each trip.
Kayak lean increases fatigue during long outings. Your muscles work harder to maintain balance. Proper motor placement reduces this strain significantly.
Distribute any additional gear evenly across your kayak. Batteries, tackle boxes, and coolers should sit near the center line. This reinforces your motor placement strategy and keeps everything stable.
Routine Maintenance and Pre-Trip Inspection Checklist
Before you hit the water, spend a few minutes checking your trolling motor mount. This simple habit prevents problems and keeps you safe.
Start by examining every bolt, screw, and fastener on your mount system. Use your hands to gently wiggle the motor side to side. If you feel any movement, something needs tightening. Movement at this stage is easier to fix than problems that develop mid-trip.
Check the bracket where it attaches to your kayak. Look for cracks, bends, or signs of stress. Run your fingers along connection points to feel for gaps. Even small spaces indicate loose fasteners underneath.
Inspect your washers and nuts carefully. Washers should sit flat against the bracket surface. Bent or damaged washers lose their gripping power. Replace them if they look worn or corroded.
Test the motor’s position by pushing it gently in different directions. The motor should not move at all. Any flex or shifting means fasteners need attention before launch.
Look for rust or corrosion on metal parts. Saltwater exposure creates oxidation that weakens connections. Wipe down your hardware and apply protective coatings if needed.
Check your kayak’s weight distribution too. Uneven gear placement adds stress to your mount. Balance your load before departure.
Listen for rattling sounds when you move the motor by hand. These noises indicate loose components that vibration will worsen during operation.
Take a quick photo of your setup. Compare it to your last trip. Changes in appearance might signal developing problems.
This inspection takes five minutes but saves hours of frustration. A secure mount performs better and lasts longer. Make this check part of your routine before every paddling session.
Common Mistakes That Lead to Mount Failure
Most people make simple mistakes that cause their trolling motor mounts to fail. Understanding these errors helps you avoid expensive repairs and stay safe on the water.
Under tightening fasteners is the biggest culprit. Many kayakers tighten bolts just enough to hold the motor in place, but not enough to prevent movement. Water vibration and motor thrust gradually loosen loose bolts over time. Your mount needs firm, secure fasteners that resist constant motion.
Another common error involves using wrong bracket materials. Plastic brackets flex and bend during use. This flexing creates tiny gaps between the bracket and your kayak. Those gaps allow the motor to shift slightly with each paddle stroke and motor thrust. Metal brackets stay rigid and keep everything locked in position.
People also ignore pre trip inspections. Many kayakers skip checking their mounts before launching. A quick inspection takes five minutes but prevents problems on the water. You might catch a loose bolt that would have failed during your trip.
Improper motor placement causes additional problems. Mounting your motor too far to one side creates imbalance. Your kayak leans, putting stress on one connection point. That single stressed point fails faster than a balanced setup would.
Some kayakers neglect hardware quality. They use regular bolts instead of lock nuts. Regular fasteners vibrate loose quickly. Lock nuts or thread locker keeps fasteners tight through vibration.
Finally, many people don’t consider kayak weight capacity before mounting. An oversized motor creates too much stress on connection points. Your kayak’s hull wasn’t designed for that load. Exceeding capacity weakens all mounting hardware faster.
These mistakes compound each other. Fixing one problem without addressing others leads to continued failures.
Troubleshooting Persistent Slipping Issues
When your trolling motor mount keeps slipping despite your best efforts, you need to dig deeper into what’s actually happening. The problem usually stems from three main sources: fasteners that loosen over time, vibration that gradually works components loose, and bracket materials that can’t handle the motor’s weight and movement.
Start by identifying which part is slipping. Push your motor gently in all directions while it’s mounted. Does the entire bracket move? Does just the motor head shift? Does the connection point to your kayak flex? Each answer points to a different problem area.
Vibration is often the hidden culprit. When your motor runs, it creates constant micro movements. These tiny vibrations slowly loosen even tight fasteners. Metal fatigue also plays a role. After hundreds of operating hours, metal components can develop small cracks or stress points that cause slipping.
Check if your bracket design matches your motor’s weight class. Some brackets simply aren’t strong enough for heavier motors. The material quality matters significantly here. Plastic components flex under load, while metal resists deformation better.
Look at your fastener pattern too. Are bolts evenly spaced? Uneven spacing creates pressure points where the bracket bears most of the motor’s weight. This concentrated stress causes localized slipping.
Inspect your mounting surface on the kayak itself. Sometimes the kayak’s material deteriorates where bolts attach. Fiberglass can crack. Plastic can develop stress fractures. These problems make even tight fasteners slip because they have nothing solid to grip.
Test your mount after any adjustment. Run your motor briefly in calm water and listen for unusual sounds. Slipping often produces creaking or clicking noises before complete failure occurs.
Final Thoughts
Fixing a slipping trolling motor mount does not need to be complicated. Most problems come from loose fasteners, worn brackets, or poor motor placement.
Once you understand the cause, the fix becomes simple. Regular checks make a huge difference over time.
Start with the basics every time you head out. Tighten every bolt and screw before launching your kayak.
Add washers where needed to spread the load evenly. This small step prevents unnecessary stress on your mount.
If plastic brackets keep failing, switch to metal ones. Metal brackets handle vibration and weight much better.
Balance matters just as much as tightness. Keep your motor centered and your gear spread out evenly.
This keeps your kayak stable in the water. It also reduces strain on your mounting system.
Consistency is the real secret to a stable mount. Check your setup before and after each trip.
Small issues become big problems if you ignore them. A few minutes of inspection saves hours of frustration later.
Think of your mount system like any other gear you rely on. It needs attention to keep working properly.
Skipping maintenance almost always leads to slipping again. Staying proactive keeps your motor secure and your trips safer.
If slipping continues after these fixes, dig deeper into your setup. Check bracket compatibility with your motor’s weight class.
Look closely at your kayak’s mounting surface too. Sometimes wear and tear on the material causes the real issue.
With the right combination of tight fasteners, quality brackets, and good balance, your trolling motor mount will stay secure. Every kayaker deserves a smooth, worry free ride on the water.
Frequently Asked Questions
Why does my trolling motor mount slip even after I tighten everything?
Mount slipping happens for several reasons working together. Vibration from the motor creates constant micro movements that gradually loosen fasteners over time. Your bracket material might not match your motor’s weight. The mounting surface on your kayak itself could be worn or damaged where bolts attach.
Start by checking if water or debris got under your bracket. Clean the mounting area completely. Then inspect the kayak material around each bolt hole. If the plastic is cracked or soft, you may need to reinforce it with backing plates underneath.
How tight should my trolling motor mount bolts be?
Tighten bolts firmly, but not so hard you crack your kayak’s material. A good rule: turn each bolt until you feel solid resistance, then give it one more quarter turn. Stop immediately if you hear cracking sounds.
Use a wrench or socket that fits properly. Avoid over tightening with power tools. Hand tightening with a regular wrench gives you better control and feedback.
Can a side mounted motor cause my kayak to lean?
Yes, side mounted motors create imbalance issues. Motor weight and thrust pull your kayak to one side during operation. This lean gets worse in turns and when the motor runs at full speed.
Check your kayak’s weight capacity first. Make sure the motor’s thrust rating matches what your kayak can handle. Proper weight distribution matters as much as secure fastening.
Should I inspect my mount before every trip?
Absolutely. Quick pre trip checks take two minutes and prevent problems on the water. Look at all visible bolts and knobs. Gently try to move the motor by hand to feel for looseness. Tighten anything that shifted since your last outing.
This simple habit keeps your setup reliable and safe.

Hi, I’m Minnie Cole, the creator of The Output Lab — a space where I share my passion for all things tech. I spend my days exploring the latest gadgets, devices, and electronics on Amazon, putting them through real-world testing so you don’t have to.