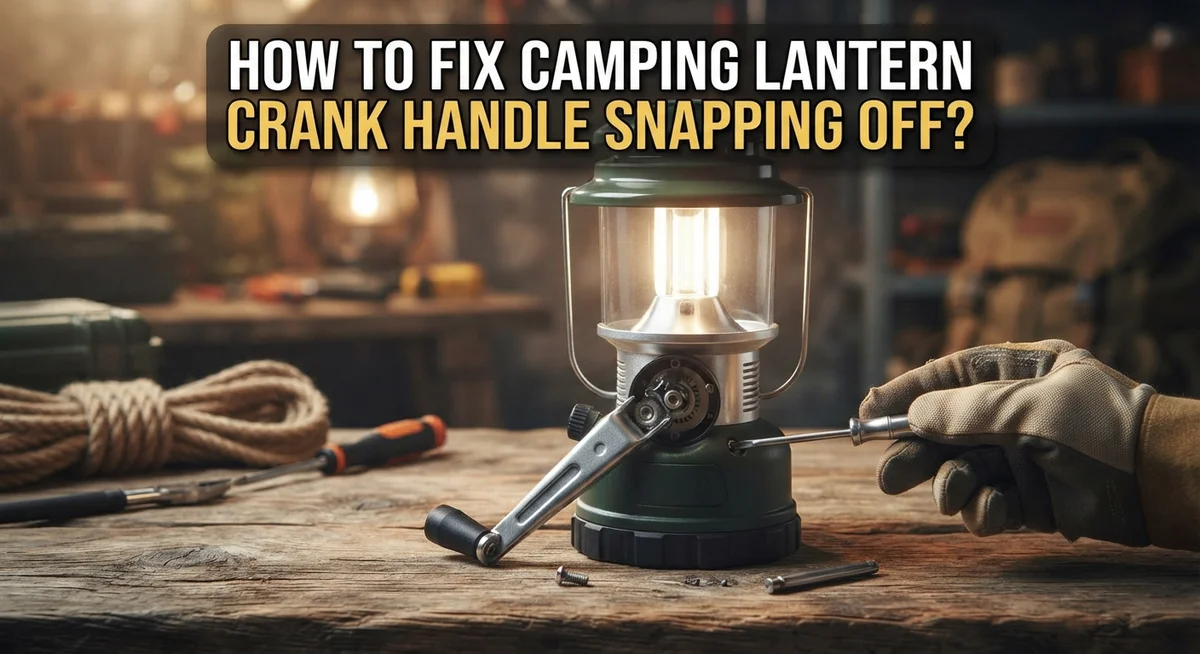
How To Fix Camping Lantern Crank Handle Snapping Off?
Your camping lantern crank handle should not snap off during a simple trip. But it happens more often than you think.
Material fatigue and rough handling wear down the handle over time. One day, it just breaks in your hand.
The good news? You can often fix this problem yourself. You do not need to be a repair expert to get your lantern working again.
In a Nutshell
- Check the handle position first. Most breaks happen because the handle sits wrong during storage or travel. Raise it to the carry position where it crisscrosses and locks.
- Inspect for material fatigue. Old plastic and metal get weak over time. Look for cracks or stress marks before they snap completely.
- Reinforce rounded crank tubes. If the tube has worn smooth from use, wrap it with steel strapping. This adds grip and stops slipping.
- Avoid excessive force when cranking. Gentle, steady turns work better than hard, fast cranking. Over-cranking speeds up wear.
- Test the lantern after repair. Crank for about one minute to see if it produces enough light. This confirms your fix actually works.
- Know when to call a professional. Structural damage or broken housing may need expert help. Simple handle fixes you can usually do yourself at home.
Why Crank Handles Snap Off in the First Place
Crank handles snap off for several clear reasons. Understanding these causes helps you prevent future breaks and fix current problems.
Material degradation happens over time. Plastic and metal both weaken as your lantern ages. Sunlight exposure, temperature changes, and humidity all speed up this process. The handle becomes brittle and loses its strength. Even small stress can cause it to break suddenly.
Worn crank tubes create major problems. When you crank repeatedly, the tube gradually rounds out and stretches. The handle loses its grip on the tube. This loose connection makes the handle more likely to snap during use or storage.
Improper positioning during transport causes most breaks. Many people leave the handle down or at odd angles in backpacks or vehicles. The handle then experiences constant pressure and bending. This repeated stress eventually causes failure. Correct positioning prevents this damage entirely.
Excessive force while cranking accelerates wear. Some people crank hard and fast, thinking it generates more light. This actually damages the mechanism. Gentle, steady turns work much better and last longer.
Poor storage habits compound the problem. Leaving your lantern in hot vehicles or damp basements speeds up material breakdown. Storing the handle in the wrong position puts strain on the connection points.
Lack of maintenance lets small issues become big ones. You might notice the handle feeling loose or hear creaking sounds. Ignoring these early warning signs leads to complete failure.
The good news? Most of these causes are preventable. Proper positioning, gentle use, and smart storage keep your crank handle strong. Regular inspection catches problems before they become serious breaks.
Tools and Materials You’ll Need for the Repair
Before you start fixing your camping lantern crank handle, gather the right supplies. You will need basic tools to inspect and repair the damage properly.
A multimeter helps you check if electrical components work after repair. This device tests switches and circuits quickly. Grab one if your lantern has electronic elements that need verification.
Steel strapping or metal bands reinforce worn crank tubes. These materials wrap around rounded areas to restore grip and prevent future snapping. They are inexpensive and highly effective for this type of repair.
A small wrench or socket set removes the crank assembly from your lantern. Most camping lanterns use standard bolt sizes. Having multiple sizes ensures you can access the connection points easily.
Sandpaper or a wire brush cleans corroded metal surfaces. Rust and dirt weaken connections over time. Scrub these areas before reassembly to improve durability.
A replacement handle kit might be necessary if the original snaps beyond repair. These kits contain new crank handles and fasteners. Check your lantern’s manual to find compatible options.
Lubricating oil or grease keeps the crank mechanism moving smoothly. Apply it sparingly to joints and pivot points. This reduces friction and prevents future jamming.
A flashlight or work lamp illuminates tight spaces where the handle connects. Good lighting helps you spot small cracks or wear patterns you might miss otherwise.
Protective gloves keep your hands safe from sharp edges and rust. Broken handles often have jagged points that cut skin easily.
Keep these items organized in a small container before you begin work. Having everything ready prevents frustration and speeds up your repair process significantly.
Step-by-Step: Removing the Broken Handle
Start by locating the lever at the top of your lantern. This lever holds the handle assembly in place. Gently pop it upward or sideways, depending on your lantern model. The lever should release without much force.
Once the lever lifts, you can now access the crank handle itself. Look at how the handle connects to the lantern body. Most handles attach via a simple pin or bolt through the crank tube. Identify which fastening method your lantern uses before proceeding.
If your lantern has a pin, carefully slide it out from the side. You may need a small tool to help push it through. If bolts secure the handle, use your wrench or socket set to turn them counterclockwise. Remove each bolt slowly and set them aside in a safe place.
As you loosen the fasteners, the handle assembly will become loose. Support it with your other hand so it doesn’t drop suddenly. Gently wiggle the handle back and forth while pulling it away from the lantern body.
Once free, examine the broken handle closely. Look for crack points or snapped sections. Check the crank tube for wear marks or rounded edges. These details tell you why the handle failed and what repair method works best.
Set the broken handle aside. Clean the connection area on your lantern where the handle attached. Remove any dirt, rust, or debris using your wire brush or sandpaper. This cleanup ensures a proper fit when you reinstall or replace the handle.
Keep all removed bolts and pins organized. You will need them again soon. Store them in a small container so nothing gets lost during the repair process.
Step-by-Step: Reinforcing and Reattaching the Crank Handle
Now that you have removed the broken handle, it’s time to reinforce the crank tube and reattach a functional handle to your lantern.
Start by inspecting the crank tube itself. Look for signs of stretching, rounding, or corrosion. These weak points are exactly why handles snap off. If the tube appears damaged, use steel strapping or metal bands to wrap around it tightly. This reinforcement prevents future breakage by distributing stress more evenly across the tube’s surface.
Clean the crank tube thoroughly with a wire brush or sandpaper. Remove any rust, dirt, or debris that accumulated inside the lantern. A clean surface helps the handle seat properly and ensures a secure connection.
If you’re reusing the original handle, check for cracks or splintering. A cracked handle will snap again quickly. If damage is severe, you’ll need a replacement handle kit designed for your lantern model.
Align the new or repaired handle with the crank tube opening. Slide it into position carefully. Insert the pin through the designated holes on both the handle and tube. This pin holds everything together and allows smooth cranking motion.
Tighten all fasteners securely, but don’t overtighten. Excessive force can strip threads or crack the handle again. Use a wrench to snug each bolt until it’s firm, then stop.
Apply a small amount of lubricating oil or grease to the crank mechanism. This reduces friction and makes cranking easier. Wipe away excess lubricant to prevent dirt accumulation.
Test your repair by cranking gently for about one minute. The handle should move smoothly without wobbling or grinding sounds. If everything feels solid and the lantern produces adequate light, your repair is complete.
Proper Handle Positioning to Prevent Future Breakage
Proper handle positioning prevents future breakage and extends your lantern’s life. The way you store and use your crank handle matters more than you might think.
Always raise the handles to the carry position when storing your lantern. They should nearly crisscross and lock in place at the top. This positioning keeps tension off the crank tube and reduces stress on connection points. Never leave handles hanging down or partially extended during transport or storage.
When you’re using your lantern, hold the handle firmly but avoid excessive force. Apply steady, controlled pressure as you crank. Rough or jerky movements put unexpected stress on the assembly. Crank for about one minute to generate sufficient light without straining the mechanism.
Pay attention to how the handle feels during use. If you notice unusual resistance or grinding sounds, stop immediately. These early warning signs indicate material fatigue or internal wear. Continuing to force the crank when something feels wrong accelerates damage.
Store your lantern in a dry location away from temperature extremes. Moisture and heat cause metal to expand and contract, which weakens connection points over time. Keep the handle in the raised, locked position throughout storage.
Check the crank tube periodically for signs of stretching or rounding. If the tube loses its shape, the handle won’t grip properly and breakage becomes likely. Steel strapping or metal bands wrapped around the tube provide reinforcement before problems develop.
Proper positioning is preventive maintenance. You’re not just storing your lantern correctly. You’re actively protecting the crank handle from unnecessary stress. This simple habit keeps your lantern functional for many camping trips ahead.
Troubleshooting: When the Lantern Still Won’t Light After Repair
Your lantern won’t light even after you’ve fixed the crank handle. This is frustrating, but several issues could cause this problem. Let’s work through them systematically.
First, check if the lantern is actually generating power. Crank the handle for a full minute at a steady pace. You should feel resistance as you turn it. If the handle spins too freely with no resistance, the crank tube may be stripped or rounded out. This prevents the mechanical energy from transferring properly to power the light.
Next, inspect the switch. The switch controls whether electricity flows to your bulb or LED element. Press it several times to ensure it clicks firmly. Listen for a clear clicking sound each time you flip it. If the switch feels mushy or makes no sound, it may be broken internally.
Test the switch with a multimeter if you have one available. Set it to the continuity setting and check if the switch completes a circuit when pressed. No continuity means the switch needs replacement.
Check your power source next. If your lantern uses a battery, remove it and inspect the contacts for corrosion or dirt. Clean the metal contacts with a dry cloth. Reinsert the battery firmly. If your lantern relies purely on hand crank power, ensure you’re cranking long enough. One minute of steady cranking should produce visible light.
Examine the bulb or LED element. The light source itself may be burnt out or loose. Gently twist the bulb to ensure it seats properly in its socket. If it still won’t light after these checks, the internal wiring may be damaged and require professional repair from equipment specialists.
Common Mistakes That Lead to Repeated Handle Failure
Most people break their camping lantern handles by making the same preventable mistakes. Understanding these errors helps you avoid repeated failures.
Improper storage positioning causes significant damage. Many users leave handles down or at odd angles during transport. This puts stress on the crank tube and weakens connection points. Always raise handles to the carry position where they nearly crisscross and lock. This simple step prevents unnecessary strain.
Over cranking with excessive force damages the mechanism quickly. You don’t need to crank hard to generate light. A steady, moderate pace for about one minute provides sufficient power. Aggressive cranking accelerates wear on the tube and handle joint. Treat the crank gently, like you would a delicate tool.
Ignoring early warning signs leads to complete failure. If your handle feels loose, wobbly, or makes grinding sounds, address it immediately. Material fatigue starts small but grows worse. Continuing to use a damaged handle speeds up the breaking process. Stop using it and inspect the crank tube for stretching or rounding.
Storing in harsh conditions accelerates material degradation. Moisture causes rust and expansion. Temperature extremes make metal brittle. Keep your lantern dry and cool when not in use. This simple habit extends the lifespan significantly.
Neglecting the crank tube itself creates weakness. The tube can stretch or lose its shape from repeated use. Check it periodically for visible damage. If you notice rounding or deformation, reinforce it with steel strapping before the handle breaks again.
These mistakes compound over time. Avoiding them prevents frustrating repairs and keeps your lantern working reliably for many camping trips ahead.
When to Call a Professional for Structural Repairs
Your camping lantern crank handle may reach a point where professional repair becomes necessary. Structural damage happens when the internal crank tube stretches beyond its original shape or rounds out from repeated use.
You should call a professional when you notice these specific issues. The handle wobbles excessively even after tightening. The crank tube no longer stays in its proper position. Metal pieces show visible cracks or breaks rather than simple wear. The mechanism grinds or makes unusual sounds during operation.
Specialists who repair camping equipment and awning systems have the right tools for this work. They can assess whether your lantern’s internal structure can be reinforced or needs replacement parts. Some professionals use steel strapping techniques to stabilize rounded tubes. Others may rebuild the entire crank assembly if damage runs too deep.
Before scheduling a repair appointment, document what’s happening. Take photos of the damage. Write down when the problem started. Note any unusual sounds or resistance you feel while cranking. This information helps the professional understand the full scope of damage.
Professional repair costs less than replacing your entire lantern in many cases. However, if your lantern is very old, professionals may recommend purchasing a newer model instead. Some modern camping lanterns use rechargeable batteries with hand crank backup, which eliminates some mechanical stress points.
Contact local outdoor equipment shops or camping supply stores for professional referrals. Many businesses that sell camping gear also offer repair services. Ask about their experience with your specific lantern model. Getting professional help early prevents complete failure during your next camping trip.
Final Thoughts
Fixing a snapped crank handle does not need to be hard. Most breaks happen from simple mistakes, not bad luck. Once you understand why handles fail, you can stop the problem from happening again.
Material fatigue is often the real culprit behind sudden breaks. Plastic and metal parts wear down after years of use. This makes the handle brittle and more likely to snap under pressure.
Good storage habits matter just as much as any repair. Keep the handle raised and locked whenever you pack away your lantern. This one habit prevents a lot of unnecessary damage.
Gentle cranking also protects the internal mechanism. You do not need to force the handle to get bright light. A steady, calm motion for about a minute is enough.
Small checks make a big difference over time. Look at the crank tube now and then for stretching or rounding. Catching these signs early saves you from bigger repairs later.
Sometimes a simple fix at home is not enough. If the damage looks structural or affects the lantern body, a professional repair is the safer choice. Equipment specialists have tools that most people do not keep at home.
Rechargeable lanterns offer a helpful backup if you want less strain on the crank system. They reduce your dependence on constant hand cranking. Still, a hand crank remains useful when batteries run low.
In the end, careful handling keeps your lantern working longer. Simple habits like proper storage, gentle use, and quick inspections go a long way. With these steps, your lantern can stay reliable trip after trip.
Frequently Asked Questions
Why does my camping lantern crank handle keep breaking?
Crank handles snap for one main reason: material fatigue. The plastic or metal wears down over time from repeated use and stress. Poor storage positioning makes this worse. When you store your lantern with the handle down or bent at odd angles, it puts constant pressure on the joint. This weakens the connection until it finally snaps.
Can I prevent the handle from snapping in the first place?
Yes. Always raise your handles to the carry position before storing your lantern. The handles should nearly crisscross and lock in place at the top. This removes stress from the connection point. Also avoid over cranking or applying excessive force when generating light. Gentle, steady cranking protects the internal mechanism and extends the lifespan of your handle.
What’s the best temporary fix if my handle snaps?
Steel strapping works well as a reinforcement solution. Wrap it tightly around the crank tube where it rounds out from wear. This prevents further movement and damage. However, this is a temporary measure only. A snapped handle may need professional repair if the break is severe or affects the mechanical function.
Should I buy a new lantern or repair the handle?
Contact a professional first. Local outdoor equipment shops and camping supply stores can assess the damage. Structural repairs cost far less than replacing your entire lantern in most cases. If the handle is completely shattered or the crank mechanism is broken, replacement might be your best option. Professional specialists have the right tools to determine which path makes sense for your situation.

Hi, I’m Minnie Cole, the creator of The Output Lab — a space where I share my passion for all things tech. I spend my days exploring the latest gadgets, devices, and electronics on Amazon, putting them through real-world testing so you don’t have to.