How To Fix Electronic Insole Battery Wires Fraying?
Electronic insoles keep your feet warm on cold days. They also track steps and support your active lifestyle. But like any wearable tech, they need proper care.
Battery wires inside these insoles often face wear and tear. Constant bending, walking, and moisture exposure cause fraying over time. This is a common problem for many users.
Frayed wires can lead to bigger issues. Your insoles might stop heating properly. They could even short circuit or stop working altogether. Nobody wants cold feet during winter walks.
In a Nutshell
- Safety comes first. Always turn off and unplug your insoles before you touch any wires.
- Spotting the damage early saves you time. Look for exposed copper or loose connections near the heel or ankle area.
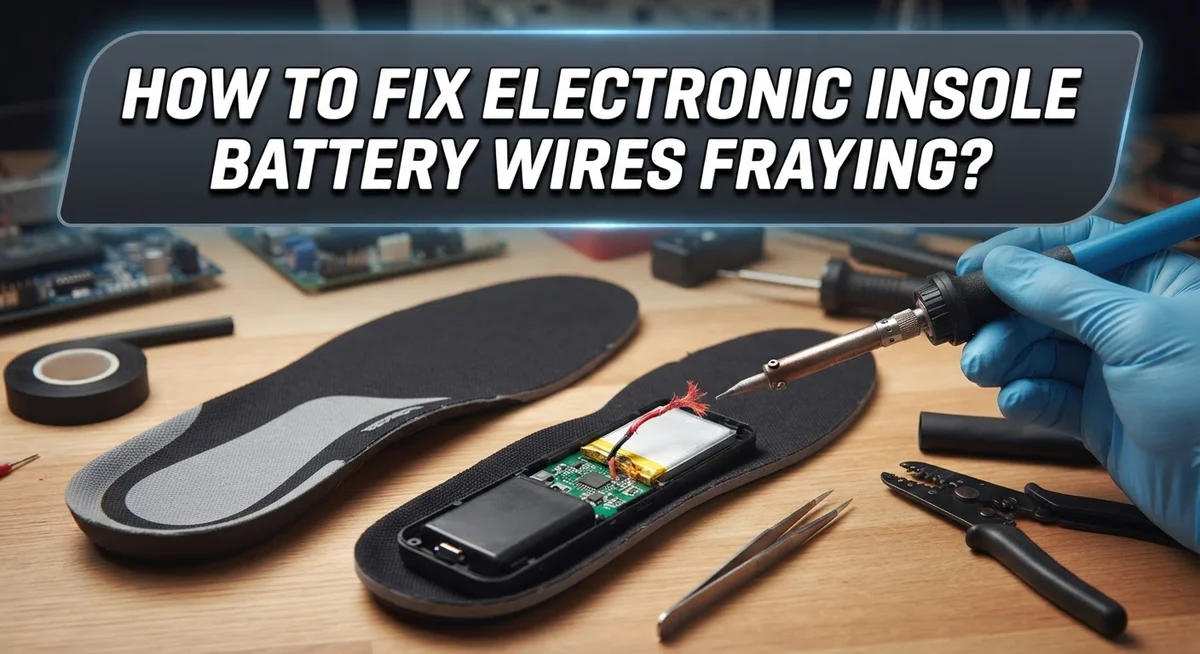
- Basic tools help most. A pair of wire strippers, electrical tape, and a soldering kit can handle most repairs.
- Small fixes work wonders. Sometimes twisting wires together and covering them with tape solves the issue completely.
- Testing matters. Always check your repair with a multimeter or by wearing the insoles briefly before trusting them fully.
- Prevention beats repair. Store your insoles flat and avoid bending them sharply to stop future fraying.
Why Electronic Insole Battery Wires Fray Over Time
Electronic insole battery wires fray for several practical reasons. Understanding these causes helps you prevent future damage and fix current problems.
Constant flexing is the main culprit. Your feet bend and move all day long. This repetitive motion puts stress on the wires inside your insoles. Over time, the insulation coating cracks and peels away from the metal underneath.
Moisture creates another serious problem. Sweat from your feet seeps into the insole structure. Water exposure weakens the wire’s protective coating. It also promotes corrosion on the metal wires themselves. This combination makes fraying happen faster.
Temperature changes damage the wire insulation too. Heat softens the plastic coating. Cold makes it brittle and prone to cracking. When you move between warm indoors and cold outdoors repeatedly, the material expands and contracts. This stress causes the insulation to split open.
Poor storage habits accelerate the damage. Folding your insoles tightly or bending them sharply puts unnecessary pressure on the wires. The wires get pinched and stressed. The insulation breaks down at these bend points.
Age and regular use naturally wear down materials. Battery wires have a lifespan. After months of daily use, the insulation simply becomes fragile. The coating loses its flexibility and protective qualities.
Manufacturing defects occasionally play a role too. Some insoles leave the factory with weak insulation. These wires fray much sooner than expected.
Knowing these causes helps you take action. You can reduce moisture exposure by drying your feet before wearing insoles. You can store them flat instead of folded. You can also inspect them regularly for early signs of damage. Catching fraying early makes repairs much easier and more successful.
Signs Your Insole Wires Need Repair
Frayed wires show you clear warning signs. Your insoles may stop heating or heat only partially. One side might work while the other stays cold. This uneven performance tells you wire damage exists somewhere inside.
You might notice visible fraying if you open the insole casing. Look for exposed copper strands or broken wire sheaths. The damage often appears where wires bend most frequently. These stress points wear down faster than other areas.
Burning smells signal serious problems. If your insoles emit a burnt odor, stop using them immediately. This smell means the wires are overheating or shorting out. Continuing to wear them creates a safety risk.
Listen for crackling or popping sounds when you turn on your insoles. These noises indicate electrical arcing between damaged wire sections. The wires are trying to complete a circuit through damaged insulation.
Check for loose connections at battery terminals. If wires wiggle freely or feel disconnected, fraying may have separated them. Gently tug on the wires to see if they move excessively.
Your insoles might feel warm to the touch even when turned off. This happens when damaged wires create electrical resistance and generate heat. The insoles should only warm up when activated.
Battery drain happens faster than normal. If your battery dies quickly despite full charging, frayed wires waste power through inefficient connections. The electrical current takes longer to reach the heating elements.
Cold spots appear randomly across your foot. Instead of even warmth, you feel heat in some areas only. This patchy heating pattern suggests broken wire sections.
Flickering on and off indicates intermittent wire contact. The connection works sometimes but fails other times. This inconsistency confirms fraying has damaged the circuit. Spotting these signs early prevents complete insole failure and keeps you safe.
Tools and Materials Needed for the Fix
You need the right equipment to fix fraying battery wires safely and effectively. Gather these items before you start working on your insoles.
Wire strippers remove the outer plastic coating from damaged sections. They come in manual and automatic versions. Manual strippers work fine for most home repairs. Choose strippers that fit your wire gauge, which is usually printed on your insole documentation.
Electrical tape seals and protects repaired wires from moisture and dirt. This tape sticks well and resists temperature changes. Buy quality tape because cheap versions peel off quickly. You’ll need at least one roll for most repairs.
A soldering iron and solder create permanent connections between broken wires. These tools join wire strands together reliably. A basic soldering kit includes the iron, solder wire, and a stand. Practice on scrap wire first if you’ve never soldered before.
A multimeter tests whether your repair actually works. This device measures electrical current and voltage. It tells you if electricity flows through your fixed wires correctly. Digital multimeters are easier to read than analog versions.
Small scissors or craft knives trim away damaged insulation carefully. Use sharp blades to avoid crushing the wire underneath. Dull tools create messy cuts that cause more problems.
Heat shrink tubing provides extra protection over your repairs. This tubing shrinks when heated, creating a tight seal. It’s optional but highly recommended for long lasting fixes.
A small flashlight or headlamp helps you see inside the insole casing clearly. Good lighting prevents mistakes during delicate work.
Keep all these tools organized in one place before you begin. Having everything ready makes the repair process faster and safer.
Step-by-Step Guide to Repairing Frayed Wires
Start by turning off your insoles completely and removing the battery. Safety comes first when working with electrical components. Let the insoles sit for at least 30 minutes to ensure all power has discharged from the system.
Open the insole casing carefully using small scissors or a craft knife. Work slowly to avoid cutting the wires inside. Use your flashlight to locate the frayed sections clearly.
Examine the damaged wire closely. If the fraying is minor and only affects the outer coating, you can proceed with a simple wrap repair. For severe damage where the inner copper strands are exposed or broken, you’ll need to strip and resolder the connection.
Strip away about half an inch of the damaged insulation using wire strippers. Work gently to avoid cutting the copper strands underneath. Remove any loose or burnt plastic coating completely.
If the wire is broken, twist the exposed copper strands together tightly. Apply a small amount of solder to create a permanent bond. Allow it to cool for a few seconds before moving the wire.
Wrap electrical tape around the repaired section. Overlap each layer by half to ensure complete coverage. Add an extra layer of heat shrink tubing for maximum protection against moisture.
Test your repair before reassembling everything. Use a multimeter to check for continuity across the repaired wire. The reading should show a complete circuit with no breaks.
Reconnect the battery carefully. Turn on your insoles and listen for any crackling sounds. Feel the insoles for unusual warmth. If everything seems normal, close the casing and secure it properly.
Your repair should now hold up through regular use and flexing.
Testing the Insole After Repair
After you repair your insole wires, testing becomes essential before you wear them again. Start by reconnecting the battery carefully and turning on your insoles. Listen closely for any crackling, popping, or unusual sounds that suggest incomplete repairs.
Watch the LED indicators or power lights on your insoles. They should turn on smoothly without flickering. If they flicker or dim inconsistently, your wire repair may have weak connections that need reinforcement.
Feel the insole surface with your hand. It should remain cool during normal operation. Warmth or heat indicates electrical resistance problems that mean your repair didn’t fully restore the wire’s conductivity.
Use your multimeter to check voltage levels if you have one available. Set it to the DC voltage setting that matches your battery type. Touch the meter’s probes to the battery terminals while the insoles are powered on. The reading should match your battery’s rated voltage. Lower readings suggest incomplete repairs.
Walk around in your insoles for several minutes. Pay attention to how they feel. The heating or stimulation elements should work evenly across both feet. Uneven performance means one wire still has connection issues.
Check the repaired area again after wearing them briefly. The tape and heat shrink tubing should stay firmly in place without peeling or shifting. Movement or loosening means you need to reapply protection materials.
If your insoles pass all these tests, your repair succeeded. If problems persist, you may need to resolder the connection or replace the entire wire section. Never ignore warning signs like burning smells or excessive heat. These indicate safety hazards that require immediate attention before wearing your insoles again.
Tips to Prevent Future Wire Fraying
Preventing wire fraying in electronic insoles requires consistent care and smart habits. The best defense is understanding what causes damage in the first place.
Moisture and sweat damage wires faster than anything else. Insoles live inside shoes where sweat accumulates daily. After wearing your insoles, remove them and let them dry completely in a warm, dry place. Never store them in damp environments or sealed bags while wet.
Heat damages insulation over time. Keep your insoles away from direct sunlight and hot surfaces. Don’t leave them in cars on sunny days or near heating vents. Extreme temperatures weaken the plastic coating around wires.
Excessive bending and flexing create stress points where wires break. While some bending is unavoidable, avoid unnecessarily folding or creasing your insoles. Store them flat or slightly curved, not crumpled in tight spaces.
Check your insoles regularly for early signs of damage. Look for cracks, discoloration, or worn spots on the surface. Catching problems early prevents complete wire failure. Small issues are much easier to fix than major damage.
Use insole covers or protective cases when not wearing them. This shields wires from dust, dirt, and accidental pressure. A simple cloth bag works well for storage.
Handle your insoles gently during insertion and removal from shoes. Rough handling can damage internal connections. Take your time positioning them properly instead of forcing them in quickly.
Replace your battery on schedule. Old batteries leak and corrode nearby wires. Follow the manufacturer’s recommended replacement timeline to avoid this problem entirely.
These preventive steps keep your electronic insoles functioning reliably for years. Small efforts now save you from frustrating repairs later.
Common Mistakes to Avoid During Repair
Many people rush through wire repairs and skip important safety steps. Skipping the power off stage creates a shock hazard. Always disconnect your battery before touching any wires inside the insole.
Don’t apply excessive heat when using a heat gun or soldering iron. Too much heat melts the insulation further and damages the wire itself. Keep your heat source moving and maintain a safe distance from the work area.
Wrapping tape too tightly around the wire restricts flexibility. Electronic insoles bend constantly during walking and running. Tight wrapping causes the tape to crack and peel away quickly. Leave a small amount of slack in your tape wrapping.
Using the wrong wire gauge creates connection problems. If you replace a frayed section, match the original wire thickness exactly. Thinner wire overheats under normal current flow. Thicker wire won’t fit properly in the insole channels.
Ignoring moisture completely leads to repeat failures. Never repair your insoles while they’re damp or wet. Let them dry completely for at least 24 hours before opening the casing.
Forgetting to test your repair before reassembling wastes time. Test the connection with your multimeter before closing everything up. This catches problems early when fixing is still simple.
Mixing different types of electrical tape creates weak spots. Use only one consistent tape type throughout your repair. Different tapes have different adhesive strengths and flexibility ratings.
Not securing loose wires inside the casing causes future damage. Wires should sit flat against the insole surface. Use small clips or adhesive backing to keep wires in place after repair.
Rushing the reassembly process breaks your fresh repair. Take your time fitting the casing back together carefully. Forcing pieces together can pinch wires and undo your work instantly.
Troubleshooting Persistent Connection Issues
When your electronic insole battery wires keep losing connection despite repair attempts, the problem usually runs deeper than simple fraying. Persistent connection issues signal that your repair didn’t fully address the root cause.
Start by examining the wire terminals where they connect to the battery. Corrosion builds up on metal contacts and blocks electrical flow. Use a small brush or cotton swab to gently clean both the wire end and battery terminal. A tiny amount of rubbing alcohol helps remove stubborn corrosion deposits.
Next, check if your wire gauge matches the battery requirements. Thinner wires have higher resistance and drop voltage during operation. If you replaced a frayed section with thinner wire, this creates ongoing connection problems. The wire must carry sufficient current without heating up.
Inspect the insulation around repaired sections carefully. Small gaps or thin spots allow moisture to seep in and cause shorts. Moisture creates intermittent connections that work sometimes but fail randomly during use.
Test your battery voltage with a multimeter to confirm it still holds a charge. Weak batteries show lower voltage readings and struggle to power your insoles consistently. A failing battery mimics connection problems but requires replacement instead of rewiring.
Check that your solder joints are solid if you soldered the wires. Cold solder joints look dull instead of shiny and break easily under stress. Reheat these joints briefly to create proper connections.
Finally, ensure wires aren’t pinched or bent sharply inside the insole casing. Bent wires develop stress fractures that break internal strands while appearing fine on the outside. Reposition wires with gentle curves instead of sharp angles to maintain reliable connections moving forward.
Final Thoughts
Fixing frayed wires in electronic insoles is a simple skill anyone can learn. You do not need special training. You just need patience and the right tools.
Small repairs make a big difference. A tiny fix today prevents a bigger problem tomorrow. Your insoles will thank you for the attention.
Remember that prevention beats repair every time. Taking care of your wires means fewer repairs down the road. This saves you time and money.
Safety always comes first. Never rush through electrical repairs. Test everything before you wear your insoles again.
If a repair does not hold, do not get frustrated. Sometimes wires need a second attempt. This is normal and happens to everyone.
Keep basic repair supplies on hand. Electrical tape, a soldering iron, and spare wire help you fix problems fast. Having these ready saves you from delays.
Your electronic insoles serve an important purpose. They track your steps, warm your feet, or monitor your health. Keeping them working means you get consistent value from them.
Trust your instincts when something feels off. If your insoles act strange, check the wires first. Most connection problems trace back to wire damage.
Learning to fix these wires builds confidence. You will feel more capable handling future repairs. This skill saves you money over time too.
Treat your insoles with the same care you give other electronics. Regular checks and gentle handling extend their life significantly.
With the right approach, frayed wires become a minor inconvenience rather than a major headache. You now have the knowledge to spot problems early and fix them correctly. Your electronic insoles can serve you well for a long time when you give them proper attention and care.
Frequently Asked Questions
Can I use regular tape instead of electrical tape to fix frayed wires?
Regular tape and electrical tape are not the same. Regular tape doesn’t insulate wires properly. It also breaks down faster when exposed to moisture and heat. Electrical tape is specifically designed to protect wire connections and resist temperature changes. If you only have regular tape available, get electrical tape before attempting your repair. Your insoles will work better and last longer with the right materials.
How do I know if the battery itself is dead versus the wires being the problem?
Use a multimeter to test your battery voltage. A healthy battery should show a charge reading. If the multimeter shows zero or very low voltage, your battery may be dead. If the voltage reads normal but your insoles still don’t work, the frayed wires are likely your culprit. Test the wires by gently flexing them while the multimeter is connected. A working connection stays steady. A bad connection will flicker or drop.
What’s the difference between soldering and using wire connectors for battery repairs?
Soldering creates a permanent, strong bond between wires and battery terminals. Wire connectors are removable and easier for beginners. Soldering requires a heat source and some skill. Wire connectors need less equipment but may loosen over time. Choose soldering if you want a lasting fix. Choose connectors if you prefer a simpler approach. Both methods work when done correctly.
Why do my repaired wires keep failing after a few weeks?
Repeated flexing breaks down your repair work. Electronic insoles bend constantly during use. Your wires need extra protection in high stress areas. Apply heat shrink tubing over your tape for added durability. Secure loose wires so they don’t move inside the casing. Check your repair monthly to catch new damage early.

Hi, I’m Minnie Cole, the creator of The Output Lab — a space where I share my passion for all things tech. I spend my days exploring the latest gadgets, devices, and electronics on Amazon, putting them through real-world testing so you don’t have to.