How To Fix Smart Umbrella Rib Hinge Rivet Popping?
Does your smart umbrella suddenly sag on one side? A popped rivet at the rib hinge is often the culprit.
This tiny part holds the ribs together. When it pops or loosens, your umbrella loses its shape fast.
The good news is that this fix is simpler than it looks. You do not need to buy a whole new umbrella.
With a few basic tools, you can get your umbrella looking sharp again. This guide walks you through the entire process.
We will show you how to separate the top from the base. You will learn how to remove the canopy safely too.
Most importantly, we cover how to measure the damaged rib correctly. This step ensures you get the repair right the first time.
You will also discover common mistakes people make. Using the wrong tools or forcing bent ribs can cause more damage.
By the end of this article, you will know exactly how to spot rivet issues. You will also know how to fix them like a pro.
Let’s get your umbrella standing tall again.
In a Nutshell
Here is a quick look at fixing this common umbrella problem.
- Separate the umbrella top from the base before you start any repair work. This step gives you clear space to handle the ribs safely.
- Remove the canopy fabric next. You need full access to the rib and its hinge point.
- Measure the damaged rib carefully before buying parts. The right size prevents wasted time and money.
- Grab a craft size rivet tool if the original rivet is lost. Standard tools often do not fit these smaller parts.
- Handle bent ribs gently with pliers. Forcing them too hard can snap the metal completely.
- Replace the rib section if the damage looks too severe for a simple rivet fix. A professional replacement part is a smart backup option.
- Test the hinge after you finish. A solid, tight connection means the job is done right.
Follow these steps in order for the best results. Your umbrella will open and close smoothly again in no time.
Understanding Rib Hinge Rivet Popping and Why It Happens
A rivet is a small metal fastener that holds the umbrella’s supporting ribs in place at the hinge point. When this rivet pops out or loosens, the rib connection fails and your umbrella loses its structural support.
This problem happens for several reasons. Repeated opening and closing creates stress on the hinge joint over time. Wind gusts and rough handling can also force the rivet out of position. On smart umbrellas with motorized features, the extra mechanical movement adds pressure to these connection points.
Weather exposure accelerates rivet failure too. Rain, humidity, and temperature changes cause metal parts to expand and contract. This constant movement weakens the rivet’s grip on the rib. Rust can also form around the rivet, making it more likely to pop free.
The location matters as well. Rivets at rib hinges experience more force than other umbrella parts. Each time you open your umbrella, those hinges bend slightly. Over months or years, this bending fatigues the rivet until it finally gives way.
You might notice signs before complete failure. A loose rivet sometimes makes a clicking sound when you move the umbrella. The canopy may sag unevenly on one side. The affected rib might feel wobbly when you touch it gently.
The good news is that popped rivets don’t mean your umbrella is ruined. This is one of the most fixable umbrella problems. The rivet itself is inexpensive and replaceable. Understanding why rivets pop helps you prevent future failures through gentler handling and regular inspection of hinge areas.
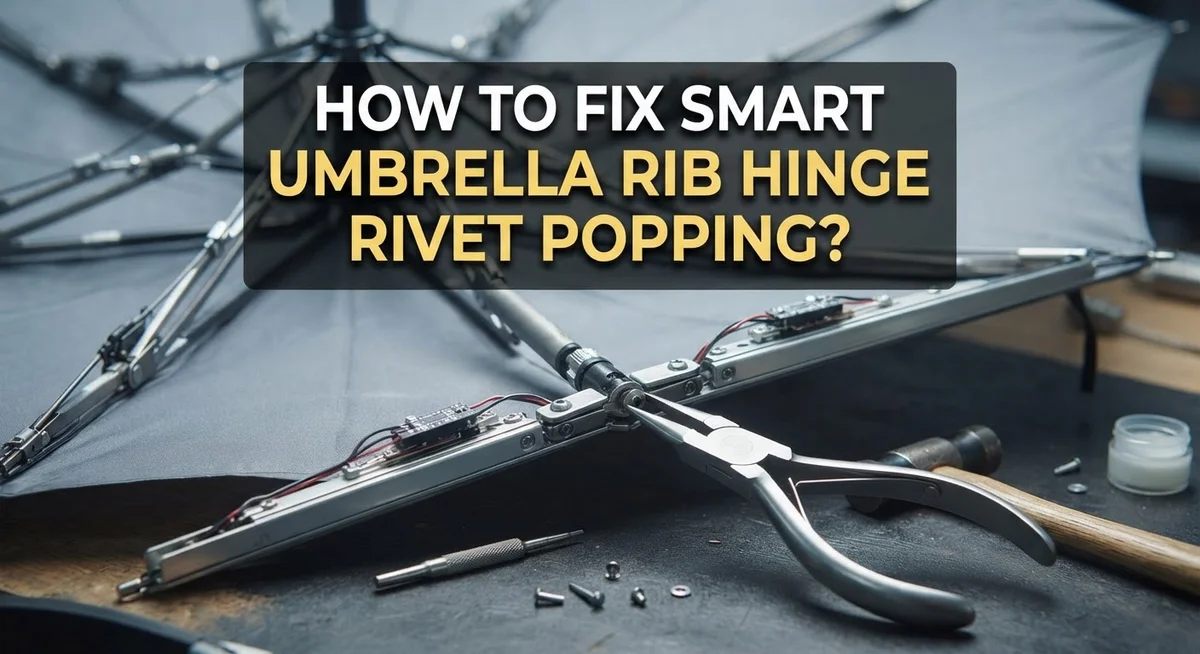
Tools and Materials You’ll Need for the Repair
Before you start fixing your smart umbrella, gather the right supplies. Having everything ready makes the job faster and prevents frustration midway through.
A rivet tool is essential for this repair. You’ll need either a standard rivet tool or a craft size version, depending on your rivet’s dimensions. Small umbrellas typically use smaller rivets, so a craft tool works best. This tool compresses the rivet and holds it firmly in place while you work.
Pliers are your second must have tool. Use them carefully to handle bent ribs or remove damaged rivets. Avoid applying excessive force, as this can break the rib itself. Gentle pressure works better than aggressive squeezing.
You should also have replacement rivets on hand. Measure your original rivet before shopping to ensure you get the correct size. Lost rivets require exact replacements, or your hinge won’t function properly.
A measuring tape or ruler helps you stay accurate. Measure the damaged rib section and note the rivet diameter. This information prevents buying wrong sized parts.
Keep a small hammer nearby for gentle tapping if needed. Some repairs require light strikes to seat rivets correctly. A regular household hammer works fine for this task.
Clean rags or paper towels are helpful too. Wipe away dirt and debris from the hinge area before starting. This gives you a clear view of the damage.
Finally, have good lighting ready. The rib hinge area is small and detailed. A bright lamp or flashlight helps you see exactly what you’re doing. With these tools assembled, you’re prepared to tackle the repair successfully and restore your umbrella to working condition.
Step-by-Step Guide to Disassembling Your Smart Umbrella
Taking your smart umbrella apart is the first step to fixing the rivet problem. Start by flipping the umbrella upside down on a flat surface. This gives you a clear view of where the top connects to the base.
Look for the fastening points where the umbrella canopy meets the shaft. Most smart umbrellas have clips, screws, or bolts holding these pieces together. Gently loosen these fasteners with your hands or a basic screwdriver. Work slowly and keep track of each piece you remove.
Once the top separates from the base, lay it flat on your work area. The canopy fabric should come off next. You may need to unzip it or peel it back carefully from the frame underneath. Take your time here because rushing can tear the fabric.
Now you can see the rib structure clearly. The rivet that popped out will be obvious as a missing fastener or a loose metal piece near the hinge. Examine the rib itself for bending or cracks. A straight rib is easier to repair than one that’s already damaged.
Measure the exact location of the popped rivet using a ruler or measuring tape. Note the size of the hole where the rivet sat. This measurement tells you what replacement rivet size you need.
Check if the rib hinge still looks solid or if it’s bent. Gently flex the area to see how much movement exists. Write down all these details so you don’t forget them later.
Keep all removed parts in one place. You’ll need them when you reassemble the umbrella after the repair is complete. Organization prevents lost pieces and confusion during reassembly.
How To Remove the Canopy and Access the Damaged Rib
Once you’ve separated your umbrella top from the base, you’re ready to access the damaged rib. The canopy fabric covers the internal structure, so removing it gives you clear visibility of the problem area.
Start by locating where the canopy attaches to the umbrella frame. Most smart umbrellas use stitching or glue along the edges. Carefully peel back the fabric from the damaged rib section. Work slowly to avoid tearing the canopy further.
Gently pull the fabric away from the frame ribs. You may need to loosen some stitches with a small tool if the attachment is tight. Don’t force the canopy off, as this can damage both the fabric and the frame underneath.
Once the canopy is loose enough, you’ll see the rib structure clearly. Look for the hinge point where the rib connects to the central shaft. This is where the popped rivet sits.
Examine the rivet closely to determine if it’s completely missing or just loose. A missing rivet leaves a small hole. A loose rivet may still be partially in place.
Check the rib itself for bending or damage around the hinge area. Sometimes the rivet pops because the rib shifted under stress. Other times, the rib remains straight and only the rivet failed.
Take measurements of the damaged section using your ruler. Note the rivet hole diameter and the rib width. This information helps you select the correct replacement rivet size later.
Lay all removed parts on your work surface in order. This prevents confusion when you reassemble everything. Good lighting in this area makes spotting small details easier.
Re-Riveting or Replacing the Rib Hinge: Detailed Instructions
Once you’ve accessed the damaged rib and canopy, you’re ready to begin the actual repair. This section covers both re-riveting and replacing the rib hinge to restore your umbrella’s function.
Start by assessing the rivet damage. If the rivet is missing entirely, you’ll need a replacement rivet that matches the original size. If the rivet is still present but loose, you can attempt re-riveting. Measure the rivet diameter carefully using your ruler to ensure you get the correct size.
For re-riveting, position your rivet tool over the damaged area. Apply steady, controlled pressure to compress the rivet back into place. Tap gently with your hammer if needed. Avoid excessive force, as this can crack the rib or damage surrounding components.
If the rib itself is bent or cracked, replacement becomes necessary. Remove the old rivet completely using your rivet tool or pliers. Carefully extract the damaged rib section from the hinge point. Clean any debris from the connection area before installing the new part.
Insert your replacement rib carefully. Align it properly with the hinge connection point. Position your replacement rivet through the aligned holes. Use your rivet tool to secure it firmly in place.
Check your work by gently testing the rib movement. The hinge should move smoothly without wobbling. The rivet should sit flush against the rib surface.
If the rib won’t straighten or the rivet won’t hold, professional replacement may be your best option. Some umbrella manufacturers offer pre-assembled rib sections that slide into place, making the repair simpler than individual component work.
Straightening Bent Ribs Without Causing Breakage
Bent ribs at the hinge point are common when rivets pop. You can often straighten them yourself if you work carefully and avoid applying too much force.
Start by examining the bent rib closely. Look at the angle and severity of the bend. A slight bend differs greatly from a severe one. Slight bends respond well to gentle straightening. Severe bends may crack or break if you try to force them back.
Use pliers with extreme caution when working with bent ribs. Pliers can easily snap the metal if you apply sudden pressure. Instead, apply slow, steady pressure in small increments. Work the rib back to its original position gradually over several attempts rather than forcing it in one motion.
Another approach involves using your hands. Place your fingers on both sides of the bent area. Apply gentle, consistent pressure while slowly moving the rib back toward its proper alignment. This method gives you better control than using tools.
Test the rib frequently during straightening. Stop immediately if you hear cracking sounds or feel resistance increasing. These are warning signs that breakage is about to occur.
Heat can help with stubborn bends. Gently warm the metal area with warm water or a heat source. Warm metal becomes more flexible and responds better to straightening efforts. Allow it to cool slowly after straightening to help it hold its new shape.
If the rib refuses to straighten or shows signs of cracking, stop attempting the repair. Continuing risks complete breakage, which makes the umbrella unusable. At this point, rib replacement becomes your better option. Professional replacement services can install a new rib section without damaging surrounding components.
Common Mistakes to Avoid During Rivet Repair
Making mistakes during rivet repair can turn a simple fix into a bigger problem. Understanding what to avoid helps you succeed on your first attempt.
Using the wrong rivet size is the most common error people make. Smart umbrellas use small craft rivets, not standard industrial ones. If you grab a rivet that’s too large, it won’t fit the hole properly. The rivet will either fall through or create a weak connection that fails quickly. Always measure your damaged rivet before purchasing a replacement.
Applying excessive force with pliers damages ribs beyond repair. Many people think pushing harder will straighten a bent rib faster. This approach breaks the metal instead. Pliers can crack the rib or snap it completely at the hinge point. Use gentle, steady pressure instead. Let the tool do the work rather than forcing it.
Skipping the disassembly step wastes your time and effort. Some people try fixing rivets while the canopy stays attached. You cannot reach the rivet properly this way. The fabric gets in your way, and you risk tearing it. You also cannot see the damage clearly enough to work accurately.
Ignoring bent ribs during inspection leads to failed repairs. A popped rivet often bends the rib around the hinge area. If you only replace the rivet without straightening the rib, the new rivet won’t hold. The bent metal creates stress on the connection point.
Reusing old rivets creates repeat failures. Never try to pop an old rivet back in place. The metal loses strength once it pops. Always use fresh replacement rivets designed for your umbrella size.
Troubleshooting Persistent Rivet Popping Issues
When rivet popping keeps happening on your smart umbrella, you’re dealing with a repeat failure issue. This section focuses on why the problem persists and how to stop it.
Rivet popping recurs when you use the wrong replacement size. Your umbrella’s rib hinges use small craft rivets, not standard ones. If you install a larger rivet, it won’t seat properly in the hinge hole. The connection stays loose and pops again within days.
Another cause is incomplete disassembly. Some people try riveting without fully removing the canopy. This prevents proper tool access and creates weak connections. The rivet never compresses fully, so it fails immediately.
Bent ribs cause persistent problems too. Even after replacing the rivet, a bent rib won’t hold tension. The hinge point sits at an angle, putting pressure on your new rivet. It pops again because the rib itself is damaged.
Moisture trapped in the hinge area weakens rivets over time. After you repair the umbrella, allow the hinge to dry completely. Store it in a dry location between uses.
Multiple pops suggest structural weakness. If the same hinge pops three or more times, the rib may be permanently compromised. At this point, replacing the entire rib section becomes more practical than repeated repairs.
Check your work by gently opening and closing the umbrella several times. Listen for clicking sounds. These indicate a loose connection that will pop soon.
If popping continues after your repair, inspect the rib for hairline cracks. Cracks mean the metal is fatigued and needs replacement. Professional part replacement becomes your best option for permanent results.
Final Thoughts
Fixing a popped rivet on your smart umbrella rib hinge is a task you can handle at home. Patience and the right tools make all the difference.
Start by disassembling the umbrella properly. Skipping this step causes more problems than it solves.
Measure your damaged rib before buying replacement rivets. Craft size tools work best for these small components.
Take your time when straightening bent ribs. Rushing this process often leads to cracks or breaks.
Test your repair frequently as you work. Open and close the umbrella gently after each adjustment.
If a rib won’t cooperate, don’t force it. Professional replacement remains a smart backup option.
Many umbrella owners fix this issue themselves successfully. The repair process is simpler than it first appears.
Remember that quality rivets matter more than speed. A rushed job often means repeating the repair soon.
Keep your umbrella hinges dry when possible. Moisture speeds up wear on rivets and ribs alike.
Check all rib hinges during your repair, not just the broken one. This helps you catch problems early.
Your umbrella can last many more seasons with proper care. Small fixes now prevent bigger headaches later.
Trust your hands and eyes during this process. If something feels wrong, stop and reassess.
Rivet repair is a skill that improves with practice. Your first fix may take longer than expected, but that’s normal.
Stay calm and methodical throughout the repair. This approach leads to lasting results every time.
With the right approach, your smart umbrella will open and close smoothly again. Careful work today means years of reliable shade ahead.
Frequently Asked Questions
What causes rivet popping on smart umbrella rib hinges?
Rivets pop when the connection between the supporting rib and hinge weakens. This happens because of repeated opening and closing of your umbrella. The metal experiences constant stress at these hinge points. Moisture can also seep into the hinge area and corrode the rivet over time.
Wind pressure and weight from rain-soaked fabric add extra strain. If you use your umbrella frequently, the rivets wear out faster. Some umbrellas have design flaws that make certain hinge points more vulnerable to failure.
Can I repair a popped rivet without removing the canopy?
No, you cannot access the rivet properly without canopy removal. The fabric covers the hinge area completely. You must separate the umbrella top from its base first.
Then you can take off the canopy to reach the damaged rib. This step takes extra time, but it’s essential for a successful repair. Trying to work around the fabric leads to incomplete repairs and wasted effort.
What size rivets do I need for replacement?
Smart umbrellas use small craft rivets, not standard construction rivets. You need to measure your broken rivet before shopping. Check the diameter and length of the original rivet carefully.
Bring the damaged rib with you when looking for replacements. Staff at craft supply stores can help match the size. Using the wrong size is the most common repair mistake people make.
How do I know if my rib is bent beyond repair?
Inspect the rib for hairline cracks or severe kinks. Gently try to straighten it by hand. If the metal shows signs of cracking, stop immediately and don’t force it further.
A rib that won’t budge or feels brittle needs replacement. Some bent ribs straighten easily with gentle pressure. Others are permanently damaged and require part replacement instead.

Hi, I’m Minnie Cole, the creator of The Output Lab — a space where I share my passion for all things tech. I spend my days exploring the latest gadgets, devices, and electronics on Amazon, putting them through real-world testing so you don’t have to.