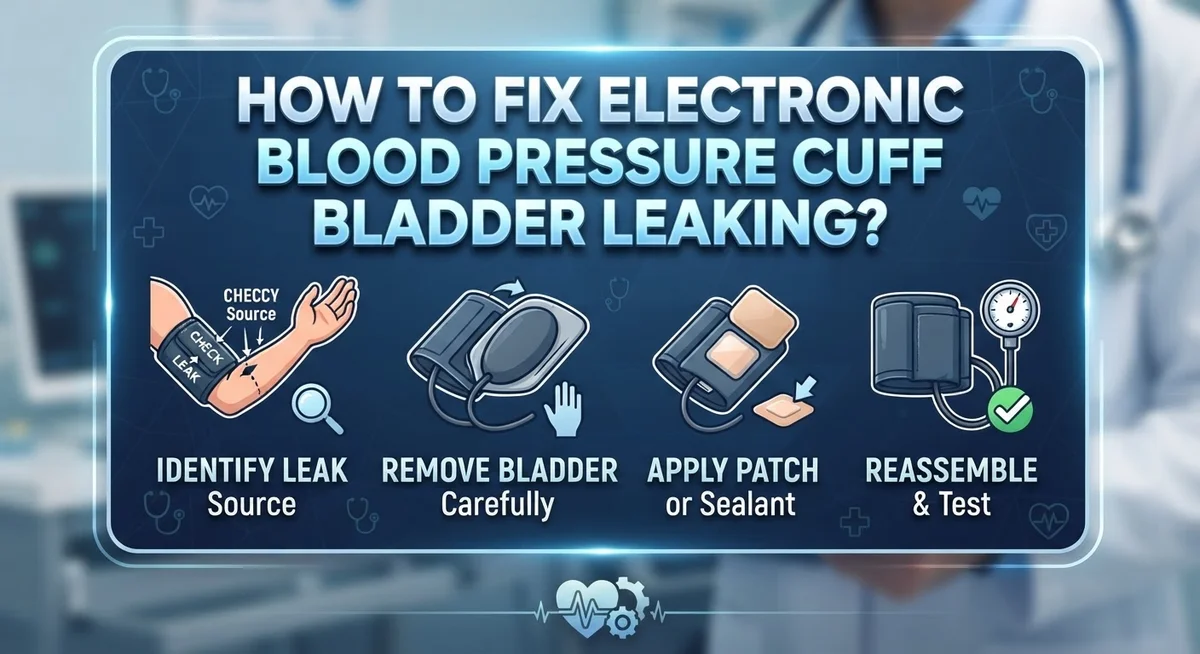
How to Fix Electronic Blood Pressure Cuff Bladder Leaking?
Does your blood pressure monitor show strange numbers lately? A leaking bladder inside your electronic cuff might be the culprit.
This tiny rubber part holds air during each reading. When it leaks, your cuff cannot hold proper pressure. This leads to inaccurate readings or sudden error messages.
The good news? You can often fix this problem at home. You do not need to buy a brand new monitor right away.
In this guide, we will show you how to spot a leaking bladder. We will walk you through simple checks for your cuff connector and tubing.
You will learn why cuff tightness matters so much for accurate results. We will also cover common mistakes people make, like positioning the cuff wrong or deflating it too fast.
By the end, you will know exactly how to troubleshoot your device. You will also learn easy tips to keep your cuff working well for years to come.
Let’s get your blood pressure monitor back in working order.
In a Nutshell
Here’s a quick recap to fix your leaking blood pressure cuff bladder fast:
-
Check the cuff fit first. A cuff that’s too tight often causes error messages that look like leaks. Loosen it slightly and try again.
-
Inspect the connector tube. Damaged connectors are a common cause of air leaks. Replace this part if you spot cracks or looseness.
-
Test your batteries. Weak batteries can create false error readings that mimic bladder problems. Fresh batteries sometimes solve the issue instantly.
-
Position the cuff correctly. Place it one inch above your elbow on bare skin. Wrong placement affects both accuracy and air retention.
-
Rest before you measure. Sit quietly for five minutes before taking a reading. This simple step reduces errors and false alarms.
-
Match cuff size to your arm. An improperly sized bladder won’t seal well against your skin. This mismatch often gets blamed on leaks.
Follow these steps in order. Most bladder issues get solved without buying new equipment.
Understanding the Cuff Bladder and Why Leaks Happen
Your electronic blood pressure cuff has a rubber bladder inside. This bladder fills with air when you take a reading. It’s what creates the pressure around your arm to measure your blood pressure accurately.
The bladder works like a balloon. Air flows into it through tubes connected to your monitor. When the device deflates, air leaves the bladder slowly and steadily. This gradual release lets the monitor capture your systolic and diastolic readings.
Why leaks happen is important to understand. The bladder can develop small tears or cracks over time. Regular use causes normal wear and tear. Temperature changes can also make the rubber brittle and crack. If the bladder develops even a tiny hole, air escapes during your measurement.
When air leaks out, your cuff loses pressure. The monitor can’t get an accurate reading. You’ll see error messages on your screen. Your blood pressure numbers might show as too high or too low.
The connector tubes are another common leak source. These tubes attach the bladder to your monitor. If they crack or separate, air escapes there instead of through the valve. A loose connection can look like a bladder problem.
Cuff tightness also plays a big role here. If your cuff is too tight, it restricts air flow. The monitor thinks air is leaking when it’s actually just blocked. This causes false error readings that confuse you.
Understanding these basics helps you fix the real problem. You’ll know whether you have an actual leak or a different issue. This knowledge saves you time and frustration when troubleshooting your device.
Signs Your Blood Pressure Cuff Bladder Is Leaking
Your blood pressure cuff sends signals when something goes wrong. Learning to spot these warning signs helps you catch a leaking bladder early.
Error messages appear on your display. If your monitor shows “error” or “E” codes repeatedly, air loss is likely happening. The device cannot maintain pressure inside the cuff. This prevents accurate readings from completing.
Your readings jump around wildly. One measurement shows 120/80, the next shows 145/90. Leaking air causes the bladder to deflate too quickly. Your device cannot get a stable pressure reading. Healthy blood pressure stays relatively consistent day to day.
The cuff won’t inflate properly. You hear the motor running, but the cuff feels loose around your arm. Air escapes before it reaches full pressure. A weak or absent squeeze on your arm means the bladder cannot hold air.
You notice hissing sounds during use. Listen carefully when your cuff inflates. A soft hissing or whistling means air is escaping somewhere. This sound comes from small tears or loose connections.
The cuff connector feels loose or cracked. Inspect the tube that connects your cuff to the monitor. Look for visible damage, cracks, or separation. A loose connection lets air escape during inflation.
Your arm feels uncomfortable pressure changes. The cuff tightens, then suddenly loosens before the reading finishes. This inconsistent pressure means air is leaking out. Your device struggles to maintain the pressure needed for measurement.
Battery problems appear alongside cuff issues. Your monitor displays low battery warnings while the cuff malfunctions. Weak batteries sometimes create false error messages that mimic leaks. Always check your battery status first before assuming your bladder has failed.
Step-by-Step: Diagnosing the Source of the Leak
Finding where your blood pressure cuff leaks requires a systematic approach. Start by listening carefully to your device during operation. A hissing sound tells you air is escaping somewhere. Pay attention to when the noise happens, whether during inflation or deflation.
Next, inspect the entire cuff visually. Look for visible cracks, tears, or discoloration on the rubber bladder surface. Run your fingers along the cuff fabric to feel for soft spots or damage. Check if the cuff feels unusually spongy in certain areas, as this indicates internal bladder deterioration.
Examine the connector tube that links your cuff to the monitor unit. Squeeze the tube gently along its entire length. Look for splits, punctures, or areas where the tube has become brittle. Check both ends of the connector where it attaches to the cuff and the monitor. Loose connections sometimes mimic leaks but are actually fixable.
Test your cuff’s inflation capability. Place the cuff on your arm and start a measurement. If it inflates slowly or incompletely, a leak is likely present. Compare this to how it performed when new, if you can remember.
Check the cuff bladder size against your arm circumference. An oversized bladder won’t seal properly against your skin. This creates gaps where air escapes during inflation.
Finally, examine your device’s battery compartment. Weak batteries cause false error readings that feel like leaks. Replace batteries and try measuring again.
Document what you find during inspection. Note the exact location of any damage, when sounds occur, and how the cuff behaves. This information helps you determine whether repair or replacement makes sense for your situation.
How to Fix a Leaking Cuff Bladder and Connector Issues
Once you’ve identified where your cuff leaks, fixing it requires a careful approach. Start by loosening your cuff slightly if you’ve been experiencing frequent errors. A cuff that’s too tight restricts proper air circulation and causes pressure loss.
Check your connector tube next. This rubber or plastic tube links your cuff to the monitor unit. Look for visible cracks, splits, or loose connections at both ends. If the connector feels loose, try gently pushing it back into place until you hear a click.
If the connector is cracked or damaged, you’ll need to replace it. Most cuff connectors detach easily by twisting or pulling them away from the monitor. New connectors are widely available and install in seconds by reversing this process.
Examine your cuff bladder itself. Small tears are harder to spot than connector damage. Run your fingers along the entire bladder surface while inflating the cuff slightly. Listen for hissing sounds that indicate air escape. Mark any suspicious spots with a pen.
Test your battery next. A weak or improperly placed battery causes inflation problems that mimic bladder leaks. Remove your battery, clean the compartment contacts with a dry cloth, and reinsert it firmly. Replace the battery if it’s old or corroded.
For actual bladder damage, you have two options. Small pinhole leaks sometimes seal temporarily with specialized cuff repair patches designed for medical equipment. However, larger tears usually require cuff replacement since the bladder cannot hold consistent pressure.
Document your findings before deciding on repair or replacement. Take photos of any visible damage. This helps you explain the problem clearly if you need professional support or warranty service.
Proper Cuff Fit, Placement, and Inflation Technique
Getting the right cuff fit and placement makes a huge difference in fixing bladder leak problems. Your cuff needs to sit snugly without cutting off circulation. A cuff that’s too tight restricts air flow and causes pressure loss during inflation. A cuff that’s too loose won’t maintain proper contact with your arm.
Start by checking your cuff size against your arm circumference. Most cuffs work best when they cover 80% of your arm’s distance around. If your cuff is oversized or undersized, it won’t seal properly. This mismatch causes air to escape even if the bladder itself is fine.
Place your cuff 1 inch above your elbow on bare skin. Avoid measuring over clothing, as fabric prevents proper air contact. Your arm should rest at heart level during the entire measurement. Support your arm with a pillow or table if needed.
When you fasten your cuff, aim for snug but comfortable. You should fit one finger under the cuff easily. If you can’t fit a finger at all, loosen it slightly. If you can fit two fingers, tighten it a bit more.
Inflation technique matters just as much as placement. Let your cuff inflate fully before it begins deflating. Slow, steady deflation gives you accurate readings. Fast deflation can cause measurement errors that look like bladder problems.
Allow a 5 minute rest period before taking your reading. This prevents artificially high numbers from physical activity. Keep your legs uncrossed and feet flat on the floor. Avoid talking while your cuff inflates and deflates, as movement affects pressure readings.
These simple adjustments often solve apparent leak issues without needing repairs.
Common Mistakes That Mimic or Worsen Bladder Leaks
Many people make mistakes that either cause bladder leaks or make existing leaks worse. Understanding these errors helps you fix problems faster.
Overtightening your cuff is the biggest culprit. You might think a tight fit ensures accuracy, but excessive pressure damages the bladder seal over time. The cuff should feel snug, not constricting. If you experience frequent errors or discomfort, loosen it slightly.
Measuring with a full bladder creates artificial pressure. Your body’s internal pressure rises when your bladder is full. This can add 10 to 15 millimeters of mercury to your systolic reading. More importantly, the extra internal pressure stresses your cuff’s bladder seal. Always empty your bladder before taking measurements.
Skipping the rest period weakens your readings and stresses equipment. Many people rush straight into measurements. Your body needs 5 minutes of sitting quietly to stabilize. Without this pause, your blood pressure stays elevated, and you place unnecessary strain on the cuff mechanism.
Deflating too quickly damages the bladder. Rapid deflation creates sudden pressure changes inside the cuff. This shock effect can crack or weaken the bladder material. Conversely, deflating too slowly prolongs the measurement and causes discomfort.
Using the wrong cuff size compounds all these problems. An oversized cuff doesn’t seal properly against your arm. An undersized cuff applies uneven pressure that stresses specific bladder areas. Check your arm circumference and match it to the correct cuff size before use.
Positioning your cuff incorrectly over clothing prevents proper sealing. Fabric creates gaps between your skin and the cuff. These gaps allow air to escape, mimicking actual bladder leaks. Always place your cuff directly on bare skin, 1 inch above your elbow.
Troubleshooting Persistent Errors After Repair
After you repair your blood pressure cuff, errors might still appear. This happens more often than you’d expect. Let’s figure out what’s causing the problem.
First, check if your cuff is too tight. A snug fit feels comfortable, but excessive pressure creates false readings. Loosen it slightly and take another measurement. You should feel gentle contact with your arm, not a vice-like grip. This simple adjustment fixes many persistent error messages.
Next, verify your battery is working properly. A weak battery causes inflation failures that feel like bladder leaks. Replace it with a fresh one and test your device again. Make sure the battery sits correctly in its compartment. Poor battery contact prevents the pump from working as it should.
Examine the connector tube where it attaches to your cuff. Even after repair, small cracks can develop from repeated use. Look for any visible damage or loose connections. A faulty connector prevents proper air pressure, triggering error codes on your display.
Take a measurement under ideal conditions. Rest for five minutes before using your device. Sit with your feet flat and your arm at heart level. These conditions reduce measurement errors that might seem like equipment problems.
If errors persist after these checks, your bladder may have developed a new leak. Slow leaks often appear weeks after initial repair. Listen carefully for hissing sounds during inflation. You can also apply soapy water to the cuff surface and watch for bubbles forming.
Document exactly when errors occur and what your display shows. This information helps you identify whether the problem is truly a bladder leak or something else entirely.
Maintaining Your Cuff for Long-Term Accuracy
Maintaining your electronic blood pressure cuff keeps it accurate for years. A consistent maintenance routine prevents small problems from becoming big ones.
Start by storing your cuff in a cool, dry place. Heat and moisture damage the bladder and electronic components inside. Keep it away from direct sunlight and extreme temperatures. Store the cuff loosely coiled, not tightly wound, to prevent creases in the bladder material.
Check your cuff regularly for visible damage. Look for cracks, discoloration, or soft spots on the bladder. Inspect all tubing connections for wear or separation. Examine the connector where the cuff attaches to the monitor. Loose connections cause air leaks that mimic bladder problems.
Clean your cuff with a soft, slightly damp cloth. Never submerge it in water or use harsh chemicals. Wipe away dust and debris gently. Pay special attention to the seams where leaks often start.
Test your device monthly for accuracy. Take multiple readings in calm conditions to establish a baseline. Consistent high or low readings suggest calibration drift rather than bladder issues.
Replace batteries on schedule. Weak batteries cause inflation problems that feel like leaks. Follow your device manual for the recommended replacement frequency.
Keep your cuff away from extreme pressure situations. Don’t drop it, sit on it, or store heavy items on top. Protect it during travel by using a padded case.
Document any changes in performance. Note when errors started and what conditions existed. This information helps you identify whether problems are maintenance related or mechanical.
Regular maintenance catches small issues before they worsen. A well maintained cuff provides reliable readings and lasts much longer than one that’s neglected.
Final Thoughts
Fixing a leaking blood pressure cuff bladder does not need to feel complicated. Most leaks come from simple problems like loose connectors, small punctures, or general wear.
Once you find the cause, you can often fix it yourself. Small patches or connector fixes solve many issues fast.
Bigger tears or widespread damage usually mean it’s time to replace the bladder. This keeps your readings accurate and safe.
Regular care makes a real difference. Store your cuff properly, check it often, and clean it gently. These small habits stop leaks before they start.
Pay attention to how your cuff feels and performs. If you notice new hissing sounds, slow inflation, or strange error codes, act quickly.
Waiting too long can turn a small leak into a bigger repair job. Early action saves you time and money.
Remember that accurate blood pressure readings depend on a healthy bladder. Even a tiny leak can throw off your numbers.
This matters most for people who track their blood pressure daily. Consistent, correct readings help you and your doctor make better health decisions.
Testing your cuff against a manual device once in a while is smart. This simple step confirms your electronic cuff still works well.
If your cuff continues to leak after repairs, do not ignore it. Persistent problems usually signal it’s time for a new one.
A well maintained cuff gives you peace of mind. You can trust the numbers you see and act on them with confidence.
In the end, fixing a leaking bladder is about patience and attention. Take your time, follow simple steps, and your cuff will serve you well for years.
Frequently Asked Questions
What causes a blood pressure cuff bladder to leak?
A cuff bladder leaks when the rubber or vinyl material develops small tears or cracks. These happen from regular wear and tear over time. Repeated inflation and deflation stress the bladder material. Storing your cuff in extreme heat or cold speeds up damage. Dropping your device or applying too much pressure also causes leaks. Age is a major factor – most bladders last several years before developing problems.
How do I know if my cuff bladder is actually leaking?
Your device will show specific signs of a failing bladder. You’ll notice frequent error messages during measurements. The cuff may fail to inflate properly or inflate very slowly. You might hear hissing sounds when the cuff inflates. Some cuffs won’t hold pressure and deflate unexpectedly. If you see these signs after checking battery health and cuff tightness, a leak is likely present.
Can a small leak get worse over time?
Yes, absolutely. Small leaks grow larger if you ignore them. Each inflation cycle puts pressure on the damaged area. The tear expands slightly with every use. Waiting makes repairs harder and eventual replacement necessary. Catching leaks early sometimes allows you to extend your cuff’s life through proper storage and careful handling.
Should I repair the bladder or replace it?
Small pinhole leaks near seams might be temporarily sealed. However, most people find replacement easier than repair. Patching rarely produces reliable results for blood pressure measurements. Accuracy matters too much to risk failed repairs. Replacement bladders restore your device to working condition reliably.

Hi, I’m Minnie Cole, the creator of The Output Lab — a space where I share my passion for all things tech. I spend my days exploring the latest gadgets, devices, and electronics on Amazon, putting them through real-world testing so you don’t have to.