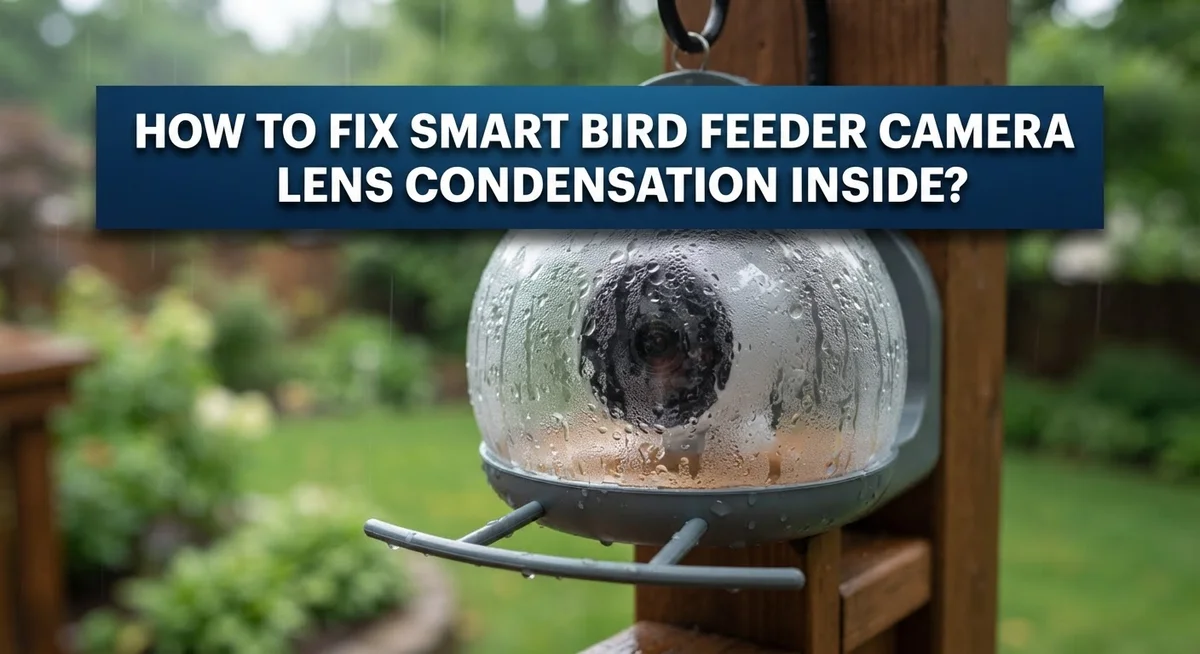
How To Fix Smart Bird Feeder Camera Lens Condensation Inside?
Do you see foggy footage from your smart bird feeder camera? That cloudy lens can ruin a perfect shot of your favorite backyard visitor. It happens when moisture sneaks into the camera housing and settles on the inside of the lens.
This problem feels frustrating, especially when you want clear, crisp videos. Condensation often points to a small gap in the housing seal or too much humidity around your feeder. The good news is that you can fix this issue with a few simple steps.
In this guide, we will walk you through easy ways to clear up that foggy lens. You will learn safe cleaning methods, like using a microfiber cloth or a low heat hair dryer. We will also cover a handy rice trick that pulls moisture out overnight.
In a Nutshell
- Wipe the lens gently with a microfiber cloth first. This removes surface smudges and dust that mimic condensation.
- Use a low heat hair dryer to dry out trapped moisture. Never use high heat, since it can damage internal parts.
- Try the rice trick for tough moisture. Seal the camera in a container with rice overnight to absorb dampness naturally.
- For grime buildup, soak parts in a hot water and bleach solution. Use a 9:1 ratio and scrub gently after fifteen minutes.
- Check your feeder placement to prevent future fog. Good airflow and partial sunlight keep moisture from building up inside.
- If fog keeps coming back, the housing seal might be broken. Contact manufacturer support for a repair or replacement option.
Why Condensation Forms Inside Your Bird Feeder Camera Lens
Condensation forms inside your bird feeder camera lens because warm air meets cold surfaces. Think of it like a bathroom mirror after a hot shower. Moisture in the air turns to liquid droplets when temperature drops suddenly.
Your camera housing traps air inside. During the day, sunlight heats the sealed space. At night, temperatures drop fast. This temperature swing causes water vapor to condense on the lens glass.
Environmental factors play a big role too. Rain and morning dew add moisture to the air around your feeder. High humidity in your area makes the problem worse. If your feeder sits in a shaded spot, it stays cooler and attracts more condensation.
The seal around your camera housing matters greatly. If the rubber gasket or seal has cracks or gaps, humid air seeps inside. Once moisture enters the sealed chamber, it has nowhere to escape. This trapped moisture keeps building up over time.
Poor air circulation around the feeder increases condensation risk. A feeder placed against a wall or fence blocks airflow. Stagnant air holds moisture longer than moving air does.
Manufacturing defects can cause this problem too. Some camera housings don’t seal properly from the factory. Tiny gaps allow moisture in but prevent it from leaving.
The key point is this: condensation happens when moisture gets trapped in a sealed space with temperature changes. Your camera lens becomes the coldest surface inside the housing. Water vapor naturally condenses there first, creating that frustrating fog.
Understanding why condensation forms helps you prevent it. You’ll know that sealing, ventilation, and placement all matter. These factors work together to keep your lens clear and your bird videos sharp.
Signs Your Camera Has Internal Moisture Buildup
Your smart bird feeder camera shows several clear warning signs when internal moisture builds up inside the lens housing.
The most obvious sign is a cloudy or foggy video feed. You’ll notice the footage looks blurry even when the camera focuses properly. This cloudiness appears across the entire image, not just in one corner. It gets worse during temperature changes or after rain.
Look for water droplets on the inner lens surface. You might see small beads of moisture if you look through the camera opening. Sometimes these droplets appear and disappear as temperatures shift throughout the day. This is a strong indicator that moisture is trapped inside.
Your video quality drops noticeably. Images that were once sharp become soft and lack detail. Colors may appear washed out or less vibrant. You might see a hazy white or gray film covering the lens when you inspect it closely.
Pay attention to when the problem worsens. Condensation typically gets worse in early morning hours or after heavy rain. If your footage is clear during dry afternoons but foggy at dawn, internal moisture is likely the culprit.
Check for any mold or discoloration on the lens. A thin greenish or brownish film can develop when moisture stays trapped for extended periods. This indicates the problem has existed for several days or weeks.
Temperature fluctuations trigger more visible condensation. If your camera sits in direct sun during the day, then cools rapidly at night, internal fogging becomes more pronounced.
Don’t ignore these signs. The sooner you address moisture buildup, the easier the fix becomes. Persistent condensation can eventually damage internal camera components permanently.
Step-by-Step: Cleaning and Drying the Camera Lens
Start by removing your bird feeder camera from its mounting location. Power off the device completely and let it cool to room temperature for at least 15 minutes. This step prevents thermal shock when you begin the drying process.
Locate the lens area and inspect it carefully. Use a soft microfiber cloth to gently wipe away any visible moisture or dust on the outer lens surface. Apply light pressure only. Avoid circular motions that can trap particles against the glass.
For internal condensation, apply a low heat hair dryer setting. Hold the dryer 6 to 8 inches away from the camera housing. Move it slowly across the lens area for 2 to 3 minutes. The gentle warmth helps evaporate trapped moisture without damaging internal components. Never use high heat settings.
If the hair dryer method doesn’t work, try the rice absorption technique. Place your camera in a sealed container with uncooked rice. The rice naturally absorbs moisture from the air around your device. Leave it overnight or for 12 hours minimum. This method works slowly but effectively for stubborn condensation.
For grime buildup combined with moisture, prepare a solution of hot water and bleach in a 9 to 1 ratio. Soak removable camera parts for 15 minutes only. Use a soft brush to gently scrub away debris. Rinse thoroughly with clean water and dry completely with a microfiber cloth before reassembling.
After cleaning, allow your camera to dry in a warm, dry location for several hours. Don’t rush reassembly. Proper drying prevents moisture from returning immediately. Once completely dry, reinstall your feeder camera and monitor the lens for any returning fog.
Using Rice, Silica, and Low-Heat Methods Safely
Rice and silica work as natural desiccants to pull moisture from inside your camera housing. These materials absorb water vapor without damaging sensitive electronics. Both options are safe, affordable, and widely available.
Here’s how to use rice properly. Place your camera in a sealed container with uncooked rice. Make sure the rice doesn’t touch the lens directly. Seal the container completely and leave it overnight or for 12 to 24 hours. The rice draws out internal moisture gradually. Check your camera the next day to see if condensation has cleared.
Silica gel packets work even faster than rice. Silica absorbs moisture more efficiently and won’t leave dust residue. Collect silica packets from packaging or purchase them separately. Place your camera in a sealed bag with several silica packets. Leave it for 6 to 12 hours. Replace silica packets if they become saturated.
The low heat hair dryer method complements these drying techniques. Use only the lowest heat setting available. Hold the dryer 6 to 8 inches away from your camera. Apply gentle warmth for 5 to 10 minutes. Never use high heat, as this damages internal components and seals.
Combine these methods for best results. Start with the hair dryer for 10 minutes, then place your camera in rice or silica overnight. This two step approach removes surface moisture first, then absorbs deeper condensation.
Important safety note: never use extreme heat or direct flame near your camera. Avoid pointing heat directly at the lens. Let your camera cool completely before reinstalling it on your feeder. Test the video feed before mounting it back outside.
Preventing Future Condensation Through Proper Sealing and Airflow
Proper sealing and airflow work together to stop condensation from forming inside your camera housing. Think of your feeder like a closed box. When warm air inside meets cold surfaces, moisture appears. Breaking this cycle requires two actions: seal the housing correctly and create air movement.
Start by checking all seams and joints on your camera housing. Look for cracks, gaps, or worn rubber gaskets. These tiny openings let moisture sneak in. Replace damaged gaskets if your manufacturer offers them. Apply weatherproof sealant around the lens barrel where it meets the housing body. This stops water vapor from entering during temperature swings.
Next, focus on airflow around the feeder itself. Position your feeder in a spot with gentle air circulation. Avoid placing it in dense shade or against solid walls. Air movement helps dry moisture before it accumulates. If your location is naturally humid, consider adding a small fan nearby to increase circulation around the camera area.
Ventilation holes matter too. Some camera designs include tiny vent ports. Keep these clear of debris and bird droppings. These ports allow pressure to equalize and moisture to escape. Don’t block them with tape or covers.
Check your mounting angle as well. Tilt the camera slightly downward so water runs off rather than pooling near the lens. This simple adjustment prevents moisture from collecting on the lens surface.
The combination works best. Tight sealing prevents moisture entry while proper airflow removes humidity that does get inside. Together, these steps create an environment where condensation struggles to form. This approach stops problems before they start, saving you from repeated cleaning sessions.
Ideal Placement and Ventilation Tips to Reduce Moisture
Your bird feeder camera placement makes a real difference in moisture control. Position your feeder in a location with natural airflow rather than a completely sheltered corner. Wind movement helps dry out moisture before it accumulates inside the lens housing.
Avoid placing your camera in areas where air gets trapped. Dead zones behind dense bushes or against walls create stagnant air pockets. These spots hold humidity longer and increase condensation risk. Instead, choose spots where gentle breezes can circulate around the feeder.
Elevation matters for ventilation too. Mount your feeder at a height where air moves freely. Higher placements often catch more wind than ground level installations. This natural airflow works as your first line of defense against moisture buildup.
If your location has limited natural ventilation, consider adding artificial airflow. A small fan positioned nearby can help circulate air around the camera housing. The goal is keeping moisture from settling on the lens surface.
Avoid placing your feeder directly under eaves or roof overhangs. These spots collect dripping water and create humid microclimates. Open areas work better for moisture control.
Check your feeder’s direction too. Face the camera lens away from prevailing wind and rain patterns when possible. This reduces direct water exposure to seams and openings.
Seasonal adjustments help as well. During humid months, prioritize placement in the sunniest, most open areas available. Sun exposure naturally dries moisture around the housing.
The combination of good air circulation and smart placement prevents moisture from entering your camera in the first place. This approach works better than repeatedly cleaning condensation after it forms inside your lens housing.
Common Mistakes That Make Condensation Worse
Many people accidentally make condensation problems worse by using the wrong techniques. Understanding these mistakes helps you protect your camera investment.
High heat is the biggest culprit. Using a regular hair dryer on high setting can damage internal components. The extreme temperature causes rapid moisture evaporation, which creates pressure inside the sealed housing. This pushes moisture deeper into the camera. Always use low heat only, and keep the dryer at least six inches away from the lens.
Attempting disassembly without proper knowledge ranks second on the mistake list. Your camera has specific access points designed by the manufacturer. Forcing open seams or joints can break the waterproof seal permanently. Once that seal breaks, moisture enters freely and repeatedly. If you cannot access internal components safely, stop and contact support instead.
Ignoring manufacturer sealing integrity causes long term problems. Many people assume their camera is sealed properly without checking. Over time, weather exposure degrades rubber gaskets and silicone seals. You should inspect all seams quarterly and replace worn gaskets before condensation appears.
Placing your feeder in completely shaded areas traps moisture. Dark, damp spots never dry out properly. The camera remains cold, which makes condensation form faster. Always position your feeder where sunlight reaches it for at least part of the day.
Finally, avoid using excessive cleaning methods repeatedly. Cleaning your lens too often removes protective coatings. Each cleaning cycle introduces tiny amounts of moisture into the housing. Clean only when you actually see condensation, not as preventive maintenance.
These mistakes compound over time. One wrong technique leads to another problem, creating a cycle of repeated condensation issues.
When to Contact Manufacturer Support or Seek Professional Repair
Your smart bird feeder camera lens condensation may need professional help if basic fixes don’t work. Know when to contact the manufacturer and what information they need from you.
Start by documenting the problem before you reach out. Take photos or videos showing the condensation inside your lens. Note when the fogging started and how often it appears. Record your camera’s model number and purchase date. This information helps support teams diagnose issues faster.
Contact the manufacturer’s support team through their official website or email. Most companies have dedicated support pages for their camera products. Explain that you’ve already tried basic cleaning methods like microfiber cloth wiping and desiccation techniques. Tell them about your feeder’s location and environmental conditions. Be specific about humidity levels in your area if you know them.
The manufacturer can determine if this is a defect or damage. Some condensation issues stem from manufacturing flaws in the camera housing seals. Others result from extreme environmental conditions beyond normal use. The company may offer warranty service, replacement parts, or a full unit replacement depending on your situation.
If your camera is out of warranty, ask about professional repair services. Some manufacturers partner with repair facilities that handle moisture damage. Professional technicians have specialized equipment to safely open sealed units and dry internal components properly.
Don’t attempt to force open your camera yourself if the manufacturer hasn’t provided access instructions. Improper disassembly can void warranties and cause additional damage. Professional repair protects your investment and ensures your camera functions correctly afterward. Request a timeline for repairs and shipping instructions before sending your device.
Final Thoughts
Smart bird feeder camera lens condensation is a common problem, but it’s not impossible to solve. Most cases come down to simple moisture control.
You now know the main causes behind this issue. Sealed housings trap moisture. Poor placement makes things worse. Small mistakes can turn a minor fog into a bigger headache.
The good news is that fixing this problem rarely requires complex tools. A microfiber cloth, some rice, and patience often do the job. Low heat and gentle care matter more than aggressive techniques.
Prevention truly beats repeated cleaning. Once you seal your camera housing properly and improve airflow around your feeder, condensation becomes far less frequent. Your camera stays clear, and your bird watching stays enjoyable.
Remember that not every fix works overnight. Some units need a full day to dry out completely. Give the process time before checking results again.
If condensation keeps returning despite your best efforts, that’s a signal. It may point to a deeper issue inside the housing itself. Don’t ignore this pattern.
Manufacturing defects do happen, even with quality cameras. Reaching out to support teams isn’t a failure on your part. It’s simply the smart next step.
Your feeder camera should give you clear, crisp footage of visiting birds. Condensation shouldn’t stand in the way of that experience. With the right cleaning steps and better placement habits, most users see real improvement.
Stay patient, stay consistent, and treat your equipment gently. Small changes in how you position and maintain your camera add up. Clear lenses and happy bird watching go hand in hand.
Frequently Asked Questions
Why does condensation form inside my smart bird feeder camera?
Moisture enters the sealed camera housing when temperature changes occur. Warm air inside the camera cools down, causing water droplets to form on the lens. This happens most often in humid environments or when your feeder sits in shaded areas. The root cause is usually environmental moisture combined with poor air circulation around the device.
Can I clean the lens myself without opening the camera?
Yes, you can try gentle cleaning first. Use a soft microfiber cloth to wipe away smudges and debris on the outside lens. For internal condensation, try a low-heat hair dryer on the coolest setting. Point it at the camera housing for a few minutes to evaporate moisture. Never use high heat, as this damages internal components.
What’s the rice method for fixing condensation?
Place your camera in a sealed container with uncooked rice overnight. The rice absorbs moisture from the air inside the container, which helps dry out your camera. This method works best for light condensation. Leave the camera undisturbed for at least 8 to 12 hours for best results.
How can I prevent condensation from coming back?
Ensure your feeder has proper air circulation around it. Position it in a spot that gets some sunlight and airflow. Check that your camera housing seals properly and hasn’t cracked. Avoid placing the feeder in completely shaded, damp locations. Adding a small fan or vent system nearby can help reduce moisture buildup significantly.
What should I do if condensation keeps returning?
Contact your manufacturer’s support team if the problem persists. Provide photos or video showing the condensation issue. Repeated condensation suggests a possible manufacturing defect or seal failure. The manufacturer can advise you on repair options or replacements.

Hi, I’m Minnie Cole, the creator of The Output Lab — a space where I share my passion for all things tech. I spend my days exploring the latest gadgets, devices, and electronics on Amazon, putting them through real-world testing so you don’t have to.