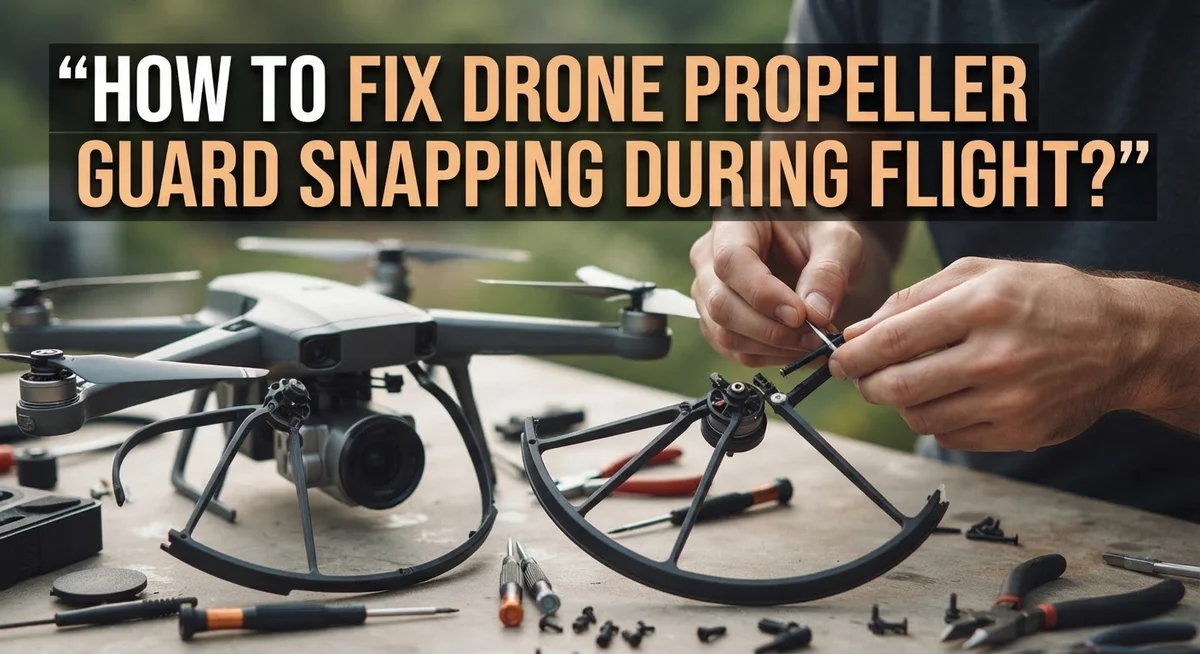
How To Fix Drone Propeller Guard Snapping During Flight?
Your drone propeller guard just snapped mid flight. Now you are wondering what went wrong and how to stop it from happening again.
This is a common problem for many drone pilots. Guards take a lot of stress during flights and landings.
Propeller guards act as a shield for your drone. They protect propellers from hitting walls, trees, or the ground.
But guards can crack or break under pressure. This often happens due to bad installation or old damage from a crash.
In a Nutshell
- Guard snaps often happen due to wrong installation or old cracks. Check your guard closely before you fly again.
- Always match your guard to your drone model. A Mavic Mini guard will not fit an EVO II or Mini 4 Pro.
- Alignment matters most. Line up the middle hook with the middle hole on your drone body. This stops wobbling during flight.
- For small cracks, you can try a quick fix with cyanoacrylate glue. This works only as a temporary solution.
- If the damage is severe, full replacement is the safer choice. Cracked guards can fail again mid air.
- Never fly with a damaged guard. This puts your propellers and drone at risk.
- After any crash, always inspect your guard. Replace it right away if you spot any defects.
- Good installation and quick checks help you avoid this problem in the future. Your drone stays safer during every flight.
Why Propeller Guards Snap During Flight
Propeller guards snap during flight for several specific reasons. Understanding these causes helps you prevent future damage and keep your drone safe.
Impact and stress are the main culprits. When your drone hits an obstacle, wall, or ground, the guard absorbs the force. The plastic material can only handle so much pressure before it breaks or cracks. Each collision weakens the guard further.
Poor installation creates weak points in the structure. If the middle hook doesn’t align properly with the drone body hole, the guard sits loose. This loose fit causes vibration during flight. The constant movement stresses the plastic until it snaps suddenly.
Age and material fatigue play a role too. Guards made from plastic degrade over time. UV light, temperature changes, and repeated use make the material brittle. An older guard becomes more prone to snapping even during normal flight.
Improper model matching causes serious problems. Using a guard designed for a different drone model means poor fit. The guard either sits too tight or too loose. Both situations create stress points that fail during flight.
Defects from crashes compound the issue. After your drone crashes, small cracks form inside the guard. These cracks aren’t always visible from the outside. When you fly again, these weak spots expand and the guard breaks suddenly.
Flying conditions also matter. Strong winds put extra stress on the guard. Rough landings on hard surfaces create impact damage. Cold weather makes plastic more brittle and prone to snapping.
The orange rubber tips on your guard aren’t just decorative. They soften impacts and reduce force transfer to the main structure. When these tips wear away, the plastic underneath becomes vulnerable to snapping during even minor contact.
Identifying the Type of Guard Damage
When your propeller guard snaps, you need to understand what type of damage occurred. This helps you decide whether to repair or replace it.
Hairline cracks are thin breaks in the guard material. You can see them by looking closely at the guard surface. These cracks usually don’t affect flight performance immediately. They often appear near the connection points or along the edges.
Partial breaks mean the guard has split but remains partially attached. A piece may hang loose or dangle from one side. This type of damage makes the guard unstable during flight. The guard may vibrate or shift position unexpectedly.
Complete snaps happen when the guard breaks into separate pieces. Part of the guard may detach completely from your drone. This is the most serious damage type. Flying with a complete snap is unsafe and not recommended.
Structural deformation occurs when the guard bends or warps out of shape. The guard stays intact but loses its proper form. This prevents correct installation and reduces protection. Deformed guards won’t fit snugly against your drone.
Damage to the orange rubber tips is also important to identify. These protective tips absorb impact energy. If the rubber separates or tears away, the hard plastic underneath becomes exposed. This reduces the guard’s ability to protect your propellers.
Check your guard under good lighting. Look for cracks, breaks, bends, or loose pieces. Feel the guard gently to detect any movement or soft spots. Identifying the exact damage type determines your next steps. Minor cracks may need adhesive repair. Severe breaks require full replacement. Always inspect your guard after any crash or impact to catch problems early.
Step-by-Step Guide to Properly Installing Propeller Guards
Proper installation is the foundation for keeping your propeller guard secure during flight. Start by positioning your drone right side up on a clean, flat surface. This gives you clear access to all attachment points and prevents accidental damage while you work.
Next, locate the middle hook on your propeller guard. This hook aligns with the middle hole on your drone body. Line them up carefully before applying any pressure. Alignment is critical because misalignment creates stress points that lead to snapping later.
Once aligned, press the guard firmly into place. You should feel it click or seat securely. Don’t force it, but do apply steady pressure until it sits flush against the drone. Check that all edges are evenly positioned around the drone frame.
After installation, gently wiggle the guard to confirm it doesn’t move. A loose guard will oscillate during flight, which causes vibration and eventual failure. The guard should feel solid and immobile.
Inspect the orange rubber tips on the guard. These protective elements should sit smoothly without gaps or separation from the main guard body. If tips are loose or peeling, address this before flying.
Finally, verify your guard matches your specific drone model. Guards are model specific, meaning a guard for one drone won’t fit another properly. Check your drone’s manual or product documentation to confirm the correct guard type.
Installation takes just minutes, but it prevents expensive repairs and keeps your drone safe. Take time to do it right the first time. Proper installation eliminates most snapping problems you’ll encounter during regular flight operations.
Temporary Repair Methods for Cracked or Snapped Guards
When your propeller guard cracks or snaps during flight, you don’t always need to replace it immediately. Temporary fixes can get you flying again safely while you order a replacement.
For small hairline cracks, cyanoacrylate glue works well as a quick solution. Clean the cracked area thoroughly and let it dry completely. Apply a thin layer of glue into the crack. Hold the pieces together for 30 seconds. Let it cure for the time recommended on the glue bottle, usually 24 hours. This method works best for cracks that don’t affect the guard’s structural integrity.
Epoxy putty is another option for minor damage. Knead the putty until it’s uniform in color. Press it firmly into the cracked area. Smooth it out to match the guard’s shape. Allow it to harden according to package instructions before flying.
For partial breaks where the guard remains mostly intact, you can reinforce it from the inside. Tape the broken section carefully using strong adhesive tape. Make sure the tape doesn’t interfere with propeller movement. This prevents the crack from spreading further.
Important: These temporary fixes are not permanent solutions. They buy you time until your replacement guard arrives. Always inspect the repaired guard before each flight. If the damage worsens or the repair fails, stop flying immediately.
Never fly with severely snapped guards or complete breaks. These create safety hazards and can damage your propellers. Temporary repairs only work for minor damage. Order your replacement guard today so you can return to normal flying soon. Your drone’s safety depends on having proper protection for your propellers.
When Full Replacement Is the Better Fix
When your propeller guard suffers severe damage, a full replacement becomes the smarter choice. Temporary fixes work only for minor cracks and hairline fractures. If your guard has completely snapped into separate pieces or shows structural failure, replacement is necessary.
Severe damage compromises the guard’s ability to protect your propeller. A guard with large breaks or missing sections cannot absorb impact energy properly. This leaves your propeller exposed to collision damage during landing or accidental contact. The cost of replacing a broken propeller far exceeds the cost of a new guard.
Complete snaps indicate structural failure. The guard can no longer hold its original shape or provide reliable protection. Flying with a severely damaged guard risks propeller breakage, which then requires more expensive repairs. Additionally, a broken guard may vibrate or shift during flight, affecting your drone’s stability.
Model specific guards are essential for proper fit and function. Your drone requires guards designed for its exact frame size and attachment points. Using the wrong guard or flying without one leaves your propeller vulnerable.
Installation of a replacement guard takes only minutes. Align the middle hook with the middle hole on your drone body. Press firmly until the guard sits flush against the frame. Verify the guard doesn’t move by gently wiggling it.
Replacement guards come ready to use without additional modifications. You don’t need tools or special equipment for installation. Once installed, your drone regains full propeller protection.
Investing in a replacement guard protects your drone’s most vulnerable components. This preventive approach saves money by avoiding propeller damage and keeps your flights safe and reliable.
Preventive Maintenance to Avoid Future Snapping
Regular maintenance stops propeller guards from snapping during flight. Start by inspecting your guard before every flight. Look for cracks, loose sections, or worn rubber tips. A guard with visible damage won’t protect your propeller effectively.
Clean your guard after each flight session. Dust and debris weaken the material over time. Use a soft cloth to wipe away dirt. Pay special attention to the connection points where the guard attaches to your drone.
Check that your guard is installed correctly every time. A loose guard vibrates during flight and breaks faster. Press it firmly into place and wiggle it gently to confirm it stays put. Misaligned hooks cause guards to snap unexpectedly.
Store your drone in a protective case when not flying. Guards get damaged during transport if your drone bounces around. A padded bag or case prevents unnecessary wear and tear.
Avoid flying in extreme conditions that stress your guard. High winds and rough landings increase snapping risk. Fly in calm weather when you’re learning or practicing new maneuvers.
Replace your guard if you notice any damage, even small cracks. A cracked guard will fail completely during the next flight. Catching problems early saves you money and keeps your propeller safe.
Keep spare guards on hand so you’re never grounded by a broken one. Store them in a cool, dry place away from direct sunlight. UV light degrades the rubber tips and weakens the plastic material.
Check your specific drone model’s requirements for guard compatibility. Using the wrong guard won’t fit properly and won’t protect your propeller. The right guard installed correctly provides consistent protection throughout your flying season.
Common Installation and Flying Mistakes to Avoid
Installing your propeller guard incorrectly is one of the biggest reasons it snaps during flight. Many pilots misalign the guard hooks when attaching them to the drone body. Position your drone right side up on a flat surface before you start. Look for the middle hook on your guard and match it with the middle hole on your drone’s body. Push firmly until you hear or feel it click into place. A loose guard will vibrate during flight, which causes stress on the attachment points and leads to cracking.
Flying with a damaged guard compounds the problem. If your guard already has visible defects, cracks, or loose sections, don’t take it into the air. A compromised guard won’t absorb impact properly and will fail faster under flight stress. The orange rubber tips on your guard are protective features, not just decoration. When these tips crack, the guard loses its ability to soften collisions.
Neglecting replacement after crashes is another common mistake. Even if your guard looks fine after a minor accident, internal damage may exist. Micro fractures develop over time and eventually cause complete snapping during normal flight. Replace your guard immediately after any crash, no matter how small.
Flying in extreme conditions puts unnecessary pressure on your guard. Strong winds, heavy rain, or rough landings stress the attachment points. Avoid these situations when possible. Store your drone properly between flights in a protective case. This simple step prevents damage before it starts. Keep spare guards available so you’re never forced to fly with a damaged one. These preventive habits eliminate most snapping problems before they occur.
Troubleshooting Persistent Guard Failures
When your propeller guard keeps snapping during flight, you need to identify what’s causing the repeated failures. This section helps you troubleshoot the underlying problems so you can fix them permanently.
Misalignment during installation is the most common culprit. If your guard hooks don’t align properly with the drone body holes, stress concentrates in one spot. Each flight creates more pressure on that weak point until the guard breaks. Remove your guard completely and reinstall it. Make sure the middle hook sits flush in the middle hole first. Then secure the remaining hooks firmly into place.
Material fatigue happens when guards endure repeated stress. Even if your installation looks correct, the guard material weakens over time from constant vibration during flight. You’ll notice small cracks appearing before complete snapping occurs. This is your signal to replace the guard rather than attempt repairs.
Flying in harsh conditions accelerates guard failure. Strong winds, rapid movements, and aggressive flying put extra strain on the guard structure. If you fly in demanding conditions regularly, your guard won’t last as long. Consider reducing flight intensity or replacing guards more frequently.
Propeller imbalance can also cause persistent snapping. Unbalanced propellers vibrate excessively, transferring that vibration to your guard. Inspect all propellers for damage or dirt buildup. Clean them gently and check that they spin freely.
Defective guards sometimes arrive with manufacturing flaws. If your guard snaps shortly after installation despite correct setup, the guard itself may be faulty. Request a replacement unit to rule out defects.
Address these root causes before attempting repairs. Fixing the underlying problem prevents future snapping cycles.
Final Thoughts
Propeller guard snapping does not have to end your flying fun. Most issues come from simple causes like misalignment or old damage.
Fixing the problem starts with proper installation. Take time to align the middle hook with the middle hole every single time. This small step prevents most snapping issues before they start.
Replacement remains the safest fix for serious damage. Cracks and structural weakness cannot be trusted in the air. A new guard costs less than a damaged drone.
Adhesive repairs work only as short term solutions. Use them to finish a flight session, not as a permanent fix. Plan to replace the guard soon after.
Model specific guards matter more than people think. A guard made for one drone will not fit another drone correctly. Always check your drone model before buying a replacement.
Regular checks make a real difference over time. Look at your guard before and after each flight. Catching small cracks early stops bigger failures later.
Store your drone properly between flights. A protective case shields the guards from accidental bumps. This simple habit extends the life of your equipment.
Flying conditions also affect how long your guard lasts. Strong wind and rough landings add stress to plastic parts. Fly gently when conditions get tough.
At the end of the day, propeller guards protect your investment. Treat them with the same care as your propellers. Simple habits prevent most snapping problems.
Stay consistent with maintenance and installation checks. Your drone will reward you with smoother, safer flights every time you take it up.
Frequently Asked Questions
Why does my propeller guard snap during flight?
Your guard snaps for several reasons. Misalignment during installation is the top cause. If the middle hook doesn’t line up with the middle hole on your drone body, the guard shifts and breaks under propeller pressure. Material fatigue also plays a role. Guards endure repeated stress from takeoffs and landings. Over time, the material weakens and fails.
Flying in harsh conditions speeds up this process. Wind, rain, and extreme temperatures stress the guard material. A propeller imbalance can cause vibrations that damage your guard too.
Can I repair a snapped propeller guard with glue?
Yes, but only for minor cracks. Cyanoacrylate glue works as a temporary fix. Clean the broken area and apply glue to both surfaces. Hold them together for 60 seconds and let it cure fully before flying.
This repair is not permanent. Adhesive fixes work only as short term solutions. The glue joint will weaken over time. For serious damage, full replacement is safer and more reliable.
How do I know if my guard is installed correctly?
Position your drone right side up. The middle hook of the guard must align perfectly with the middle hole on the drone body. Push the guard firmly into place until it sits flush against the frame.
Check for gaps or loose areas. A properly installed guard sits tight and does not wiggle. If you feel movement, remove it and realign the hooks.
Do I need a specific guard for my drone model?
Yes, absolutely. Guards are model specific. A guard made for one drone will not fit another drone correctly. Always check your drone’s manual to find the right guard model.
Using the wrong guard causes poor fit and snapping during flight.

Hi, I’m Minnie Cole, the creator of The Output Lab — a space where I share my passion for all things tech. I spend my days exploring the latest gadgets, devices, and electronics on Amazon, putting them through real-world testing so you don’t have to.