How To Fix Smart Scale Glass Top Separating From Base?
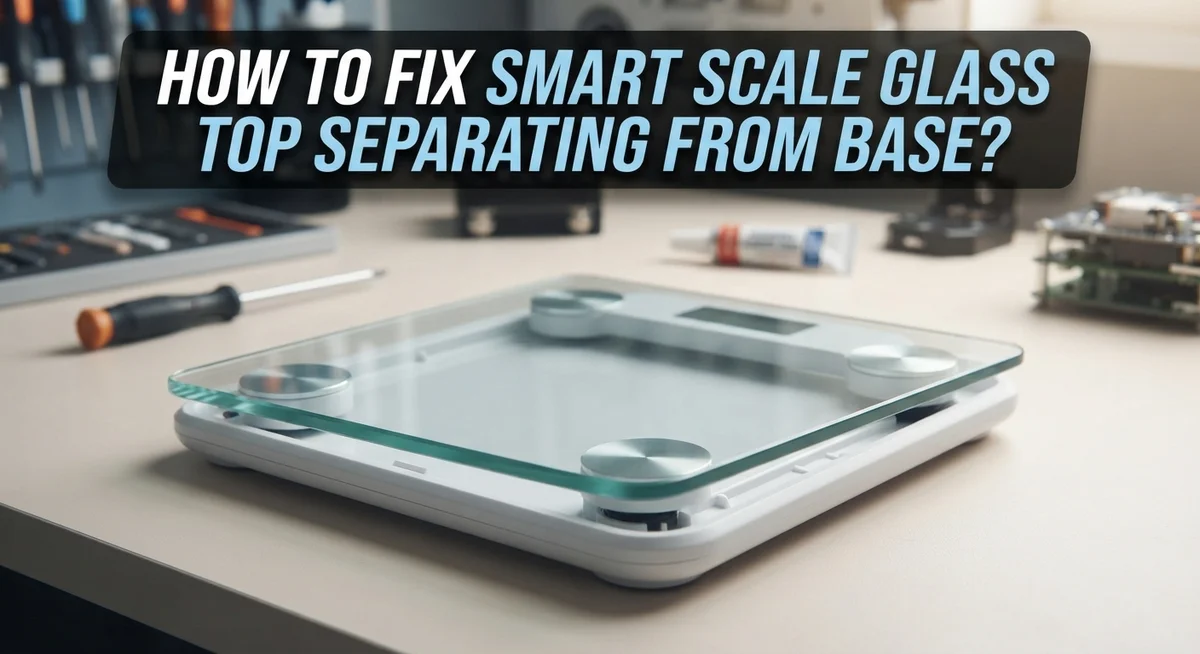
Have you noticed the glass top on your smart scale coming loose from its base? This is a common problem. It usually happens because of adhesive failure or general wear over time.
A wobbly scale can also cause other issues. You might see inaccurate readings or a flickering LCD screen. These signs often show up together.
The good news is that you can fix this at home. You do not need to buy a new scale right away.
This guide walks you through the entire repair process. We will show you how to safely open the scale cover. You will learn the best way to reheat and reseal the glass top.
In a Nutshell
- Open the scale first. Remove the five PH screws from the bottom cover. This gives you access to the internal parts.
- Apply gentle heat to the corner where the glass lifts away from the base. Heat helps loosen the old adhesive without cracking the glass.
- Check your batteries before you seal anything back up. Old or wrong batteries often cause reading errors that mimic a separation issue.
- Always place your scale on a hard and flat surface. Soft rugs or uneven tiles can stress the adhesive bond over time.
- Recalibrate the scale once you reassemble the cover. Skipping this step is a common mistake that leads to inaccurate weight readings.
- If the LCD screen looks damaged or the glass wont stay put, you may need professional help to finish the job safely.
Why Smart Scale Glass Tops Separate From the Base
Smart scale glass tops separate from the base for several clear reasons. Understanding these causes helps you prevent the problem from happening again in the future.
Adhesive failure is the main culprit. The glue that bonds the glass to the plastic base weakens over time. Temperature changes, moisture, and regular use all break down this adhesive layer. When you step on the scale repeatedly, the glass flexes slightly. This constant movement stresses the bond between materials.
Structural damage also causes separation. If you drop your scale or place it on an uneven surface, the base can crack or warp. When the base shifts shape, the glass no longer fits snugly against it. The gap grows larger with each use.
Improper placement matters more than you think. Soft surfaces like carpet or bathroom rugs create an unstable foundation. The scale rocks back and forth on these surfaces. Hard, flat surfaces like tile or wood prevent this rocking motion. When your scale rocks, the glass experiences stress at the corners where it meets the base.
Moisture and humidity play a role too. Bathrooms are humid environments. Water vapor seeps into the joints between glass and base. This moisture weakens the adhesive bond over weeks and months.
Manufacturing defects occasionally cause early separation. Sometimes the adhesive was applied unevenly during production. Other times the glass and base do not align properly from the factory.
Battery issues can create pressure changes inside the device. When batteries lose power, internal components shift slightly. This small movement can stress the glass seal.
Age is a natural factor. As your scale gets older, all materials deteriorate. Plastic becomes brittle. Adhesive loses its strength. The combination of these age related changes leads to separation.
Knowing these causes helps you fix the problem correctly and keep it from returning.
Tools and Materials You’ll Need Before Starting
Before you start fixing your smart scale, gather the right tools and materials. Having everything ready makes the job faster and safer.
You will need a Phillips head screwdriver to remove the five screws holding the bottom cover. Make sure the screwdriver fits snugly in each screw head. A loose fit can strip the screws and make reassembly difficult.
A heat source helps separate the glass from the base without causing damage. A hair dryer works well for this task. Keep it on a low to medium setting to avoid cracking the glass or warping the plastic base.
You should have clean, lint-free cloths on hand. Use these to wipe away old adhesive residue and dust from both the glass and base surfaces. Dirty surfaces prevent new adhesive from bonding properly.
If the adhesive has dried out completely, you may need a replacement adhesive suitable for bonding glass to plastic. Look for products designed for this specific purpose. Some scales require silicone-based adhesives while others work better with epoxy.
Keep fresh batteries nearby in the correct size and type for your scale model. Check your scale’s manual to find the exact battery specifications. Having new batteries ready lets you test the device immediately after repair.
A small flat tool like a plastic pry tool or old credit card helps lift the glass gently. Never use metal tools that can scratch or crack the glass surface.
Place your work area on a hard, flat table away from moisture. Avoid working near sinks or humid bathrooms. A stable workspace prevents accidents and lets you see the small components clearly.
Finally, have your scale’s manual nearby. It contains important information about your specific model, including recalibration instructions you will need after reassembly.
Step-by-Step Guide to Fixing a Separated Glass Top
When your smart scale’s glass top separates from the base, you’re likely dealing with adhesive breakdown or thermal stress. The good news is that you can fix this yourself with basic tools and patience.
Start by placing your scale on a clean, hard surface like a tile floor or wooden table. Soft surfaces like carpet create instability and make the problem worse. Make sure the area around you has good lighting so you can see what you’re doing clearly.
Before you touch anything, check your batteries. Low battery power can create internal pressure changes that push the glass away from the base. Replace old batteries with fresh ones that match your scale’s specifications exactly. This simple step solves the problem in many cases.
If battery replacement doesn’t work, you’ll need to access the internal components. Locate the five Phillips head screws on the bottom cover and remove them carefully. Keep these screws in a safe spot so you don’t lose them during the repair process.
Once the cover is open, examine where the glass separates from the plastic base. Apply gentle, steady heat to this corner area using a heat source like a hair dryer on low setting. Hold it about six inches away and move it slowly back and forth. The heat softens the old adhesive and allows the glass to reseat properly.
Let the scale cool completely before you reassemble anything. This cooling period helps the adhesive bond strengthen again. Once everything is cool, carefully replace the bottom cover and screw all five screws back in. Make sure they’re snug but not over-tightened, as this can crack the glass.
Recalibrate your scale after reassembly to ensure accurate readings. Place it on a hard, flat surface and follow your scale’s calibration instructions. If readings remain inaccurate or the glass separates again quickly, professional service is your best option.
How to Properly Recalibrate Your Scale After Repair
After you’ve reattached your smart scale’s glass top, recalibration is essential. This process tells your scale to recognize its own weight and reset its measurement system.
Start by placing your scale on a hard, flat surface. Use tile, wood, or concrete. Never put it on carpet, rugs, or bathroom mats. These soft surfaces throw off calibration immediately.
Remove all weight from the scale. Wait for the display to show zero or “0.0” depending on your model. If it doesn’t show zero automatically, press the calibration button. This step clears any previous readings from memory.
Stand on the scale alone without moving. Your scale needs your actual body weight as a reference point. Stay still for 3 to 5 seconds. The display will flash or beep when calibration completes. Write down the weight your scale shows you.
Weigh yourself again within the next few minutes. Your new reading should match the first one closely. If readings jump around wildly, your scale needs recalibration again. Repeat the entire process from the beginning.
Check your batteries after recalibration. Weak batteries cause inconsistent readings even after you’ve fixed the glass. Replace them with fresh, matching batteries if needed.
Test your scale multiple times over the next week. Consistent readings mean your repair worked. Fluctuating numbers suggest the glass may have shifted again or internal components need professional attention.
If readings remain inaccurate after recalibration, the internal sensors may have damage beyond the separated glass. Professional service becomes your best option at this point.
Keep your scale on the same hard surface every time you use it. Moving it between different floor types confuses the calibration. Consistency helps your scale maintain accuracy long term and prevents future separation issues.
Best Practices for Placement and Long-Term Care
Where you place your smart scale matters more than most people realize. Hard, flat surfaces work best for accurate readings and long-term durability. Tile floors, wooden tables, and concrete surfaces provide the stability your scale needs. Soft surfaces like carpet, rugs, or foam mats cause uneven weight distribution. This uneven pressure stresses the glass top and weakens the adhesive bond over time.
Bathroom floors are common placement spots, but moisture creates problems. Water and humidity can seep into the base and damage internal electronics. If you must use a bathroom, place your scale on a raised shelf or cabinet away from direct water exposure. Ensure the area stays dry after each use.
Keep your scale away from direct sunlight and heat sources. Temperature changes cause the glass and plastic base to expand and contract at different rates. This thermal stress eventually separates the glass from the base. A cool, dry room provides ideal conditions for long-term stability.
Regular cleaning prevents adhesive breakdown and keeps your scale functioning properly. Wipe the glass top with a dry cloth after each use. Remove dust and debris from the edges where glass meets the base. Avoid using harsh chemicals or excessive water during cleaning, as moisture penetrates the seams.
Check that your scale sits completely level on its surface. Even slight tilting puts uneven pressure on the glass corners. Use a small level tool to verify proper positioning. Adjust the placement until the scale sits perfectly flat.
Store your scale in a consistent location. Moving it frequently causes vibrations that stress the adhesive. If you travel with your scale, use protective padding during transport. Handle it carefully to avoid dropping or bumping the glass top against hard surfaces.
These simple placement and care practices significantly extend your scale’s lifespan and prevent separation issues from developing in the first place.
Common Mistakes to Avoid During the Repair Process
When you repair your smart scale’s glass top, certain mistakes can make the problem worse. Understanding what to avoid saves you time and prevents additional damage.
Never force the glass apart from the base. Many people use excessive pressure when separating the glass, which can crack it or damage the internal LCD screen. Apply gentle, steady heat instead. Let the adhesive soften gradually before you attempt any separation.
Don’t skip checking your batteries before you start repairs. Many people assume the glass separation causes inaccurate readings, but dead or weak batteries are often the real culprit. Replace them with the exact same type and voltage your scale requires. Using incorrect battery types can damage internal circuits.
Avoid working on an unstable surface while you repair your scale. Place it on a hard, flat workspace like a kitchen counter or table. Working on soft surfaces like beds or couches makes it harder to access screws and internal parts safely.
Don’t reattach the glass using the wrong adhesive or too much adhesive. Excess adhesive can seep into electronic components and cause permanent damage. Use only adhesives specifically designed for electronics if you need to reapply any bonding agent.
Never skip the recalibration step after reassembly. Your scale needs to reset its sensors after you’ve opened it and handled internal components. Skipping this causes persistent inaccurate readings even though your repair was successful.
Avoid rushing the cooling process. After you reassemble your scale, let it sit undisturbed for several hours before using it. This allows all adhesives to cure completely and ensures components settle properly.
Don’t use your scale immediately after repair. Wait at least 24 hours before weighing yourself. This gives everything time to fully bond and stabilize. Test your scale with small weights first to verify accuracy before trusting your personal measurements.
Troubleshooting Persistent Issues After Reassembly
When your smart scale continues showing problems after you’ve reassembled it, the issue usually stems from one of several specific causes. Understanding what went wrong helps you fix it properly.
Inaccurate weight readings often appear even after you’ve reattached the glass. This happens because the internal sensors didn’t recalibrate correctly. Remove the batteries and wait 30 seconds. Reinsert them and place your scale on a hard, flat surface. Stand on it without moving to trigger a fresh calibration cycle.
If readings jump around or display strange numbers, check your battery connections inside the unit. Corrosion or loose contacts prevent proper power flow to the sensors. Clean the battery terminals gently with a dry cloth. Make sure you’re using the exact battery type your scale requires, as mismatched voltage causes sensor errors.
The glass may still shift slightly even after reattachment. This suggests the adhesive didn’t cure fully. Give it additional time to harden completely. Some adhesives need 24 to 48 hours before they reach full strength. During this period, don’t use your scale or move it around.
LCD display problems sometimes appear alongside glass separation. The screen may flicker or show blank sections. This indicates moisture entered the unit during your repair work. Allow the scale to dry in a warm, dry room for several hours with the cover removed.
If problems persist after these steps, the internal components may have sustained damage during the original separation. The circuit board or weight sensors could be compromised. At this point, professional service becomes your best option since internal repairs require specialized equipment and expertise.
Always test your scale multiple times over several days before deciding the repair failed completely. Some issues resolve themselves as adhesive sets and internal components resettle into proper position.
Final Thoughts
Fixing a separated glass top on your smart scale is a task you can handle at home. You don’t need special tools or advanced skills. You just need patience and a careful approach.
The process involves a few clear steps. Remove the cover screws, apply gentle heat, and reattach the glass properly. Then recalibrate your scale before you use it again.
Most separation issues happen because of adhesive breakdown over time. This is normal wear that occurs with regular use. It doesn’t mean your scale is broken beyond repair.
Take your time during each step of the repair. Rushing often leads to mistakes that create new problems. A slow, steady approach gives you the best results.
Remember that proper placement prevents future separation. Keep your scale on a flat, stable surface. This simple habit protects your repair work.
If you follow the steps correctly, your scale should work like new again. The glass will sit securely on the base. Your readings should return to normal accuracy.
Sometimes a repair doesn’t fully solve the problem. If your scale still shows odd readings or display issues, internal damage might be the cause. In these cases, professional help becomes your best option.
Most smart scale owners find this repair straightforward once they understand the steps. The key lies in careful handling and proper technique. Avoid force, use the right materials, and always recalibrate afterward.
Your smart scale can serve you well for years with proper care. Small maintenance habits go a long way. Regular cleaning, stable placement, and prompt attention to problems keep your scale working accurately.
Fixing glass separation isn’t complicated once you know what to do. With the right steps and a bit of patience, you can restore your scale’s function. This saves you money and extends the life of a device you rely on daily.
Frequently Asked Questions
Why is my smart scale glass separating from the base?
Glass separation happens when the adhesive holding the glass to the base fails over time. Moisture, temperature changes, and regular use can weaken the bond. Sometimes the glass shifts because you placed the scale on an uneven surface. Structural stress from impacts also causes separation.
How do I safely remove the cover to access the glass?
Locate the five Phillips head screws on the bottom of your scale. Remove each screw slowly and set them aside in a safe place. Gently lift the cover away from the base. Work carefully to avoid dropping any internal components.
What’s the best way to reattach the separated glass?
Apply gentle, steady heat to the corner where the glass separated from the base. You can use a heat gun on low setting or warm water. This softens the old adhesive slightly. Once warm, press the glass firmly back into place and hold it steady for several minutes. Let it cool completely before moving the scale.
Why do I still get inaccurate readings after fixing the glass?
Battery issues often cause this problem. Check that your batteries are the correct type and fully charged. Make sure the battery connections inside are clean and secure. After reassembly, you must recalibrate your scale. This resets the internal sensors to work properly with the newly attached glass.
When should I seek professional repair instead of fixing it myself?
If the glass has visible cracks or chips, professional service is safer. If readings remain wrong after you recalibrate, the internal components may have damage. Stop working on it if you feel uncertain about any step.

Hi, I’m Minnie Cole, the creator of The Output Lab — a space where I share my passion for all things tech. I spend my days exploring the latest gadgets, devices, and electronics on Amazon, putting them through real-world testing so you don’t have to.