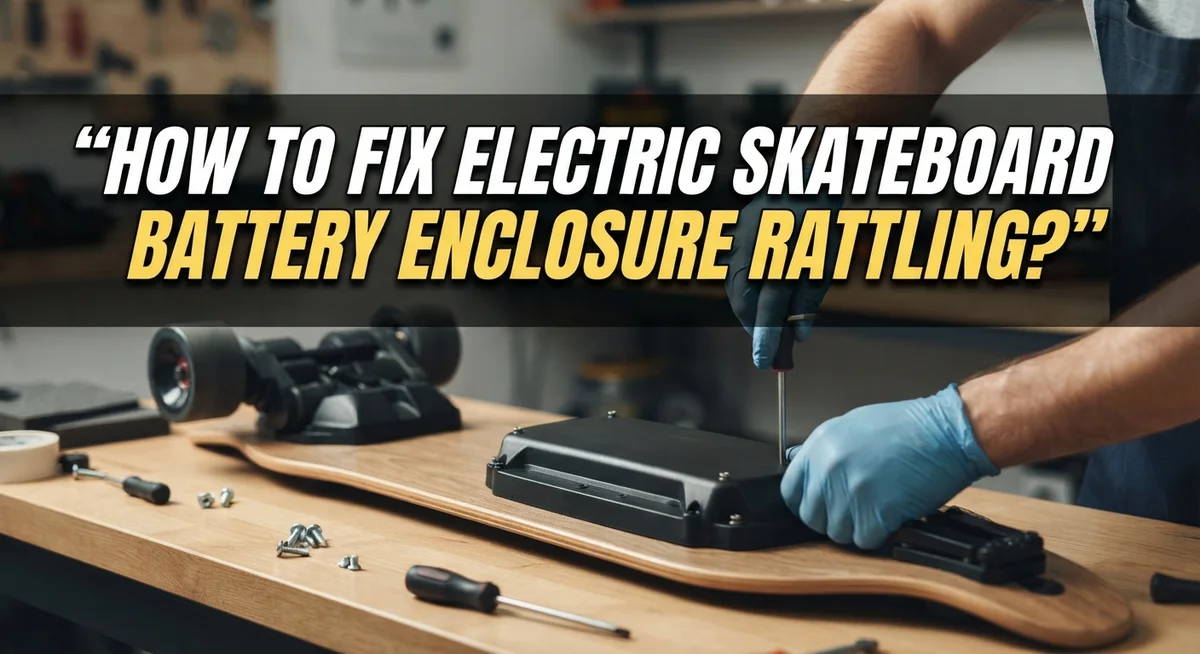
How To Fix Electric Skateboard Battery Enclosure Rattling?
That annoying rattle from your electric skateboard battery enclosure can ruin a smooth ride. It usually means something inside is loose. The good news? You can fix it yourself with a few simple steps.
Most rattling happens because the battery or internal wires shift around inside the enclosure. This movement creates noise every time you hit a bump or crack in the pavement. Left unfixed, it can even cause damage over time.
This guide walks you through finding the exact source of the rattle first. Skipping this step often leads to incomplete fixes that leave some noise behind.
In a Nutshell
- Find the source first. Open the enclosure and shake each part separately. This tells you exactly what needs fixing.
- Secure the battery tightly. Use foam shims or 3D-printed inserts to stop it from moving. A loose battery is the top cause of rattling.
- Fill empty gaps with foam. Closed-cell packaging foam works great inside the enclosure. It stops parts from bumping into each other.
- Immobilize loose wires. Combine electrical tape and hot glue to keep wires still. This small step prevents a lot of noise.
- Seal the enclosure edges. Add weatherstripping between the enclosure and deck. This creates a snug fit and blocks vibration.
- Avoid cutting vents for cooling. Your battery does not need active airflow. Cutting holes only weakens protection and safety.
Why Battery Enclosures Rattle: Understanding the Root Causes
Your electric skateboard battery enclosure rattles because the battery and internal components move around during rides. This movement creates vibration noise that gets worse on rough terrain or at higher speeds.
The main culprit is a loose battery sitting inside the enclosure without proper support. When you accelerate, brake, or hit bumps, the battery shifts side to side. This shifting causes the plastic or metal enclosure walls to vibrate against the battery.
Internal wires also contribute to rattling. Loose power cables and sensor wires bounce around freely inside the enclosure. They touch the battery, walls, or other components, creating additional noise during vibration.
The enclosure itself can rattle against your skateboard deck. If the mounting bolts are not tight enough, the entire enclosure moves as one unit. This gap between the enclosure and deck acts like a drum, amplifying vibration sounds.
Dampening materials are missing from the space between your battery and enclosure walls. Without foam or padding, hard plastic directly contacts the hard battery case. This creates a perfect sound conductor for vibrations.
Your enclosure vents or seams might also be loose. Small openings allow internal components to shift more freely. Even tiny gaps let the battery move slightly, which causes noise.
Temperature changes can worsen the problem too. Your battery expands and contracts with heat and cold. This expansion creates gaps that were not there before, allowing more movement.
Understanding these causes helps you identify your specific rattle source. Some enclosures have multiple issues at once. Finding which component actually moves will guide your repair strategy. This knowledge prevents wasting time on fixes that do not address your real problem.
Tools and Materials You’ll Need Before Starting
Before you start fixing your electric skateboard battery enclosure rattle, gather the right tools and materials. Having everything ready makes the job faster and prevents frustration.
You will need basic hand tools to open your enclosure safely. A screwdriver set with multiple head sizes works best. Some enclosures use Phillips head screws, while others need flathead or hex keys. A socket wrench set helps if your skateboard uses bolts instead of screws.
For identifying the rattle source, bring a flashlight or headlamp into the mix. You need to see inside the enclosure clearly when shaking individual components. A small mirror also helps you inspect hard to reach corners.
Dampening and isolation materials form the core of your fix. Closed cell packaging foam strips fill empty spaces inside the enclosure. Weatherstripping tape seals gaps between the enclosure and your skateboard deck. Electrical tape holds wires in place securely.
Hot glue serves as an excellent adhesive for wire management. It bonds quickly and creates a flexible hold. Some people also use foam shims or 3D printed inserts to cradle the battery and prevent movement.
Safety gear matters too. Wear work gloves when handling sharp edges or rough enclosure parts. Safety glasses protect your eyes from debris when opening the enclosure.
Keep a notepad nearby to document your findings. Write down which parts rattle individually so you remember exactly what needs fixing.
Clean rags help you wipe away dust and debris inside the enclosure. A clean workspace lets you see everything clearly and work more effectively.
Having these materials ready before you start ensures a smooth repair process from beginning to end.
Step-by-Step: Diagnosing the Exact Source of the Rattle
Start by removing your battery enclosure from the skateboard deck. Set it on a flat work surface where you have good lighting. Take your time during this step to avoid damaging any connectors or seals.
Once the enclosure is removed, shake it gently near your ear. Listen carefully to identify where the rattle comes from. Does it sound like it’s coming from the center, the sides, or the bottom of the enclosure?
Next, open the enclosure carefully according to your board’s manual. Remove the battery and place it on a clean surface. Now shake the empty enclosure again. If the rattle disappears, your battery is the main culprit. If noise persists, internal components or the enclosure itself needs attention.
Shake the battery separately outside the enclosure. Listen for movement inside the battery casing. Some rattle here is normal, but excessive noise means the battery needs securing.
Inspect all internal wires and connectors while the enclosure is open. Gently move them to see if they create noise. Loose wires often vibrate against the enclosure walls during rides.
Check the enclosure walls for cracks or damage. Run your fingers along all seams and edges. Look for gaps between the enclosure and the mounting surface on your deck.
Document your findings in your notepad. Write down exactly where each rattle originates. Note which components move freely and which seem secure.
This systematic approach prevents you from fixing the wrong problem. You will know precisely what needs dampening materials and what needs tightening. Once you identify the exact source, your repair becomes straightforward and effective.
Step-by-Step: Disassembling and Isolating Loose Components
Now that you’ve identified where the rattle comes from, it’s time to disassemble your enclosure carefully. Start by removing all fasteners holding the enclosure together. Keep these screws and bolts in a small container so you don’t lose them during the process.
Gently separate the enclosure halves. Take your time here because you want to avoid damaging seals or connectors. Once open, remove the battery pack slowly and set it on a clean surface.
Shake each component individually to pinpoint the exact rattle source. Hold the battery and move it side to side. Listen carefully for any internal sounds coming from inside the battery itself. Next, shake the wires and connectors separately. These often rattle against enclosure walls during rides.
Inspect the enclosure walls for loose pieces or debris. Sometimes small objects get trapped inside during assembly. Remove anything you find that shouldn’t be there.
Check all internal connectors and terminals. Push them firmly to ensure they’re seated properly. Loose connections can vibrate and create noise.
Examine the enclosure gaskets and seals. These rubber components prevent water entry but can shift over time. Note any areas where they’ve moved or compressed unevenly.
Document which components moved when you shook them. This information guides your reassembly strategy. Take photos of the internal layout before making changes.
Now you understand exactly which parts cause the rattle. This knowledge prevents you from applying fixes to the wrong areas. You’re ready to move forward with confidence, knowing precisely where dampening materials need to go and how to secure loose components properly.
Step-by-Step: Reassembling With Dampening Materials
Now that you’ve identified which components cause the rattle, it’s time to reassemble everything with dampening materials in place.
Start by laying out all your components on a clean surface. Position the battery in the center of the enclosure base. Before securing it, wrap closed cell foam strips around the battery sides. These strips absorb vibration energy and prevent the battery from moving during rides.
Insert air shims or custom inserts between the battery and enclosure walls. These create a snug fit without crushing the battery. The battery should not shift when you gently push it from side to side. This is your key test for proper positioning.
Next, address internal wires and connectors. Apply electrical tape to bundle wires together. Use hot glue to anchor wire bundles to the enclosure base at strategic points. Leave enough slack so wires don’t strain during assembly and disassembly. Avoid gluing wires directly to the battery.
Apply weatherstripping tape along the interior edges where the enclosure halves meet. This material compresses slightly and fills micro gaps that transmit vibration noise. Press it firmly into place using steady hand pressure.
Before closing the enclosure, shake each secured component one final time. Nothing should rattle. The battery must stay completely immobilized. Check all wire connections remain tight and undamaged.
Close the enclosure halves slowly and carefully. Align all mounting points before tightening fasteners. Tighten fasteners in a cross pattern to ensure even pressure. Avoid over tightening, which can crack the enclosure.
Finally, remount your enclosure onto the skateboard deck. Apply weatherstripping between the enclosure and deck surface. This creates a complete vibration isolation system. Test your board by riding it gently and listening for any remaining noise.
Sealing the Enclosure-to-Deck Interface With Weatherstripping
Weatherstripping creates a seal between your battery enclosure and the skateboard deck. This seal stops vibrations from traveling between these two surfaces. The connection point is where much of your rattle noise escapes.
Start by cleaning both surfaces thoroughly. Remove dirt, dust, and old adhesive from the enclosure bottom and the deck mounting area. Use a dry cloth to wipe everything down. A clean surface helps weatherstripping stick properly and last longer.
Measure the perimeter where your enclosure meets the deck. You need to know the total length before applying weatherstripping. Weatherstripping comes in rolls, so accurate measurements prevent waste.
Apply the weatherstripping around the entire mounting area. Start at one corner and work your way around the enclosure. Press firmly as you go to ensure good contact. The material should compress slightly under pressure.
Pay special attention to gaps and uneven spots. These areas allow vibrations to pass through easily. Fill any visible spaces with weatherstripping material. Multiple layers work better than one thick layer in some cases.
Let the adhesive cure for the recommended time before riding. Most weatherstripping needs 24 hours to set completely. Riding too soon reduces the seal’s effectiveness.
Test your skateboard after the weatherstripping has fully cured. Accelerate and listen for rattling sounds. The noise should decrease noticeably. If rattling persists, you may need thicker weatherstripping or additional layers.
Check your weatherstripping every few months. Heat, cold, and regular use wear it down over time. Replace it when you notice peeling edges or reduced compression. Proper maintenance keeps your battery enclosure quiet and vibration free.
Common Mistakes to Avoid When Fixing Rattles
Many people make preventable mistakes when fixing battery enclosure rattles. Understanding these errors helps you solve the problem correctly the first time.
The biggest mistake is cutting vents into your enclosure. People think airflow will cool the battery, but this actually compromises safety. Your enclosure protects the battery from water, dirt, and impacts. Cutting holes removes this protection entirely. Batteries don’t need active cooling in most skateboards. The enclosure design already accounts for heat dissipation.
Another common error is jumping straight to fixes without identifying the rattle source. Some riders apply dampening materials everywhere inside the enclosure without knowing what actually moves. This wastes time and materials. You must shake each component individually first to find the real culprit.
Incomplete component isolation is equally problematic. After you identify what rattles, secure only that specific part. Many people over tighten materials or use too much adhesive. This can damage connectors, wires, or the battery itself. Use gentle pressure and appropriate materials that won’t harm electronics.
Failing to check the enclosure gaskets is another oversight. These rubber seals shift during rides and create gaps. If you don’t inspect them during disassembly, the rattle returns quickly after reassembly.
Some riders also forget about internal wires and connectors. Loose wires vibrate against the enclosure walls and create noise. Securing these with electrical tape or gentle hot glue prevents movement without damaging components.
Finally, rushing the weatherstripping application causes problems. People apply it unevenly or skip curved areas where the enclosure meets the deck. This leaves gaps that transmit vibrations. Take time to apply weatherstripping completely around the entire perimeter.
Troubleshooting Persistent or Recurring Rattles
When rattles keep coming back after your initial fix, the problem usually stems from incomplete isolation or material degradation over time. Start by identifying whether the rattle is new or the same one returning. Shake your skateboard gently near your ear and listen carefully to pinpoint the sound location.
Persistent rattles often happen because dampening materials shift during rides. Foam strips compress and lose effectiveness. Weatherstripping adhesive weakens from temperature changes and vibration. You need to check these materials regularly and replace them when they fail.
Disassemble your enclosure again and inspect all components. Look for any gaps that weren’t sealed properly the first time. Sometimes small spaces escape notice during initial assembly. Pay special attention to corners and edges where materials meet.
Check if your battery has moved within the enclosure. Air shims or inserts may have settled differently. The battery itself might have shifted slightly, creating new contact points with the walls. Reposition everything and add extra dampening material if needed.
Examine your internal wires and connectors. Repeated vibration can loosen electrical tape or hot glue bonds. These connections may rattle against the enclosure sides. Secure them more firmly this time using stronger adhesive or additional wrapping.
Test your weatherstripping seal between the enclosure and deck. Adhesive can fail from moisture, temperature fluctuations, or constant flexing. Remove old weatherstripping completely and apply fresh material along the entire perimeter.
Consider using multiple dampening methods together rather than relying on one solution. Combine foam strips with electrical tape and weatherstripping for better results. This layered approach prevents any single material failure from causing rattles.
Ride your skateboard on different terrain after reassembly. This helps you identify if the fix actually works under real conditions.
Final Thoughts
Fixing a rattling battery enclosure comes down to patience and careful checking. You need to find the exact source before you apply any fix.
Skipping this step wastes time and materials. It also leaves the real problem unsolved.
Foam strips, weatherstripping, and hot glue all play a role. Each material handles a different type of movement inside your enclosure.
Never cut vents into your enclosure to solve rattling. This mistake compromises battery safety and does not fix the noise.
Your battery does not need active airflow. Enclosed designs protect it just fine without extra holes.
Take your time during reassembly. Rushing this stage often causes the rattle to return within a few rides.
Secure every component you identify, not just the obvious ones. Wires, connectors, and small parts can rattle too.
Test your board after every fix. Ride on different surfaces to confirm the noise is fully gone.
Small rattles can turn into bigger problems if left unchecked. Loose parts may shift further and cause damage over time.
Regular maintenance keeps your enclosure quiet for the long run. Check your seals and foam every few months.
Simple checks now save you bigger repairs later. A quiet board also means a safer ride.
Most rattles have a straightforward fix once you locate the cause. Combine the right materials with careful assembly.
Your electric skateboard deserves a smooth, quiet ride. With the right approach, you can eliminate rattling for good.
Stay consistent with checks and you will enjoy a stable, noise free board for many rides ahead.
Frequently Asked Questions
Why does my battery enclosure rattle during rides?
Your battery or internal components shift inside the enclosure as your skateboard moves. The battery itself may not be secured tightly enough. Wires and connectors can also vibrate against the enclosure walls. These loose parts create noise when you accelerate, brake, or hit bumps.
Isolation is key. Each component needs to stay in place. Without proper support, even small movements add up to annoying rattles.
How do I find exactly what’s rattling?
Disassemble your enclosure carefully. Shake each component individually while holding it in your hand. Listen closely to identify which part makes the noise. Test the battery first, then check wires, connectors, and any internal mounting brackets.
Once you know what rattles, you can target that specific part with dampening materials. This saves time and prevents over-fixing areas that don’t need help.
What materials stop battery enclosure rattles?
Closed cell packaging foam strips work well for filling gaps around your battery. Weatherstripping seals the connection between your enclosure and deck. Electrical tape plus hot glue immobilizes loose wires and small components. Air shims or foam inserts keep your battery centered and secure.
Use multiple methods together for best results. Combine foam strips with weatherstripping for complete rattle elimination.
Should I cut vents into my enclosure to reduce noise?
No. Cutting vents compromises your battery’s safety and protection from water and dust. Your battery does not need active airflow to function properly. Vents actually increase rattle problems by creating more movement space inside.
Focus on dampening materials instead. They eliminate noise without reducing safety.
How often should I check for new rattles?
Test your skateboard after every repair and reassembly. Ride on different terrain to stress test your fixes. Check your enclosure every few weeks during regular maintenance.
Early detection prevents small rattles from becoming serious problems later.

Hi, I’m Minnie Cole, the creator of The Output Lab — a space where I share my passion for all things tech. I spend my days exploring the latest gadgets, devices, and electronics on Amazon, putting them through real-world testing so you don’t have to.