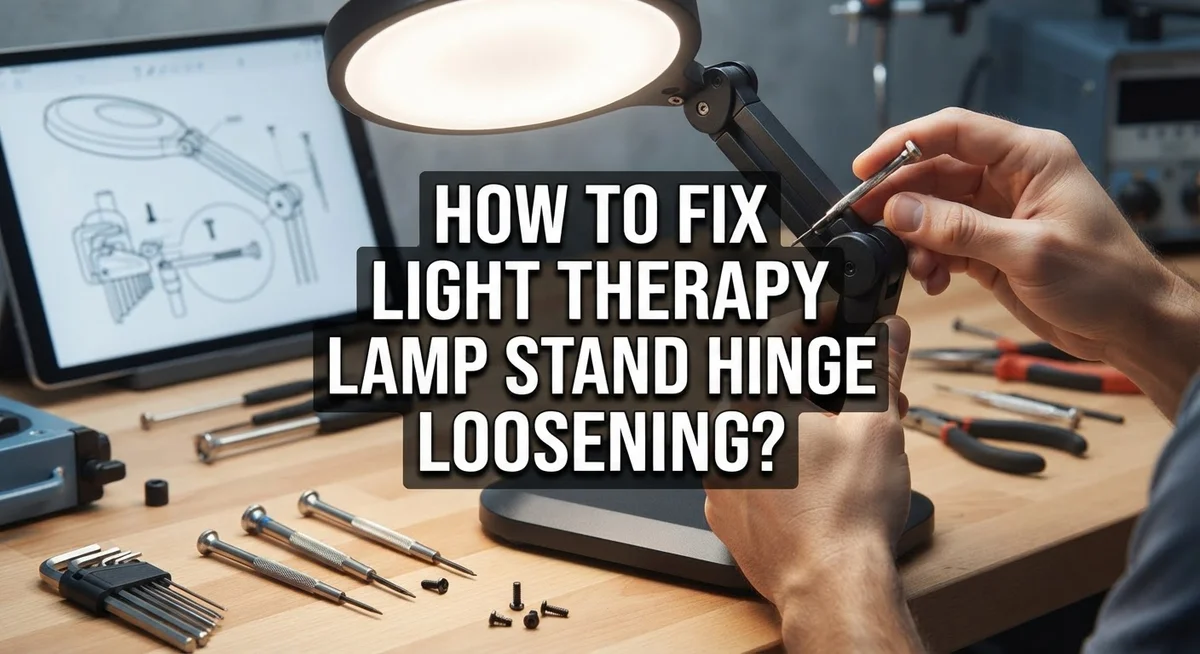
How To Fix Light Therapy Lamp Stand Hinge Loosening?
Does your light therapy lamp droop like it’s tired of standing up straight? You are not alone. Over time, the hinge that holds your lamp in place can loosen. This makes it hard to keep your lamp at the right angle for your daily light session.
This annoying problem happens to almost every adjustable lamp eventually. The plastic friction hinges inside your lamp stand wear down with regular use. Soon, your lamp starts sliding, tilting, or flopping when you least expect it.
The good news? You can fix this issue at home. You do not need to be a repair expert or buy a brand new lamp.
In a Nutshell
- Unplug your lamp first. Safety comes before any repair. This simple step protects you from shock during the fixing process.
- Identify your hinge type. Most lamps use plastic friction hinges, while others rely on metal screws. Knowing which type you have guides your next move.
- Check for loose nuts or screws. Many hinge problems come from simple loose parts. A quick look can save you time and effort.
- Tighten gently and slowly. Turn screws or nuts a little at a time. This prevents cracking or damaging plastic components.
- Test the lamp position after each adjustment. Move the lamp head to see if it holds steady. Repeat tightening if needed.
- Consider replacement if tightening fails. Worn friction hinges sometimes need a full swap. This restores smooth, lasting movement.
Understanding Why Lamp Stand Hinges Loosen Over Time
Light therapy lamp stands use hinges that gradually lose their grip over time. Understanding why this happens helps you prevent future problems and fix current ones.
Friction hinges wear down naturally. Most adjustable lamps rely on plastic friction hinges. These hinges create resistance through contact between materials. Each time you move your lamp, the plastic surfaces rub together slightly. After months or years, this friction decreases. The hinge can no longer hold your lamp in place.
Metal screws and fasteners loosen from vibration. Some lamps use screw based hinges instead of friction models. Vibrations from daily use cause these fasteners to gradually unwind. Even tiny movements add up over time. Your lamp may sit on a desk near foot traffic or machinery. This constant vibration accelerates loosening.
Heat affects plastic hinge materials. Light therapy lamps generate warmth during operation. Plastic hinges expand when heated and contract when cooled. This repeated expansion and contraction weakens the material’s grip. The hinge becomes less effective at holding your lamp steady.
Improper positioning accelerates wear. Repeatedly forcing your lamp into extreme angles stresses the hinge. Holding your lamp at sharp angles puts uneven pressure on one side. This concentrated stress weakens the hinge faster than normal use would.
Age and material breakdown occur naturally. Plastic deteriorates over time, especially with sun exposure or heat. The material becomes brittle and loses its original flexibility. Once this happens, even tight hinges struggle to maintain position.
Recognizing these causes helps you fix the problem correctly. You can tighten loose fasteners or adjust friction points. If your hinge has deteriorated beyond repair, replacement becomes necessary. Either way, knowing the root cause guides your repair strategy forward.
Identifying Your Hinge Type: Plastic Friction vs. Metal Screw-Based
Your light therapy lamp likely uses one of two hinge systems. Understanding which type you have makes repairs much easier and prevents damage during tightening.
Plastic friction hinges work by creating resistance between two surfaces. These hinges hold your lamp in place through pressure alone, with no screws or bolts. You will find them on most budget and mid range light therapy lamps. They feel smooth when you move the lamp arm. Plastic friction hinges tighten through adjustment points or friction rings located at the hinge connection.
Metal screw based hinges use bolts, nuts, or set screws to hold the lamp arm firmly. These hinges look more mechanical and industrial. You can see visible metal fasteners at the connection points. They are common on professional grade and heavy duty light therapy lamps.
To identify your hinge type, first examine the joint where the lamp arm connects to the base or pole. Look for visible screws, nuts, or bolts. If you see metal fasteners, you have a screw based hinge. If the connection looks smooth with no visible hardware, you likely have a plastic friction hinge.
Check the hinge material next. Run your finger across the joint. Metal hinges feel cool and solid. Plastic hinges feel lighter and may have a slight texture or grip surface.
Read your lamp manual if available. Most manufacturers specify the hinge type in technical specifications. This saves you guessing time.
Knowing your hinge type prevents costly mistakes. Tightening plastic hinges requires gentle incremental adjustments. Metal hinges need wrench or screwdriver work. Misidentifying your hinge could cause permanent damage or breakage during repair attempts.
Tools and Safety Precautions Before You Begin
Before you start fixing your light therapy lamp stand hinge, gather the right tools and take safety steps. This preparation prevents injury and ensures smooth repairs.
Safety comes first. Always unplug your lamp from the electrical outlet before touching any parts. Even though you’re only working on the hinge, electricity can still pose risks if something goes wrong. Wait a few minutes after unplugging to let any residual charge dissipate.
Gather essential tools. You’ll need an adjustable wrench or socket set to tighten nuts and bolts. A screwdriver set with both Phillips and flathead options handles different screw types. Keep a flashlight nearby to see into tight hinge spaces clearly. A small container helps you organize tiny fasteners so nothing gets lost during the repair.
Prepare your workspace. Work on a flat, stable surface with good lighting. Place a soft cloth or towel under your lamp to prevent scratches on the base or arm. This also catches any small parts that might fall.
Check your hinge type. Before touching anything, examine your lamp’s hinge closely. Look for visible bolts, nuts, or set screws on metal hinges. Plastic friction hinges look smooth without obvious fasteners. This identification helps you select the right tools and techniques.
Protect the lamp materials. Wear work gloves to protect your hands and prevent oils from your skin transferring to the hinge. Keep water away from your work area. Moisture can damage electrical components if it somehow reaches the lamp’s interior.
Document the current state. Take a quick photo of the hinge before you begin. This reference helps you remember how everything looked originally.
Step-by-Step Guide to Tightening a Loose Hinge
Start by unplugging your lamp from the electrical outlet. This keeps you safe while working on the hinge. Never skip this step, even if you’re only making small adjustments.
Locate the hinge connection point where the lamp arm meets the base or pole. Look closely at this joint. You’ll see either small nuts and bolts or a plastic friction mechanism.
For screw based hinges, use an adjustable wrench or the correct sized wrench to turn the nuts clockwise. Turn slowly and steadily. Tighten each nut a quarter turn at a time.
Stop and test the lamp position after each adjustment. Plug the lamp back in and move the arm to your preferred angle. The lamp should hold its position without drooping or shifting.
If your lamp uses plastic friction hinges, look for adjustment points around the joint. These are often small screws or bolts that increase the friction pressure. Turn these screws clockwise using the appropriate screwdriver.
Avoid over tightening plastic hinges. This damages the material and makes the problem worse. Tighten gradually and test frequently.
If the hinge still feels loose after tightening, examine the joint for cracks or worn plastic. Plastic friction hinges wear out naturally over time. You may need to replace the hinge assembly if tightening doesn’t work.
Plug in your lamp and position it at different angles to confirm it holds steady. Move the arm up, down, and side to side. The lamp should stay exactly where you place it.
If loosening returns quickly after a few days or weeks, the hinge material has likely worn beyond repair. Plan for a replacement hinge or consider a new lamp stand with more durable hardware.
Using Adhesive to Reinforce Worn Friction Hinges
When friction hinges wear down, adhesive can help restore grip and stability. This method works best for plastic hinges that have lost their holding power but show no visible cracks or damage.
Start with safety first. Unplug your lamp completely before applying any adhesive. This prevents electrical hazards while you work on the hinge mechanism.
Clean the hinge surfaces thoroughly. Use a dry cloth to remove dust, debris, and any old residue from the friction hinge areas. Dirt prevents adhesive from bonding properly. Wipe both the upper and lower hinge surfaces where they meet and create friction.
Apply adhesive strategically. Use a small amount of super glue or epoxy around the friction contact points. Focus on areas where the two surfaces press together. Avoid using too much adhesive, which creates messy overflow.
Let it cure completely. Most adhesives need 15 to 30 minutes before you move the lamp. Check your specific adhesive instructions for exact timing. Rushing this step causes the hinge to fail again quickly.
Test the hinge carefully. After curing, move the lamp arm slowly to check if friction has improved. The arm should hold its position without slipping. If it still moves too easily, the adhesive may not have bonded properly.
Know when adhesive won’t work. If your hinge shows cracks, splits, or severely worn plastic, adhesive alone won’t fix it. In these cases, you may need to replace the hinge assembly entirely. Adhesive works best as a temporary reinforcement for hinges that are simply loose rather than structurally damaged.
Common Mistakes to Avoid During Repair
When fixing a loose lamp hinge, people make mistakes that cause bigger problems. Here are the errors you should avoid.
Over tightening is the biggest mistake. Many people twist nuts and bolts as hard as they can. This damages plastic hinges permanently. The material cracks or breaks under too much pressure. Tighten gradually. Test the lamp after each small turn.
Skipping the unplugging step puts you at risk. Some people work on their lamp while it’s plugged in. This creates a shock hazard. Always disconnect your lamp first, even if you’re just tightening bolts.
Working without identifying your hinge type wastes time. Plastic friction hinges need different treatment than metal screw based hinges. Check what you have before starting repairs. This prevents you from using the wrong technique.
Applying too much adhesive creates messy problems. When using super glue or epoxy, a small amount works best. Too much glue spreads into areas where it shouldn’t go. It hardens in the wrong spots and locks the hinge completely.
Rushing the curing process fails quickly. Some people move their lamp immediately after applying adhesive. The bond hasn’t set yet. Wait the full time recommended by the adhesive instructions, usually 15 to 30 minutes minimum.
Ignoring visible damage wastes your effort. If you see cracks in the plastic or stripped screw holes, tightening alone won’t help. You need replacement parts. Attempting repairs on severely damaged hinges leads to frustration and repeated failures.
Forgetting to test after each step keeps problems hidden. Always check your lamp’s position between adjustments. This shows whether your fix is working or if you need a different approach.
Troubleshooting: When Tightening Doesn’t Solve the Problem
Sometimes tightening alone won’t fix your loose lamp hinge. This happens when the underlying problem goes deeper than just loose fasteners. Understanding what’s actually wrong helps you find the right solution.
Worn plastic friction hinges lose their grip over time. The material compresses and no longer creates enough friction to hold your lamp in place. Even after tightening, the hinge collapses under the lamp’s weight. You’ll notice the arm drifts downward slowly or falls suddenly.
Check for visible damage first. Look closely at the hinge joint for cracks, splits, or crushed plastic. Run your finger over the surfaces to feel for flat spots or deformation. Damaged material cannot grip properly, no matter how tight you make the screws.
Metal hinges present different challenges. The bolt holes may have stripped threads, meaning the screw spins without tightening. The hinge itself could be bent or warped. A bent hinge won’t align correctly even with new fasteners.
Test your lamp after each adjustment step. Move the arm slowly through its full range. Does it hold steady at every angle? Or does it drift in certain positions? This tells you if tightening helped or if you need a different approach.
If tightening doesn’t work, your hinge likely needs replacement or reinforcement. Adhesive methods can restore friction temporarily on worn plastic hinges. Metal hinges with stripped holes may need new fasteners with larger diameters or different anchor points.
Document what you observe. Note which direction the lamp drifts, whether it happens immediately or gradually, and if certain positions are worse than others. This information guides your next repair step and prevents wasted effort on solutions that won’t work.
Maintaining Your Lamp Stand Hinge for Long-Term Stability
Your lamp stand hinge needs regular care to stay stable and functional. Simple maintenance habits prevent problems before they start.
Check your hinge every few months. Look for any visible gaps between the hinge parts. Feel the hinge by gently moving the lamp arm. It should resist movement smoothly without wobbling or clicking sounds.
Clean the hinge area regularly. Dust and debris collect around hinges and reduce friction. Use a soft, dry cloth to wipe away particles. Pay special attention to the connection points where the hinge attaches to the lamp base and arm.
Tighten adjustment points gently. Most hinges have small screws or nuts at the connection points. Use the correct tool to avoid stripping the fasteners. Turn slowly and stop as soon as you feel resistance. Never force these components.
Test the lamp position after tightening. Move the arm to different angles and hold it in place. The lamp should stay exactly where you position it without drifting or sagging.
Keep your lamp away from extreme temperature changes. Heat and cold cause plastic and metal to expand and contract. This movement loosens hinges over time. Store your lamp in a climate controlled space when not in use.
Avoid placing heavy objects on the lamp arm. The added weight strains the hinge and speeds up wear. Use the lamp as designed for its intended weight capacity.
Replace worn components promptly. If your hinge shows cracks or permanent damage, replacement parts are available. Catching problems early prevents your lamp from becoming unusable. Regular attention keeps your light therapy lamp working reliably for years.
Final Thoughts
A loose lamp hinge feels like a small problem. But it affects how you use your light therapy lamp every day.
Fixing it takes just a few simple steps. You don’t need special tools or advanced skills.
Start by unplugging your lamp. This keeps you safe during the entire repair process.
Next, identify your hinge type. Plastic friction hinges need gentle handling. Metal hinges can handle firmer tightening.
Check all nuts, screws, and connection points. Tighten them slowly and test after each adjustment.
Avoid over tightening at all costs. This single mistake breaks more hinges than normal wear does.
If tightening doesn’t work, your hinge may need reinforcement or replacement. Worn plastic parts often reach a point where adjustment alone won’t help.
Regular maintenance prevents future loosening. Check your hinge every few months. Clean away dust and debris that reduce grip.
Keep your lamp in stable temperatures. Avoid resting heavy objects on the arm.
These small habits extend your hinge’s life significantly.
Most hinge problems have simple solutions. You just need patience and the right approach.
Take your time with each step. Rushing leads to stripped screws or cracked plastic.
Test your lamp after every fix. This tells you if the repair actually worked.
If your hinge still won’t hold position after trying these methods, it’s time to consider a replacement part.
Your light therapy lamp deserves proper care. A stable hinge means consistent light exposure every session.
Fixing hinge issues yourself saves money and time. You avoid buying a whole new lamp for one small part.
With the right care, your lamp stand can serve you reliably for years to come.
Frequently Asked Questions
What causes a light therapy lamp stand hinge to loosen?
Light therapy lamps use hinges that gradually lose their grip. Plastic friction hinges wear down from repeated adjustments. Metal hinges can develop loose fasteners over time. Daily use causes the connection points to shift slightly. Temperature changes and vibrations also contribute to loosening.
Can I fix a loose hinge without taking the lamp apart?
Yes, you can often fix it without disassembly. First, unplug your lamp for safety. Look for visible nuts or screws at the hinge connection. Tighten these fasteners gently using the appropriate tool. Turn slowly to avoid stripping the threads.
Test your lamp after each small adjustment. Move the arm to different angles and check if it holds position. This simple approach works for many loose hinges before you need deeper repairs.
How tight should I make the hinge adjustment?
Tighten just enough so the lamp stays in place. Stop as soon as you feel resistance. Do not force the fastener or turn it hard. Over tightening breaks plastic hinges and strips metal threads.
A good rule: tighten until snug, then stop. Your lamp should hold its position without wobbling. If it still moves, tighten one more quarter turn. Check the position again before making further adjustments.
When should I consider replacing the hinge instead of tightening?
Replace the hinge if tightening no longer works. Worn plastic hinges lose their friction ability permanently. If the screw spins without tightening, the threads are stripped. Visible cracks or damage mean replacement is necessary.
Your lamp hinge has reached the end of its life when adjustments provide no improvement. Replacement hinges restore full functionality and stability to your lamp stand.

Hi, I’m Minnie Cole, the creator of The Output Lab — a space where I share my passion for all things tech. I spend my days exploring the latest gadgets, devices, and electronics on Amazon, putting them through real-world testing so you don’t have to.