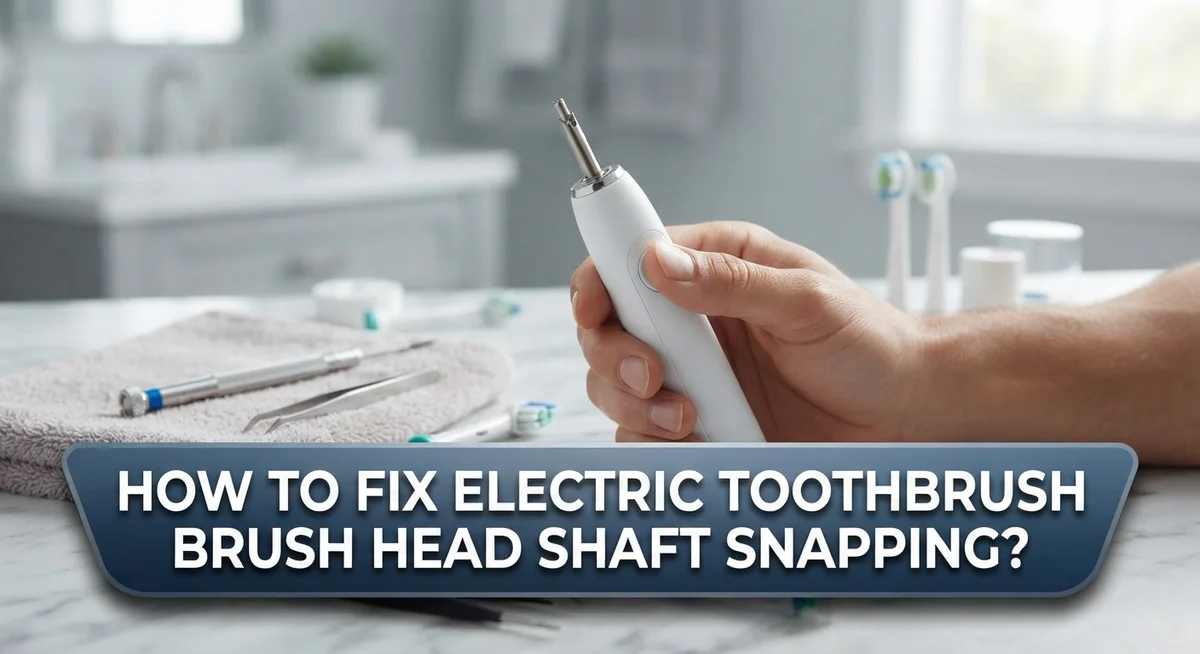
How To Fix Electric Toothbrush Brush Head Shaft Snapping?
Have you ever picked up your electric toothbrush and noticed the brush head shaft feels wobbly or snapped? It’s a frustrating problem. One moment you are brushing normally, and the next, the small plastic shaft breaks off.
This issue happens more often than people think. Brush head shafts are small and thin. They face constant pressure every single day.
Many users panic when this happens. They think they need to throw away the entire toothbrush handle. That is not always true.
In this guide, we will explore why this snapping happens in the first place. We will look at common causes like excessive pressure and material wear.
In a Nutshell
- Shaft snapping usually happens due to worn out gears or a loose fit between the brush head and the handle.
- Excess pressure while brushing can weaken the plastic shaft over time.
- Water damage or moisture buildup inside the shaft may cause it to crack.
- Always check if the brush head clicks firmly into place before turning on the toothbrush.
- Cleaning the shaft regularly helps remove toothpaste residue that can cause friction and wear.
- If the shaft keeps snapping, it might be time to replace the brush head or check the toothbrush motor for issues.
- Simple fixes like gentle brushing and proper storage can extend the life of your toothbrush parts.
Why Electric Toothbrush Shafts Snap
Electric toothbrush shafts snap for several clear reasons. Understanding these causes helps you prevent future damage.
Material fatigue is the primary culprit. The plastic or composite material in the shaft weakens over time. Each brushing motion creates tiny stress points. After months of use, these stress points combine and cause failure. The shaft simply cannot handle the repeated pressure anymore.
Improper attachment creates unnecessary strain. When you force the brush head onto the handle incorrectly, the shaft bears extra load. The connection point experiences tension it was never designed to handle. This repeated stress eventually leads to snapping.
Aggressive brushing habits accelerate shaft damage significantly. Pressing too hard against your teeth transfers excessive force down the shaft. The motor spins fast enough already. Adding extra pressure only weakens the connection point faster.
Moisture and corrosion weaken the shaft from inside. Water seeps into small cracks and gaps. This moisture causes the material to expand and contract. Over time, this cycle creates weak spots that snap easily.
Temperature changes also play a role. Moving your toothbrush from hot bathrooms to cold bedrooms causes expansion and contraction. The shaft material becomes brittle from these temperature swings. Brittleness makes snapping more likely.
Loose gears inside the handle transfer vibration directly to the shaft. When internal components wear out, they shake more violently. This vibration travels through the shaft constantly. The increased movement weakens the structure.
Poor quality construction in some models makes shafts snap sooner. Cheaper materials break faster than premium options. Thinner shaft designs fail more readily too. Manufacturing defects sometimes create weak points from day one.
Recognizing these causes helps you take action before your shaft snaps completely.
Signs Your Brush Head Shaft Is About to Fail
Your electric toothbrush gives you clear warning signs before the shaft completely fails. Pay attention to these signals so you can act quickly.
A wobbly brush head is the first red flag. When you insert the brush head, it should click firmly into place. If it moves side to side or feels loose even after clicking, the shaft is wearing down. Test this by gently wiggling the brush head with your fingers before turning on the toothbrush.
Unusual vibrations or rattling sounds mean something is wrong inside. A healthy toothbrush runs smoothly and quietly. If you hear clicking, grinding, or rattling noises during brushing, the shaft connection is deteriorating. These sounds indicate the gears are no longer aligned properly.
Visible cracks or splits in the shaft area demand immediate attention. Look closely at where the brush head connects to the handle. Small hairline cracks will grow larger with each use. If you spot any damage, stop using the toothbrush right away.
Resistance when inserting the brush head suggests shaft damage too. The brush head should slide in smoothly and click without forcing. If you need to push harder than usual or twist it awkwardly, the shaft may be bent or cracked inside.
Leaking water around the connection point reveals internal shaft problems. Water seeping from where the brush head meets the handle means the seal is broken. This leads to corrosion and shaft failure.
Decreased brushing power can also signal shaft issues. If your toothbrush feels weaker than before, the shaft may be absorbing vibrations instead of transferring them properly to the brush head.
Tools and Materials Needed for Repair
Before you start fixing your electric toothbrush shaft, gather the right tools. You will need a small screwdriver set with both Phillips and flathead options. These help you open the toothbrush handle and access internal components.
A replacement brush head is essential. Even if you repair the shaft, having a backup ensures you can still brush your teeth while working on the main unit. Make sure it matches your toothbrush model.
Grab a soft cloth or microfiber towel. You will use this to dry components and prevent water damage during inspection. Avoid paper towels since they can leave fibers inside the mechanism.
Rubbing alcohol is highly useful for cleaning. It removes toothpaste buildup and moisture from the shaft area. This simple step prevents corrosion and helps you see damage more clearly. Let alcohol evaporate completely before reassembling anything.
A magnifying glass or flashlight helps you spot tiny cracks. Shafts often have hairline fractures that are hard to see with the naked eye. Better visibility means better repairs.
Keep a small container of lubricating grease nearby. This material reduces friction between moving parts and can extend shaft life. Use only a tiny amount since excess grease attracts dust.
Finally, have a replacement shaft assembly ready if needed. Some toothbrushes allow you to swap just the shaft without replacing the entire handle. Check your manual first to see if this option exists for your model.
Organize all materials on a clean, flat surface before you begin. This prevents losing small parts and keeps your workspace tidy. Working methodically with proper tools makes the repair process much smoother and more successful.
Step-by-Step Guide to Fixing a Snapped Shaft
Start by turning off your electric toothbrush and removing the battery if possible. This keeps you safe while working with the device.
Examine the shaft closely under good lighting. Use your flashlight or magnifying glass to identify exactly where the damage occurs. Look for hairline cracks, splits, or complete breaks in the plastic or metal connector.
If the shaft is cracked but not fully broken, clean the area thoroughly with rubbing alcohol and a soft cloth. Let it dry completely for several minutes. This removes any debris that might prevent a proper repair.
For minor cracks, apply a small amount of epoxy adhesive designed for plastic or metal to the damaged section. Follow the product instructions carefully for mixing and application time. Hold the pieces together firmly for the recommended duration, usually between 5 to 10 minutes.
Once the adhesive sets, test the connection gently. Insert and remove the brush head a few times to ensure the shaft holds properly. The repair should feel secure without wobbling.
If the shaft is completely snapped, you’ll need a replacement shaft assembly. Carefully remove the broken piece from the handle using gentle twisting motions. Avoid forcing it, as you might damage the internal mechanism.
Install the new shaft by aligning it with the connection point inside the handle. Push it in slowly until you hear or feel a click, indicating proper seating.
After any repair, let your toothbrush rest for 24 hours before using it. This allows adhesives to cure fully and ensures the connection strengthens properly. Test it briefly before returning to normal brushing.
Monitor the repaired area during your next few uses. Watch for any wobbling or unusual sounds that might indicate the repair needs reinforcement.
Tips to Prevent Future Shaft Breakage
Preventing shaft breakage starts with how you handle your electric toothbrush every single day. Avoid applying excessive pressure when brushing your teeth. Many people push too hard thinking it cleans better, but this strains the shaft connection. Let your toothbrush do the work instead.
Store your toothbrush upright in a dry holder when not in use. Laying it flat or storing it in damp environments causes corrosion that weakens the shaft over time. Keep it away from extreme temperatures and direct sunlight.
Handle the brush head gently when inserting or removing it. Don’t twist it forcefully or yank it out with sudden movements. A slow, steady motion protects the connection point from stress fractures.
Rinse your toothbrush thoroughly after each use. Water and toothpaste residue accumulate around the shaft area and create buildup that damages the connection. Use a soft cloth to dry the connection zone completely.
Check your brush head regularly for signs of wear. Replace it before problems develop rather than waiting for complete failure. Most manufacturers recommend changing brush heads every three to four months.
Keep the charging contacts clean and dry. Moisture around these areas can seep into the shaft assembly and cause internal corrosion. Wipe the contacts with a dry cloth before charging.
Avoid dropping your toothbrush or exposing it to physical impacts. Even small falls can create internal cracks that spread over time. Store it safely away from edges where it might accidentally fall.
Use only compatible replacement brush heads designed for your specific model. Incompatible heads create poor connections that stress the shaft unnecessarily. Check your user manual for approved replacement options.
These simple habits dramatically extend your toothbrush’s lifespan.
Common Mistakes When Repairing Toothbrush Shafts
Many people damage their electric toothbrush shafts while trying to fix them. Applying too much force is the biggest mistake. You might think pressing harder will help the adhesive bond better, but excessive pressure actually cracks the plastic further.
Another common error is using the wrong adhesive type. Standard superglue doesn’t work well on toothbrush materials. It hardens too quickly and creates brittle bonds that snap easily under normal brushing pressure.
People often skip the cleaning step before repairs. Dirt, toothpaste residue, and mineral buildup prevent adhesives from sticking properly. Your bond will fail within days if you skip this critical preparation.
Rushing the drying time causes many repair failures. You might think your adhesive is ready after 10 minutes, but most epoxy products need several hours to cure fully. Using your toothbrush too soon weakens the repair.
Ignoring misalignment issues is another frequent mistake. When you reattach a brush head, the shaft must sit perfectly straight. Even slight angles create stress points that break again quickly.
Some people reuse damaged shafts instead of replacing them. A shaft with internal cracks will fail again, even with adhesive. Replacement is often your better option for lasting results.
Forgetting to test gently after repairs is risky too. You should check your connection carefully before normal brushing. Apply light pressure first to confirm the bond holds.
Finally, many people don’t inspect their toothbrushes regularly afterward. Small cracks develop into big problems fast. Check your shaft weekly for new damage signs during the first month after repair.
Troubleshooting Persistent Snapping Issues
When your electric toothbrush shaft keeps snapping despite previous repairs, you need a different approach. Persistent snapping signals deeper problems that simple fixes won’t solve.
First, check if you’re using the correct brush head model. Incompatible heads create extra stress on the shaft connection point. The shaft flexes more than it should, leading to repeated breaks. Verify your toothbrush model number and confirm you have the right replacement heads.
Next, examine your storage habits. Storing your toothbrush horizontally or in damp environments weakens the shaft over time. Moisture seeps into connection points and causes material degradation. Always store your toothbrush upright in a dry location away from humidity.
The charging dock matters too. If your dock is loose or damaged, it may cause vibration issues during charging. This constant movement stresses the shaft connection. Check that your toothbrush sits securely in the dock without wobbling.
Consider your brushing technique. Applying excessive pressure while brushing forces the shaft to bend beyond its design limits. Hold your toothbrush at a 45 degree angle and let the vibrations do the work. Gentle pressure prevents unnecessary strain.
If snapping continues after these checks, your toothbrush handle itself may be damaged. Internal cracks in the handle transfer stress directly to the shaft. In this case, replacement becomes your best option rather than repeated repairs.
Finally, inspect your replacement shafts before installation. Sometimes defective shafts come from the factory. Test the connection loosely first before fully assembling everything. This simple step catches faulty parts immediately and saves you frustration later.
When to Consider Professional Repair or Replacement
Sometimes your electric toothbrush shaft breaks repeatedly despite your repair efforts. This situation tells you something important: professional help or replacement might be your best option.
When to seek professional repair services: If your toothbrush is relatively new and still under warranty, contact the manufacturer first. They often repair or replace broken units at no cost. Professional technicians have access to genuine parts and specialized tools that home repairs cannot match.
Consider professional repair if the handle itself shows cracks or damage. A damaged handle means the internal structure may be compromised. This creates ongoing stress on any new shaft you install. Professionals can assess whether the entire unit needs replacement instead.
Signs that replacement makes more sense: If your toothbrush is several years old, repair costs might equal replacement costs. Older models also have fewer compatible parts available. Buying a new toothbrush often costs less than multiple repair attempts.
Check if your model is still in production. Discontinued models have limited replacement parts. You may struggle to find compatible shafts even if you want to repair it yourself.
Making your decision: Calculate the total time and money spent on repairs. If you’ve already attempted fixes twice, professional evaluation saves frustration. Many repair shops offer free diagnostics that tell you exactly what’s wrong.
Contact the manufacturer’s customer service department first. They provide guidance on warranty coverage and authorized repair centers near you. Some companies offer mail in repair services that are surprisingly affordable.
The practical reality: Electric toothbrushes are designed for regular replacement. After multiple shaft failures, accepting that replacement is necessary often brings better results than endless repair cycles. A new toothbrush works reliably and comes with a fresh warranty.
Final Thoughts
A snapped brush head shaft feels frustrating. But now you know how to handle it with confidence.
Small fixes often solve the problem. Clean the shaft, apply the right adhesive, and let it dry fully. These steps make a real difference.
Remember that patience matters more than speed. Rushing leads to weak bonds and repeated breaks. Take your time during every repair step.
Regular inspection keeps small cracks from becoming big problems. Check your toothbrush shaft every few weeks. Catching damage early saves you time and money.
If repairs keep failing, don’t force a fix. Sometimes the handle or shaft is simply worn out. Replacing the part is often smarter than repeating a bad repair.
Your safety comes first too. A wobbly or unstable brush head can hurt your gums. Always test your toothbrush gently before full use.
Think about the bigger picture as well. Weigh repair costs against buying a new head or handle. Sometimes replacement is the more practical choice.
Manufacturer support can guide you when you feel unsure. Reach out if your toothbrush is under warranty. They can offer solutions you might not have considered.
Every toothbrush has a lifespan. Understanding this helps you set realistic expectations for repairs. Not every shaft can be saved forever.
With the right knowledge, you can extend your toothbrush’s life. You can also know when it’s time to let go. This balance keeps your oral care routine smooth and stress free.
Trust your judgment. You now have the tools to decide wisely. Whether you repair or replace, you’re making an informed choice for your dental health.
Frequently Asked Questions
Why does my brush head shaft keep snapping after I fix it?
Repeated snapping usually means the root cause wasn’t addressed. Check if you’re using the correct brush head model for your handle. Wrong models create extra stress on the shaft during vibration. Also review your brushing pressure. Pressing too hard forces the shaft to bend repeatedly until it breaks again.
Your storage method matters too. Keep your toothbrush upright in a dry place. Storing it horizontally or in humid areas weakens the shaft over time. The charging dock itself could be the culprit. If your dock wobbles or feels loose, vibrations during charging can cause micro fractures that eventually lead to snapping.
Can I prevent my brush head shaft from snapping in the first place?
Yes. Gentle brushing technique is your best defense. Let the toothbrush do the work instead of applying heavy pressure. You should use light circular motions, not aggressive scrubbing.
Handle your toothbrush carefully when inserting and removing the brush head. Twist slowly and avoid forcing the head into place. Store it properly in an upright position where it won’t get knocked over. Keep it away from extreme heat or cold, which makes plastic brittle.
Inspect your brush head regularly for small cracks. Catching damage early prevents complete shaft failure later.
What’s the difference between a broken shaft and a faulty handle?
A broken shaft snaps cleanly at the connection point. You can see the fracture where the head meets the handle. A faulty handle shows cracks, loose parts, or visible damage to the main body itself.
If your handle is cracked or damaged, repairs won’t help. The internal components may be compromised. Replacement becomes your only real option in this case.
Should I repair or replace my toothbrush?
Consider your toothbrush’s age first. If it’s only a year or two old, repair makes sense. Older models from five years ago might cost more to fix than replace.
Check if your model is still being produced. Discontinued models are harder to get parts for. Contact the manufacturer’s customer service team for guidance on your specific situation.

Hi, I’m Minnie Cole, the creator of The Output Lab — a space where I share my passion for all things tech. I spend my days exploring the latest gadgets, devices, and electronics on Amazon, putting them through real-world testing so you don’t have to.