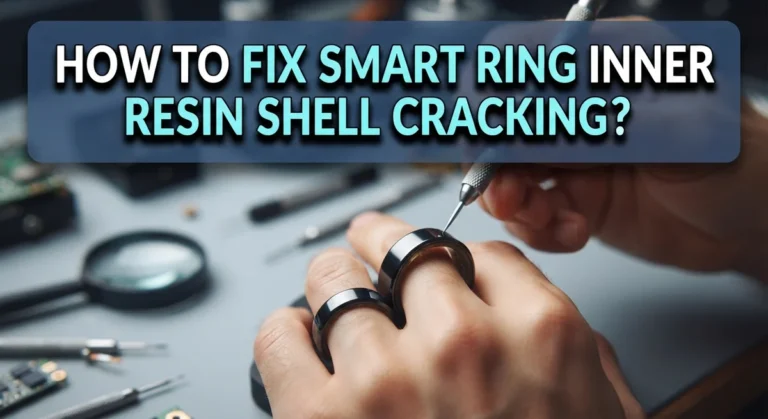
How To Fix Dead Pixels On A Secondary Laptop ScreenPad?
Your secondary laptop ScreenPad just showed a tiny black dot. You stare at it. You blink. The dot stays.
That little spot is likely a dead pixel, and it can ruin your workflow on devices like the ASUS ZenBook Duo or ZenBook Pro. The good news is that you can often fix it at home with simple tools and free software.
This guide walks you through every working method. You will learn how to spot the problem, test your screen, and apply fixes that actually work. Let us bring your ScreenPad back to life.
Key Takeaways
- Identify the problem first. A dead pixel stays black on every color. A stuck pixel shows one color, like red, green, or blue. The fixes for each are different, so testing matters.
- Software fixes work best on stuck pixels. Tools like JScreenFix, PixelHealer, and DeadPix flash rapid colors to wake the pixel back up. Most sessions take 10 to 30 minutes.
- The pressure method can revive stuck pixels. A soft damp cloth and light finger pressure on the spot can shift the liquid crystals back into place. Use gentle force only.
- Heat and tapping methods carry risk. They sometimes work on the ASUS ScreenPad Plus, but they can also crack the panel. Always weigh the risk against the cost of a screen replacement.
- Driver updates fix fake dead pixels. Sometimes the ScreenPad shows ghost spots due to outdated ScreenXpert or graphics drivers. Update them before opening any tools.
- Warranty is your best friend. If your laptop is new and has multiple dead pixels, contact ASUS support before trying any DIY fix.
What Is A Dead Pixel On A Secondary Laptop ScreenPad
A dead pixel is a tiny dot on your screen that no longer lights up. It looks like a small black speck, even when the rest of the display works fine. On a secondary ScreenPad, these dots show up more because the panel sits closer to your eyes.
Each pixel on your ScreenPad has three sub pixels: red, green, and blue. When all three fail, the pixel turns black. When one or two get stuck, the pixel shows a strange color. Dead pixels are usually a hardware fault, while stuck pixels are software fixable in many cases.
Knowing the type helps you pick the right repair path. So always test first before you try any method.
How To Tell If Your Pixel Is Dead Or Stuck
You need a clear test before you start any fix. Open a full screen image of solid colors: white, black, red, green, and blue. You can use free websites like LCDtech or Eizo Monitor Test for this check.
Move the image to your ScreenPad and look closely. If the pixel stays black on every color, it is dead. If the pixel glows bright on the black screen or stays one color across all backgrounds, it is stuck.
Stuck pixels respond well to repair tools. Dead pixels rarely come back. This single test saves you hours of wasted effort and points you to the right method right away.
Pros: Quick, free, and accurate.
Cons: Needs good lighting and patience to spot small dots.
Restart Your Laptop And Update ScreenPad Drivers
Sometimes the dot is not a real dead pixel at all. A glitch in the ASUS ScreenXpert software or a frozen frame can leave a fake mark on your secondary display. A quick restart often clears it.
Press Windows + Ctrl + Shift + B to reset the graphics driver without rebooting. If the spot stays, restart your laptop fully. Then go to the ASUS support page and download the latest ScreenXpert and ScreenPad drivers for your model.
Install them, reboot, and check the spot again. Driver updates fix more ScreenPad issues than people realize. This step costs nothing and takes about 10 minutes.
Pros: Free, safe, and fast.
Cons: Will not fix true hardware faults.
Use JScreenFix To Repair Stuck Pixels
JScreenFix is one of the most trusted free tools for stuck pixel repair. It runs in your browser, so you do not have to install anything. The site flashes hundreds of colors per second over a small area to shock the pixel back into action.
Open JScreenFix in your browser. Drag the flashing square onto your ScreenPad. Place it directly over the stuck pixel. Leave it running for at least 10 minutes. Many users report success in under 30 minutes.
The method works because the rapid color cycling forces the liquid crystals to move again. If your pixel does not respond after an hour, try a second session later.
Pros: Free, browser based, and works on most panels.
Cons: Only helps stuck pixels, not dead ones.
Try PixelHealer For Targeted Pixel Recovery
PixelHealer is a small free program for Windows. It lets you place a flashing window exactly over the bad pixel. You can resize the window and pick custom flash speeds for stronger results.
Download PixelHealer from the official CodeDead site. Run the program without installing. Drag the colored box over the stuck pixel on your ScreenPad. Click Start Flashing and wait 20 to 30 minutes.
You should look away while it runs because the flashing can strain your eyes. Repeat the session two or three times if needed. Many ASUS ZenBook Duo owners have brought back stuck pixels using this tool.
Pros: Free, lightweight, and easy to control.
Cons: Bright flashing can cause headaches; not for people with photosensitivity.
Apply The Pressure Method With Care
The pressure method is an old trick that still works for some stuck pixels. The idea is to gently push the liquid crystals back into the correct spot under the glass.
Turn off your ScreenPad first. Take a soft microfiber cloth and dampen it lightly. Place the cloth over the stuck pixel. Press the spot with your fingertip using light, even pressure for about 10 seconds.
Turn the screen back on while still pressing. Release slowly and check the result. Never use a hard object like a pen or coin, as that can crack the ScreenPad glass.
Pros: No tools or software needed.
Cons: Risk of new damage if you press too hard.
Use The Tapping Method As A Last Resort
The tapping method works like the pressure method, but with small taps instead of steady force. It can shift trapped liquid crystals when pressure alone fails.
Display a black image on your ScreenPad. Find the stuck or dead pixel. Take a soft eraser tip or a capped pen wrapped in cloth. Tap the spot lightly, about 5 to 10 times.
Check after each round of taps. If the pixel changes color or comes back, stop right away. Continue only if there is no progress and no new damage.
This method is risky on a thin secondary display. Use it only if other methods have failed and you accept the risk of cracking.
Pros: Sometimes revives stubborn stuck pixels.
Cons: High chance of permanent damage if done wrong.
Run A Dead Pixel Test Video On Loop
YouTube hosts many dead pixel fixer videos that run for several hours. They cycle through red, green, blue, white, and black at high speed. The effect is similar to JScreenFix but covers your full ScreenPad screen.
Search for a video labeled stuck pixel fixer 10 hours on YouTube. Play it full screen on your ScreenPad. Let it run for at least one hour, or overnight if possible.
The non stop color change can force stuck sub pixels to reset. Keep your laptop cool and plugged in while the video runs. This is a hands off method that works while you sleep or work elsewhere.
Pros: Free, easy, and runs unattended.
Cons: Uses battery and may stress the panel over long sessions.
Try The UDPixel Software For Older Laptops
UDPixel, also called UndeadPixel, is a free Windows tool made for older laptops and monitors. It includes two modes: one to locate dead pixels and one to fix stuck ones with flashing dots.
Download UDPixel from a trusted source. Launch the program and click Start under the locator. Move the flashing dot over the bad pixel on your ScreenPad. Leave it running for at least 30 minutes.
The flashing dot is smaller than JScreenFix, so you can target one pixel without affecting the rest. This tool works well when the bad pixel sits near the screen edges where larger flashing windows feel awkward.
Pros: Precise targeting and free to use.
Cons: Older interface and Windows only.
Adjust Refresh Rate And Color Settings
Sometimes the issue is not a real dead pixel but a refresh rate mismatch. The secondary ScreenPad may run at a different rate from your main screen, causing tiny flicker spots.
Right click your desktop and pick Display settings. Scroll to Advanced display. Select your ScreenPad from the drop down. Match its refresh rate to your main display, usually 60 Hz.
Then open the ASUS ScreenXpert app and reset color calibration. A wrong color profile can make normal pixels look broken. Resetting these settings often clears ghost dots and color glitches on the ASUS ScreenPad Plus without any extra tools.
Pros: Built into Windows, no downloads.
Cons: Will not help true hardware faults.
Warm The Screen Gently To Loosen Crystals
A mild heat method can sometimes help when crystals freeze in place. Warmth makes the liquid crystals more flexible, which lets them move back to position.
Turn off your laptop first. Place a warm, not hot, soft cloth over the affected area for 2 to 3 minutes. Never use a hair dryer directly, as concentrated heat can warp the ScreenPad layers.
Turn the laptop back on and check the pixel. You can pair this with the pressure method for better results. Heat works best with stuck pixels that have been there for a long time.
Pros: Simple and uses no tools.
Cons: Heat damage risk if temperature is too high.
When To Contact ASUS Support For Repair
If none of the home methods work, it is time to call in the experts. Most ASUS laptops come with a zero bright dot policy during the warranty period. This means ASUS may replace your ScreenPad for free if it has visible dead pixels.
Check your warranty status on the ASUS website. Take a clear photo of the dead pixel with a solid background. Open a support ticket and explain the issue. Mention the number of dead pixels and where they sit on the ScreenPad.
Doing this before any DIY attempt is smart, because heavy pressure or heat can void your warranty if ASUS spots the damage.
Pros: Free repair if under warranty.
Cons: Out of warranty fixes can be costly.
How To Prevent Dead Pixels In The Future
Prevention beats repair every time. Dead pixels often appear from heat, pressure, or rough handling. A few good habits can keep your ScreenPad clean for years.
Always close your laptop with no objects on the keyboard or ScreenPad. Even a small crumb can press on the panel when shut. Clean your screen with a microfiber cloth and screen safe spray, never paper towels.
Keep your laptop in a padded sleeve when traveling. Avoid leaving it in hot cars or direct sunlight, since heat is one of the top causes of pixel failure. Regular driver updates also keep the display software healthy.
Pros: Saves money and stress.
Cons: Cannot stop random factory defects.
Frequently Asked Questions
Can a dead pixel spread to other pixels on my ScreenPad?
A true dead pixel does not spread on its own. But if the cause is liquid damage or pressure, more pixels nearby may fail over time. Watch the spot for a few weeks. If new bad pixels appear, contact ASUS support, as the panel may have a deeper fault.
How long should I run JScreenFix on my secondary screen?
Run it for at least 10 minutes the first time. If the pixel does not respond, run a second session for 30 minutes. Some users have left it on for several hours overnight with success. There is no harm in long sessions as long as your laptop stays cool.
Will pressing on my ScreenPad void the warranty?
It can, if you cause visible damage. Light pressure with a soft cloth rarely leaves marks. But hard pressing or tapping can crack the panel, and ASUS technicians can spot the damage. Always try software methods first while your laptop is still under warranty.
Are dead pixels common on the ASUS ZenBook Duo ScreenPad Plus?
They are not common, but they do happen. The ScreenPad Plus is a high density touch panel, which makes any defect more visible. Most reports involve one or two stuck pixels, not full dead ones. ASUS handles these cases under their bright dot policy.
Can I replace just the ScreenPad without replacing the main screen?
Yes, but only through an authorized ASUS service center. The ScreenPad is a separate panel with its own ribbon cable. DIY replacement is risky because you can damage the hinge or the touch layer. Always let a trained technician handle it.
Do stuck pixel fixer apps work on OLED ScreenPads?
Yes, but with care. OLED screens are more prone to burn in from long flashing sessions. Limit your fixer runs to 15 or 20 minutes at a time on OLED panels. JScreenFix officially supports both LCD and OLED, but shorter sessions are safer for OLED ScreenPads.
Hi, I’m Minnie Cole, the creator of The Output Lab — a space where I share my passion for all things tech. I spend my days exploring the latest gadgets, devices, and electronics on Amazon, putting them through real-world testing so you don’t have to.