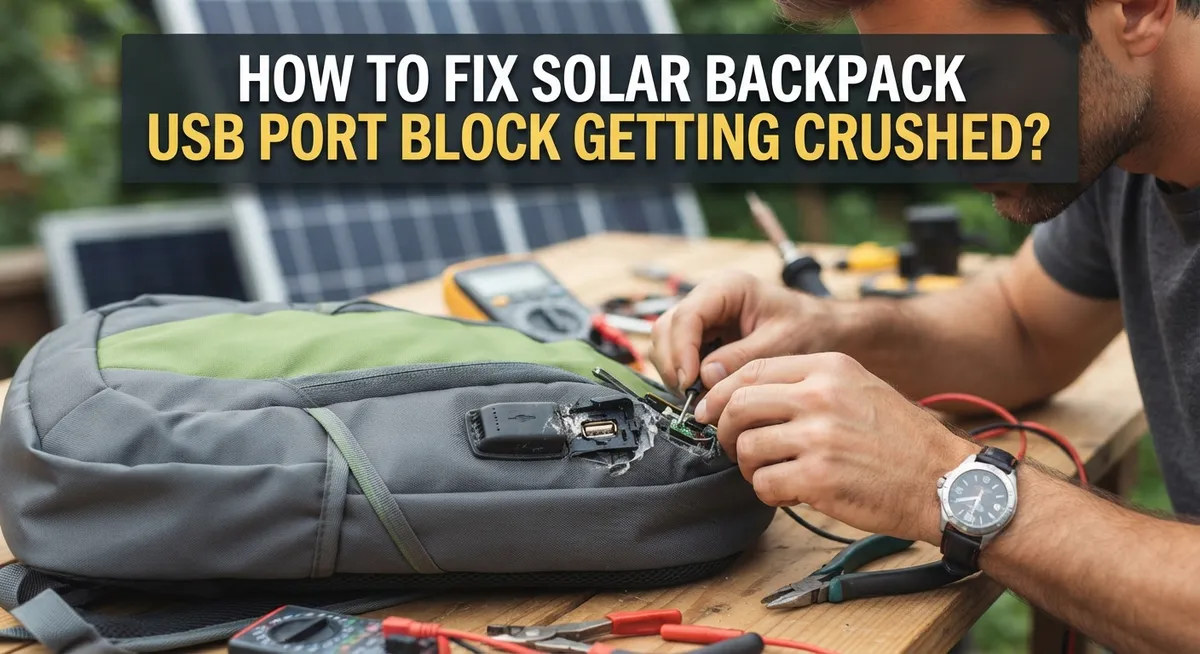
How To Fix Solar Backpack USB Port Block Getting Crushed?
Your solar backpack keeps your gadgets charged on the go. But what happens when the USB port gets crushed or stops working? This small problem can turn your backpack into a useless bag.
A crushed USB port usually happens from heavy pressure, rough handling, or years of wear. The good news? You do not need to throw away your backpack. Many port issues can be fixed at home with simple tools.
This guide walks you through the entire repair process. You will learn how to open your backpack safely and find the damaged port. We cover the tools you need, like screwdrivers and thermal paste.
In a Nutshell
- Check the damage first. Open the backpack panel and look closely at the port. This tells you if you need a simple fix or a full replacement.
- Gather basic tools. You will need a small blade, a screwdriver set, and some thermal paste. These handle most repair jobs.
- Disassemble carefully. Remove screws slowly and keep track of small parts. This step protects the rest of your solar charger from extra damage.
- Repair or replace the port. Minor crushing often allows resoldering. Severe crushing usually means you should replace the whole port.
- Apply thermal paste properly. This step keeps your circuit board cool during use. Skipping it can shorten the life of your repair.
- Reassemble with care. Loose screws or misaligned panels can cause the same problem again. Take your time putting everything back together.
Why Solar Backpack USB Ports Get Crushed
USB ports on solar backpacks face constant pressure from everyday use. Your backpack gets shoved into car trunks, dropped on floors, and crammed into tight spaces. Each impact puts strain on the small USB connector inside.
The micro USB port design is fragile by nature. The connector sits slightly recessed in the backpack’s charging module. When you push cables in and out repeatedly, the internal solder joints weaken over time. Heavy pressure from the backpack’s weight or external impacts can bend the port’s metal frame.
Moisture also plays a major role in port failure. Solar backpacks spend time outdoors in rain, humidity, and extreme temperatures. Water seeps into the USB compartment and corrodes the metal contacts. This corrosion creates loose connections that feel crushed even though the port structure remains intact.
Loose connections feel like crushing damage because the cable no longer fits snugly. The port’s internal pins separate from their solder joints. Your charger cable sits too loosely in the opening, making contact difficult or impossible.
Cable strain is another common cause. You might bend the USB cable at sharp angles while charging. This bending transmits force directly to the port’s internal components. The port itself doesn’t physically crush, but the solder joints crack and separate.
Poor backpack design contributes to the problem too. Some solar backpacks have USB ports positioned where they absorb direct impact. Others lack protective covers or reinforced port housings. These design flaws make the port vulnerable to crushing from normal use.
Understanding these causes helps you prevent future damage. You’ll know which behaviors stress your USB port most and how to handle your solar backpack more carefully going forward.
Tools and Materials You’ll Need
Before you start fixing your solar backpack USB port, gather the right tools. Having everything ready makes the repair smooth and prevents frustration.
A small blade or knife helps you carefully pry open the backpack casing without damaging it. Use gentle pressure to avoid scratching the material. A plastic pry tool works even better if you have one available.
Screwdrivers in multiple sizes are essential. Most solar backpacks use Phillips head screws, but some models have flathead or specialty screws. A precision screwdriver set gives you options for small fasteners inside the unit.
Thermal paste becomes important when you reassemble the device. This material helps transfer heat away from sensitive components. It prevents overheating during charging cycles. Arctic MX-2 is a common option, though any quality thermal paste works fine.
You’ll also need a soldering iron and solder if the port connections are loose rather than physically crushed. These tools let you reattach wires to the port terminals. If you’ve never soldered before, this task takes practice. Steady hands and a well-lit workspace help tremendously.
A magnifying glass or headlamp makes seeing small components easier. USB ports are tiny, and proper lighting prevents mistakes.
Keep a small container nearby to hold screws as you remove them. Losing fasteners during disassembly is frustrating. Label each screw location if your backpack has different sized fasteners.
A soft cloth and isopropyl alcohol clean the port area before repairs. Dirt and debris inside the port block connections. Cleaning improves your chances of success.
Finally, have a USB cable handy to test the port after you finish repairs. Testing confirms your work before you fully reassemble everything.
Disassembling Your Solar Backpack to Access the Port
Opening your solar backpack requires patience and the right approach. Start by laying the backpack on a clean, flat surface with good lighting. This prevents you from losing small screws or damaging components.
Look for seams or edges where the casing connects. Most solar backpacks use screws hidden under fabric patches or rubber seals. Gently peel back any fabric to reveal screw locations. Take photos of the layout before you start removing anything.
Use the appropriate screwdriver size to avoid stripping screw heads. Strip screws are nearly impossible to remove later. Work slowly and apply steady pressure rather than forcing the tool. Remove all screws and place them in a small container labeled by location.
Once screws are out, carefully pry the casing apart using a plastic tool or old credit card. A metal blade works too, but it can scratch the surface. Start at a corner and work your way around the edges. The casing may have clips inside that hold it together, so be gentle.
Take your time during this step to avoid cracking the plastic or damaging internal wiring. Some backpacks have multiple layers you need to separate. Remove protective layers carefully to expose the USB port area.
When you can see the port clearly, examine the damage closely. Look for bent pins, loose connections, or physical crushing. Use a magnifying glass if needed. This inspection determines whether you can repair the port or need to replace it entirely.
Keep all removed parts organized. You’ll need to reassemble everything later, so knowing where each piece goes matters. Store screws separately by size to make reassembly easier.
Step-by-Step: Repairing or Replacing the Crushed USB Port
Once you have access to the damaged USB port, you need to decide whether to repair or replace it. Examine the port closely under good lighting to understand the full extent of the damage.
If the port is slightly bent or loose, you may be able to resolder the connections. Use a soldering iron to heat the joints gently. Apply fresh solder to reconnect any loose wires. This method works best when the physical structure remains intact.
For severely crushed ports, replacement is your better option. Carefully desolder the old port by heating each connection point. Remove the damaged port completely from the circuit board. Clean any old solder residue using solder wick or a desoldering pump.
Install the new port carefully by aligning it properly with the circuit board holes. Solder each connection point securely. Work slowly to avoid creating cold joints that fail later. Let the solder cool completely before testing.
If you prefer not to solder, consider a custom solution. Some people design 3D printed port blocks that hold loose cables firmly in place. This approach works well for ports that are worn but not completely broken.
After completing either repair or replacement, test the connection before reassembling. Plug in your charging cable and verify power flows correctly. Check that the cable sits snugly without wiggling.
Once testing is successful, proceed with reassembly. Apply thermal paste to any heat generating components. Align the casing carefully and reinstall all screws. Tighten them evenly to avoid cracking the plastic.
Your solar backpack should now function properly again. Monitor the port during regular use to catch any new problems early.
Reassembling the Unit and Applying Thermal Paste Correctly
Reassembling your solar backpack requires careful attention to detail. Start by checking that your new or repaired USB port sits flush against the circuit board. The port should align perfectly with all connection points before you proceed further.
Apply thermal paste to the areas where the circuit board meets the backpack casing. This paste helps transfer heat away from sensitive components. Use a small amount—about the size of a pea—on each corner of the circuit board. Spread it evenly with a plastic spreader or old credit card to create a thin, uniform layer.
Position the circuit board back into the casing carefully. Make sure no wires get pinched or twisted during this step. Check that the USB port opening aligns with the hole in the backpack exterior. Misalignment here will cause problems when you try to plug in your devices later.
Reinsert all screws in their original locations. Tighten them gently in a crisscross pattern to apply even pressure across the casing. Avoid over tightening, as this can crack the plastic or damage the circuit board.
Once the casing is fully closed, wipe away any excess thermal paste from the exterior with a soft, dry cloth. Let the thermal paste cure for a few hours before using your backpack. This waiting period allows the paste to set properly and create an effective heat barrier.
Test the USB port with a compatible charging cable before taking your backpack outside. Plug in your device and confirm that power flows correctly. If everything works as expected, your repair is complete and your solar backpack is ready for use again.
Designing a Custom 3D-Printed Port Block for a Permanent Fix
A custom 3D printed port block offers a practical solution for loose or worn USB ports that don’t need full replacement. This approach protects your port from further damage and extends your backpack’s life.
Start by modeling the receiver component first. This is the female part that accepts your charging cable. Measure your existing port carefully with calipers to get accurate dimensions. Record the width, depth, and height of the port opening. Take photos from multiple angles to reference while designing.
Use free design software to create your port block model. The block should fit snugly around your existing port without covering the connection points. Make the walls thick enough to provide support, typically 2 to 3 millimeters. Add small notches or guides so the block aligns correctly each time you insert it.
Before printing your design, test it on paper first. Cut out a template and hold it against your backpack port. Does it cover the right areas? Will it interfere with your charging cable? Make adjustments before committing to a print.
Print your port block using durable material like PETG or ABS plastic. These materials resist wear better than standard PLA. Print with high infill density, around 80 to 100 percent, for maximum strength.
Once printed, test fit the block on your port. Sand any rough edges with fine grit sandpaper if needed. Apply a small amount of flexible adhesive to attach it permanently. Avoid super glue, which can crack plastic. Instead, use epoxy or flexible plastic cement for better durability.
Let the adhesive cure fully before using your backpack. Your custom port block now provides extra protection against crushing and accidental damage.
Common Mistakes to Avoid During Repair
When repairing a crushed USB port on your solar backpack, certain mistakes can make the damage worse. Understanding what to avoid saves you time and money.
Do not rush the disassembly process. Many people force open the backpack casing, which damages surrounding components. Take your time removing screws and gently prying apart the panels. Keep each screw in a labeled container so you know exactly where each one belongs during reassembly.
Avoid touching the circuit board with bare hands. Oils from your skin can interfere with electrical connections and cause future failures. Wear clean gloves or use a grounding strap when working near the port and wiring.
Never apply excessive force when removing the old port. If you’re replacing it, gentle heat from a tool can help loosen solder connections. Aggressive pulling can tear the circuit board traces, creating irreparable damage that spreads beyond the port itself.
Do not skip the testing phase. After repair or replacement, always test the port with a compatible charging cable before fully reassembling the backpack. This catches problems early when the unit is still open and accessible.
Avoid reassembling without cleaning first. Dust and debris inside the casing can cause shorts or block airflow. Use a soft brush or compressed air to remove particles from all internal surfaces.
Do not forget about thermal paste application. Skipping this step or applying too much can cause overheating issues. Use only the recommended amount in the specified areas where the circuit board contacts the casing.
Finally, avoid reusing damaged connectors or cables. If your charging cable is bent or crushed alongside the port, replace it. Using a damaged cable with your newly repaired port defeats the entire repair effort.
Troubleshooting: Repair vs. Replace Decisions
When your solar backpack’s USB port gets crushed, you face a key decision: repair it yourself or replace the entire unit. Understanding when each option makes sense saves you time and money.
Minor damage often calls for repair. If the port still connects but feels loose or slightly bent, a home fix works well. You can resolder loose connections or design a custom protective block. These repairs take a few hours and cost very little. The port remains functional after treatment.
Severe crushing usually means replacement. When the port is completely flattened or broken into pieces, repair becomes risky. Attempting to fix severely damaged ports can harm nearby circuit board components. Heat from soldering tools might damage other parts. Replacement becomes the safer choice in these cases.
Consider your skill level too. Basic soldering and simple disassembly are manageable for most people. However, if you’ve never opened electronics before, start with easier repairs like protective port blocks. These require no soldering at all.
Think about the backpack’s age. Older solar backpacks with crushed ports might not be worth extensive repair work. Newer models with multiple features justify the effort and cost of port replacement or repair.
Check if your warranty still covers damage. Some solar backpacks include repair coverage that makes replacement free or cheap.
Start by assessing the actual damage level. Gently examine the port without forcing anything. Take clear photos to review later. This inspection helps you decide confidently between repair and replacement options.
Final Thoughts
A crushed USB port does not mean your solar backpack is done for. You can fix it with patience and the right tools.
Small fixes often solve the problem. A loose port or bent pin needs simple repair steps. You already know these steps now.
Severe damage calls for a different approach. Full replacement makes sense when the port breaks apart completely. This saves you time and frustration.
Remember to check your damage level first. This decision guides every step after that. It also saves you from wasted effort.
Custom 3D printed blocks give you a lasting fix. They work great for ports that feel loose but still function. This option costs less than full replacement in most cases.
Testing your work matters just as much as the repair itself. Always plug in a cable before you head outside. This simple check confirms your fix actually works.
Avoid rushing through any repair stage. Take your time with disassembly and reassembly. Rushed work often leads to more damage later.
Clean components before you put them back together. Apply thermal paste where needed. These small details make a big difference in how long your repair lasts.
Your solar backpack can work like new again. The port that once seemed broken can power your devices reliably. All it takes is careful attention and the right approach.
Trust your assessment of the damage. Pick the repair method that fits your situation. Then take action with confidence, knowing you have the knowledge to succeed.
Frequently Asked Questions
Can I repair a crushed USB port myself or should I replace it?
This depends on the damage level. If your port feels loose but still connects, a home repair works well. You can resolder connections or use a custom 3D printed block to stabilize it.
Severe crushing calls for replacement. When the port is completely flattened or broken into pieces, repair becomes difficult. Consider your own skill level too. If you feel unsure about working with small electronics, replacement might be the safer choice.
What tools do I actually need to fix a crushed USB port?
You need just a few basic items. A blade or knife helps you open the backpack casing carefully. Small screwdrivers let you access the internal components.
Thermal paste helps protect connections after you reassemble everything. That’s really all you need to get started. Most people have these tools at home already.
Is it worth fixing an old solar backpack with a crushed port?
Older solar backpacks might not justify extensive repair work. Check if your warranty still covers the damage first. If repairs cost more than a replacement would, replacement makes sense.
However, if your backpack still works otherwise, a simple fix saves money. A custom 3D printed port block often solves the problem quickly.
Can I fix a Type C USB port the same way as Micro USB?
Yes, the process is similar. Type C ports follow the same repair principles as Micro USB ports. You disassemble the backpack, access the damaged port, and either resolder or replace it.
The main difference is the port size and connector shape. Type C ports are slightly larger, so your tools might need adjustment.

Hi, I’m Minnie Cole, the creator of The Output Lab — a space where I share my passion for all things tech. I spend my days exploring the latest gadgets, devices, and electronics on Amazon, putting them through real-world testing so you don’t have to.