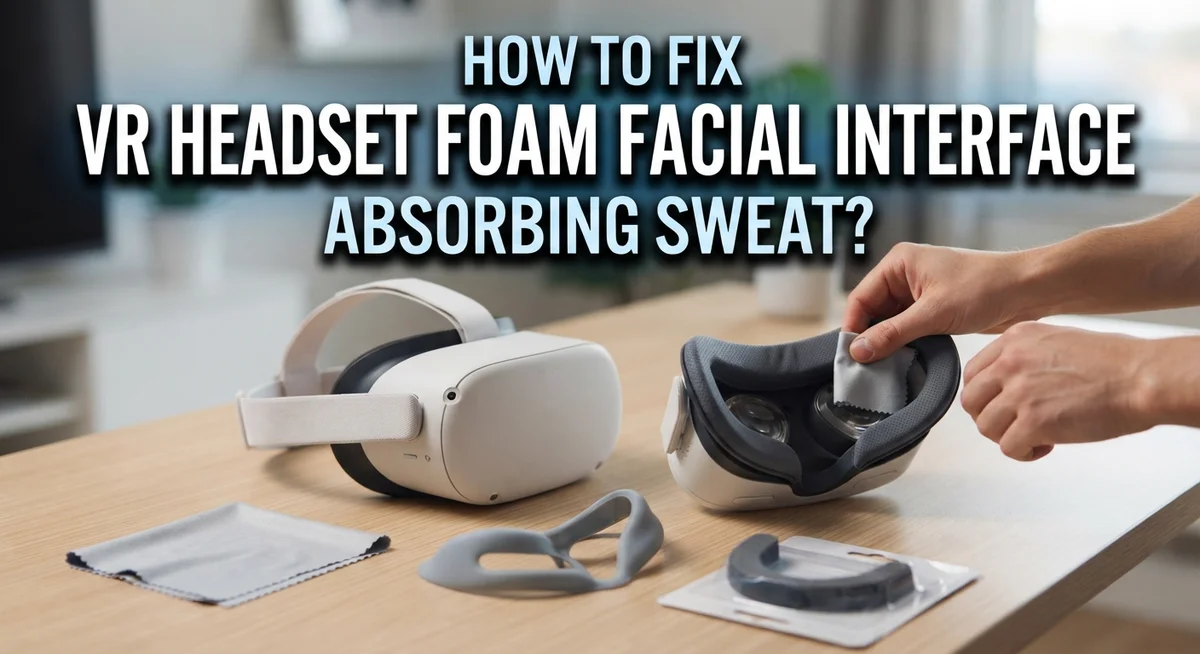
How To Fix VR Headset Foam Facial Interface Absorbing Sweat?
Sweaty VR sessions can ruin your favorite headset fast. That soft foam facial interface feels comfortable at first. But it soaks up sweat like a sponge after every gaming session.
This is a common problem for VR users everywhere. The foam padding sits directly against your skin. It traps moisture, oils, and bacteria over time.
Soon, you notice bad smells coming from your headset. The foam looks darker and feels damp even after breaks. Your straps might smell too.
This buildup does not just create odors. It can also cause skin irritation and breakouts. The foam can degrade faster, forcing you to replace it sooner than expected.
In a Nutshell
• Foam interfaces soak up sweat because they are porous and cannot dry fast.
• Switching to a silicone facial interface is one of the easiest fixes since silicone repels moisture instead of absorbing it.
• You can also add a washable cover over your foam pad. This adds a barrier between your skin and the material.
• Cleaning your headset after every session helps stop bacteria growth and bad smells. A simple wipe down with a damp cloth works well.
• Letting your headset air dry between uses gives trapped moisture time to escape. Avoid sealing it in a bag right after playing.
• Some users choose moisture wicking covers made from sweat resistant fabric. These pull sweat away from your skin during long sessions.
• Regular maintenance, like swapping out worn foam, keeps your headset comfortable and hygienic for longer.
Why VR Foam Interfaces Absorb Sweat
Foam facial interfaces absorb sweat because of their physical structure. The material contains tiny air pockets throughout. These pockets trap moisture instead of letting it escape.
When you wear a VR headset, your face generates heat and perspiration. The foam acts like a sponge. It pulls sweat away from your skin and holds it inside the material. This happens quickly during active games or long sessions.
The problem gets worse over time. Moisture stays trapped in the foam because air cannot reach deep inside. The material dries slowly, especially in the center layers. This creates an ideal environment for bacteria to grow. Bad smells develop as bacteria multiply in the damp foam.
Different foam types absorb sweat at different rates. Standard PU foam, commonly used in VR headsets, is highly absorbent. Memory foam performs similarly. Both materials prioritize comfort and fit over moisture management. They conform nicely to your face but sacrifice water resistance.
Heat also plays a role in this process. Your face warms the foam, which speeds up sweat production. The combination of heat and moisture makes the problem worse. VR sessions lasting over 30 minutes increase sweat accumulation significantly.
Understanding this issue helps you take action. You now know why your foam interface smells bad and feels uncomfortable. The moisture trapped inside is not just a comfort problem. It can cause skin irritation and accelerate foam degradation. The material breaks down faster when constantly wet.
This knowledge is the first step toward fixing your headset. You can now choose the right solution based on your usage habits and comfort preferences.
Signs Your Facial Interface Needs Attention
Your VR headset sends several clear signals when the foam facial interface needs attention. Pay close attention to these warning signs so you can act before the problem gets worse.
Visible discoloration is often the first clue. Look at your foam pad during daylight. If you see dark spots, yellow stains, or areas that look darker than the rest, moisture and bacteria have started building up inside the material.
Unpleasant odors become noticeable during gameplay. If your headset smells sour, musty, or like old gym socks, the foam has absorbed too much sweat. This smell means bacteria are thriving in the moist environment.
Skin irritation after wearing your headset suggests the foam interface needs cleaning or replacement. Red marks, itching, or rashes on your face indicate bacteria and mold growth on the surface touching your skin.
A sticky or damp feeling when you put on your headset means moisture is still trapped inside. The foam should feel dry to the touch. If it feels wet or clammy, it did not dry properly since your last session.
Foam degradation shows when the material starts breaking down. If pieces of foam come off on your face or the pad feels mushy instead of firm, the structure has been compromised by sweat damage.
Increased discomfort during sessions is another warning sign. If your headset feels heavier, causes pressure points, or feels less comfortable than before, sweat absorption may have changed the foam’s shape and density.
Catching these signs early lets you clean, treat, or replace your facial interface before serious damage occurs. Check your headset regularly to stay ahead of moisture problems.
Step-by-Step: Cleaning and Drying Your Foam Interface
Start by removing your VR headset and letting it sit in a cool, dry place for at least 30 minutes. This allows surface moisture to evaporate before you begin cleaning.
Use a soft, damp cloth to gently wipe down the foam interface. Focus on areas where sweat collects most, like the forehead and cheek regions. Avoid soaking the foam since excess water pushes moisture deeper inside.
For stubborn stains or odors, mix equal parts water and white vinegar in a spray bottle. Lightly mist the foam and let it sit for 5 minutes. The vinegar kills bacteria without damaging the material. Wipe away excess liquid with a clean cloth.
Pat the foam dry with a towel using light pressure. Do not rub aggressively, as this can damage the foam structure. Leave your headset in a well ventilated area with good air circulation.
Position your headset so the foam interface faces upward or sideways. This position helps moisture escape instead of pooling in one spot. Open windows or use a fan to speed up the drying process.
Check the foam every 2 hours during the drying period. If it still feels damp after 4 hours, move it to a different location with better airflow.
Never use heat sources like hair dryers or radiators. High heat can warp the foam and damage internal components. The drying process takes patience, but proper technique prevents long term damage.
Once completely dry, inspect the foam for any remaining discoloration. If the foam still smells bad or looks stained after cleaning, replacement becomes your next option. Regular cleaning after each session prevents this situation from developing.
Using Covers and Liners to Prevent Sweat Absorption
Protective covers and liners act as a barrier between your skin and the foam interface. They stop sweat from soaking directly into the material. This simple approach works well for people who sweat heavily during VR sessions.
Covers slip over your existing foam interface like a sleeve. They catch moisture before it reaches the foam underneath. You can remove covers easily and wash them separately. This keeps your main foam interface dry and clean for much longer.
Liners work differently than covers. They sit between your face and the foam. Liners are thin and comfortable. They absorb sweat instead of letting it pass through to the foam. You replace liners more often than covers, but they cost less money.
Both options come in various materials. Some are made from cotton blends. Others use synthetic fabrics that dry quickly. Choose materials that feel comfortable against your skin. Avoid anything too thick, as it can affect your VR fit and visibility.
Installation takes just seconds. Most covers and liners attach with elastic straps or adhesive strips. Check that they sit flat and don’t shift during gameplay. Wrinkles or bunching can cause discomfort.
Wash your covers regularly with mild soap and water. Air dry them completely before reattaching. Replace liners every few weeks or when they show signs of wear. This routine prevents sweat from ever reaching your foam interface.
Using covers and liners also extends the life of your original foam. You avoid constant cleaning and drying cycles. Your headset stays fresher longer. This method pairs well with your existing cleaning routine. Together, they keep your VR experience comfortable and hygienic.
Adjusting Fit and Ventilation to Reduce Sweat Buildup
Your VR headset’s fit plays a huge role in how much sweat builds up in the foam. A loose headset allows your face to shift around, creating friction that generates heat and moisture. A tight headset restricts airflow and traps sweat against your skin.
Start by adjusting the head straps to find the sweet spot. The foam should touch your face evenly without pressing too hard. You should fit one finger between the strap and your head. This balance keeps the headset stable while allowing air to circulate.
Ventilation matters just as much as fit. Most VR headsets have vents designed to let air flow through. Check that nothing blocks these openings. Dust, hair, or debris can stop air from moving freely. Clear any obstructions gently with a soft brush or cloth.
Position your headset slightly away from your face if the design allows it. Some headsets have adjustable spacing mechanisms. Even a small gap helps air reach the foam interface. This simple change reduces moisture buildup significantly.
Wear your headset in cool environments when possible. Warm rooms cause more sweating. If you’re gaming in a hot space, use a fan nearby to improve air circulation around your head.
Take breaks during long sessions. Remove your headset every 20 to 30 minutes. This gives the foam time to dry and your skin time to cool down. Your comfort improves, and sweat absorption decreases.
Consider your clothing too. Tight hats or headbands under the headset trap heat. Wear light, breathable fabrics instead. These small adjustments work together to keep your foam interface dry and comfortable throughout your gaming sessions.
Common Mistakes That Worsen Sweat Absorption
Many VR users accidentally make their sweat problem worse without realizing it. Understanding these mistakes helps you protect your foam interface from unnecessary damage.
Wearing your headset too tightly is the biggest culprit. When you strap your headset snugly against your face, you trap heat and moisture directly against the foam. This creates a perfect environment for sweat absorption. The foam becomes saturated faster, and bacteria thrive in the damp conditions.
Skipping breaks during long sessions compounds the problem. Your face produces more sweat the longer you wear the headset continuously. Taking 10 to 15 minute breaks every hour gives your skin time to dry and reduces overall moisture buildup.
Storing your headset in humid environments is another major mistake. Bathrooms, basements, or sealed bags keep moisture trapped in the foam even when you’re not using it. This prevents proper drying between sessions and promotes mold growth.
Using harsh cleaning products damages the foam structure. Bleach, strong detergents, or abrasive scrubbing breaks down the foam material and makes it more porous. This actually increases its ability to absorb and hold sweat.
Ignoring the foam until it smells bad means you’ve waited too long. By that point, bacteria and mold have already colonized deep into the material. Catching sweat issues early prevents this situation entirely.
Wearing the headset immediately after sweating from exercise or outdoor heat adds unnecessary moisture. Let your body cool down for 20 to 30 minutes before putting on your VR headset.
Finally, never assume your foam will dry on its own in closed storage. Active drying in open air with good airflow is essential for keeping your foam healthy and fresh.
Troubleshooting Persistent Odor and Moisture Issues
When your VR foam interface develops stubborn odors and moisture problems, you need a systematic approach to fix them. These issues often persist because moisture gets trapped deep within the foam material and bacteria thrives in damp conditions.
Start with a deep cleaning routine. Remove your foam interface if possible and soak it in a mixture of equal parts white vinegar and water for 30 minutes. Vinegar naturally kills odor causing bacteria without damaging foam. Gently scrub the surface with a soft brush to reach bacteria in crevices.
After soaking, rinse thoroughly with clean water until the vinegar smell fades. Squeeze out excess water gently. Do not wring or twist the foam as this damages its structure. Pat dry with a clean towel and let it air dry completely in a well ventilated space.
Baking soda works wonders for lingering odors. Sprinkle it generously over your dried foam interface and let it sit overnight. Baking soda absorbs remaining moisture and neutralizes smells. Vacuum or brush away the powder the next morning.
For persistent moisture issues, place your foam interface in a dry area with a small bowl of uncooked rice or silica gel packets nearby. These materials absorb ambient humidity and help dry out the foam faster.
Prevention stops future problems. After each use, wipe your foam with a dry cloth to remove surface sweat. Store your headset in a cool, dry location. Use moisture absorbing packets in your storage container. These simple steps prevent bacteria growth and keep odors from returning.
If odors still linger after cleaning, consider replacing the foam interface entirely. Sometimes old foam becomes permanently saturated and cleaning alone cannot restore it.
Long-Term Maintenance Habits for a Fresh Fit
Building good habits now keeps your VR headset fresh for years. The key is consistency, not complicated routines.
Daily inspection matters more than you think. Check your foam interface every time you use your headset. Look for visible moisture or discoloration. Catch problems early before they become stubborn odor issues.
Air dry your headset properly after each session. Remove the foam interface if your design allows it. Place it in a well ventilated area away from direct sunlight. Never store it immediately after use while still damp. Give it at least 30 minutes to an hour to dry completely.
Rotate between multiple foam covers if you have them. This simple swap gives each cover time to dry thoroughly between uses. You avoid wearing the same damp interface repeatedly. Your foam stays fresher much longer with this rotation method.
Keep your storage area dry and cool. Humidity is your foam’s worst enemy. Store your headset in a closet or cabinet with good air circulation. Avoid basements or bathrooms where moisture lingers. A small container of uncooked rice near your storage spot absorbs excess humidity naturally.
Establish a weekly cleaning schedule. Wipe down your foam with a dry microfiber cloth. This removes dust and light moisture buildup. Once a month, do a deeper clean with mild soap and water. Let everything dry completely before reassembling.
Track your usage patterns too. Notice when your foam gets sweatiest. Maybe you use your headset during workouts or in warm rooms. Adjust your habits around these patterns. Wear lighter clothing or take more frequent breaks during these sessions.
These simple habits prevent major problems from developing. You’ll enjoy a fresh, comfortable fit every time you put on your headset.
Final Thoughts
Sweaty VR sessions do not have to end your fun. Your foam facial interface can stay fresh with the right care routine. Small, consistent actions make the biggest difference over time.
Remember that sweat absorption is normal. Every VR user faces this challenge. The key is knowing how to manage it properly.
Cleaning your foam regularly stops odor and bacteria from building up. Simple solutions like mild soap and water often work best. You do not need fancy products to keep your gear clean.
Replacement covers give you a fresh backup option. Swapping between covers lets each one dry completely. This simple trick extends the life of your entire headset.
Storage matters just as much as cleaning. Keep your headset in a cool, dry spot away from direct sunlight. Good airflow around your foam prevents moisture from getting trapped.
Pay attention to warning signs early. A slight smell or damp feeling means it is time to act. Waiting too long makes the problem harder to fix.
Your habits shape how long your foam interface lasts. Daily checks and quick cleanups take only a few minutes. These small efforts save you time and money later.
VR technology keeps improving, but foam care basics stay the same. Clean gear means better comfort during every session. It also means clearer audio and a better seal for your visuals.
Take these tips and build them into your routine. Your VR headset will thank you with longer life and better performance. A little maintenance now means many more hours of enjoyable, sweat free gaming ahead.
Frequently Asked Questions
Can I machine wash my VR foam interface?
No, machine washing damages foam interfaces. Heat and agitation break down the foam material and ruin the protective layer. Instead, hand wash your foam with lukewarm water and mild soap. Gently squeeze soapy water through the foam. Rinse with clean water until no soap remains. Never wring or twist the foam. Let it air dry completely before reattaching it to your headset.
How often should I replace my foam interface?
Most foam interfaces last 6 to 12 months with proper care. You need replacement sooner if you experience frequent sweating or notice the foam staying damp for hours. Check for permanent discoloration, odor that won’t go away, or visible breakdown of the material. These signs mean it’s time for a new interface. Regular cleaning extends the life of your foam significantly.
What’s the best way to dry my foam after cleaning?
Air drying is your best option. Place your foam interface on a clean, dry towel in a well-ventilated area. Position it so air flows around all sides. Direct sunlight helps kill bacteria and speeds drying. Avoid heat sources like hair dryers or radiators. High heat warps the foam permanently. Drying usually takes 24 to 48 hours depending on humidity levels. Never store wet foam in your headset case.
Why does my foam smell even after cleaning?
Bacteria and mold grow in damp foam. Vinegar and baking soda treatments help, but if odor returns quickly, your foam may be too saturated. Deep cleaning involves soaking the foam longer and letting it dry in direct sunlight for several days. If the smell persists after thorough cleaning and drying, replacement becomes necessary.

Hi, I’m Minnie Cole, the creator of The Output Lab — a space where I share my passion for all things tech. I spend my days exploring the latest gadgets, devices, and electronics on Amazon, putting them through real-world testing so you don’t have to.