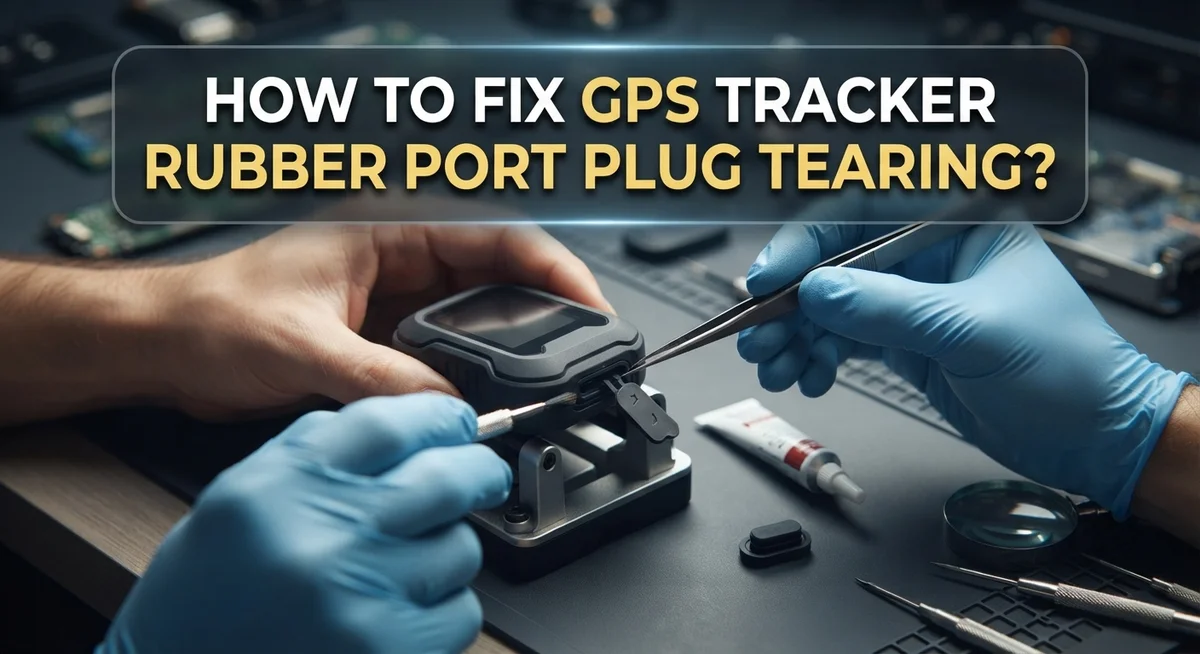
How To Fix GPS Tracker Rubber Port Plug Tearing?
Your GPS tracker’s rubber port plug plays a bigger role than you think. It shields the OBD port from dust, moisture, and dirt. But over time, this small part can tear or crack.
Maybe you pulled the plug too hard. Maybe it got snagged during installation. Or maybe regular wear just caught up with it.
Whatever the cause, a torn rubber plug is not the end of the world. You do not need to buy a whole new tracker. In most cases, you can fix the problem yourself with a few simple steps.
In a Nutshell
- Clean the area first. Wipe the ball grooves and socket surfaces before you start any repair. This helps the adhesive stick better and last longer.
- Use flexible adhesive. Silicone glue works best for rubber plugs. It bends with the material instead of cracking over time.
- Let it cure fully. Do not rush this step. Give the adhesive enough time to set before you use the tracker again.
- Avoid forcing plugs into slots. Most tears happen because someone pushes too hard or at the wrong angle. Gentle, steady insertion prevents this.
- Check your charging cable too. Sometimes power issues are not about the torn plug at all. A faulty cable can mimic the same symptoms.
- Replacement parts exist for some models. If the tear is too bad to fix, certain trackers offer replacement doors or plugs you can swap in.
Careful handling now saves you from bigger headaches later. A few smart habits keep your tracker’s port safe for years.
Understanding Rubber Port Plugs and Their Purpose
Rubber port plugs serve one main job: they protect your GPS tracker’s connections from damage. These small covers sit over the OBD port and power connection points on your device. Without them, dust and moisture can sneak inside and cause serious problems.
The OBD port is where your tracker connects to your vehicle’s electrical system. This connection supplies power to keep your device running. The rubber plug acts as a barrier between this sensitive port and the outside world. Think of it like a door that keeps unwanted elements out.
Why does the plug matter so much? Moisture is your tracker’s enemy. Water can corrode the metal contacts inside the port and create connection failures. Dust particles can also block proper contact between the plug and the port. A torn rubber plug loses its ability to seal effectively, leaving your device vulnerable.
The plug’s design includes grooves and a socket structure. These features help it fit snugly into the port opening. When the plug sits correctly, it creates a tight seal that keeps everything protected. A proper fit means water and debris cannot slip through the edges.
Understanding proper handling is key. Many people damage their plugs by forcing them into slots at the wrong angle. Others pull too hard during removal and cause tears. The plug should slide in smoothly without resistance. If you feel pressure, stop and check the alignment.
Different tracker models have different port designs. Some devices have larger plugs, while others have smaller ones. Knowing your specific tracker’s port type helps you understand what kind of damage might occur. This knowledge also guides you toward the right repair approach.
A functioning rubber port plug extends your GPS tracker’s lifespan significantly. It prevents costly internal damage and keeps your device working reliably. Taking care of this small component pays big dividends over time.
Why Rubber Port Plugs Tear: Common Causes
Rubber port plugs tear for several straightforward reasons. Understanding these causes helps you prevent damage before it happens.
Repeated removal and insertion is the most common culprit. Every time you pull the plug out or push it in, the rubber flexes. Over months or years, this repeated stress weakens the material. The rubber loses its elasticity and eventually splits or cracks.
Forcing the plug into the slot causes immediate damage. Many people push too hard or insert at the wrong angle. The rubber gets pinched or stretched beyond its limits. This violent insertion often tears the material on the first or second attempt.
Accidental snagging happens more often than you’d think. Your hand catches the plug while reaching for something else. Your clothing snags it during installation. Even a gentle kick while working under the vehicle can tear the rubber. These small accidents add up over time.
Environmental stress plays a role too. Heat and cold cycles make rubber brittle. UV exposure degrades the material. Moisture seeping into small cracks accelerates deterioration. A plug that works fine in spring might fail in winter.
Using faulty or incompatible charging cables creates unnecessary tension. A cable that doesn’t fit properly puts strain on the plug. You end up wiggling it or forcing it to make a connection. This stress transfers directly to the rubber.
Poor initial installation sets the stage for future problems. If the plug wasn’t seated correctly from the start, it sits at an angle. This puts constant pressure on one side of the rubber. Misalignment causes faster wear and tear.
The good news? Most tears are preventable. Gentle handling and proper seating stop most damage before it starts. Avoid rushing. Take your time inserting and removing the plug. Treat it like a delicate connection, not a rough component. This simple approach saves you from expensive repairs later.
Tools and Materials Needed for Repair
Before you start repairing a torn rubber port plug, gather the right supplies. Having everything ready prevents mistakes and speeds up your work.
Cleaning supplies come first. You need a soft cloth or microfiber towel to wipe away dust and debris. A small brush with soft bristles helps you reach the ball grooves without scratching them. Isopropyl alcohol works well for removing stubborn grime from the socket surfaces.
Adhesive is essential for the repair. Silicone glue is your best choice because it stays flexible after drying. This flexibility matters since rubber plugs move slightly when you insert and remove them. Regular rigid glue cracks under this movement and fails quickly.
Protection tools keep your workspace clean. Newspaper or a drop cloth prevents adhesive from staining your work area. Small containers help you organize screws or tiny components if your tracker disassembles during repair.
Optional but helpful items include a magnifying glass. GPS tracker ports are small, and seeing the damage clearly makes repairs easier. A small clamp or vice holds the tracker steady while you work, preventing accidental slips.
Patience is your most important tool. Set aside enough time for the adhesive to cure completely. Rushing this step causes the repair to fail within days.
Documentation helps too. Take a photo of your tracker before you start. This reference shows you how everything should look when reassembled. Keep your manual nearby in case you need to check port specifications.
Safety matters during repair. Work in a well ventilated area since silicone adhesive releases fumes. Wear gloves to keep adhesive off your skin. Let your hands stay clean and dry throughout the process.
Gathering these materials takes just minutes but saves you hours of frustration during the actual repair work.
Step-by-Step Guide to Fixing a Torn Rubber Port Plug
Start by locating your GPS tracker’s rubber port plug. This small component sits at the entry point of your OBD connection or power port. Examine the tear carefully before you begin any repair work.
Clean the damaged area thoroughly. Use a soft cloth to remove dust, dirt, and any debris around the torn plug. Pay special attention to the grooves where the plug connects. A clean surface helps adhesive bond properly and ensures a stronger repair.
Dry the area completely. Moisture prevents adhesive from setting correctly. If your tracker was recently exposed to rain or moisture, wait several hours before proceeding. This step is often overlooked but makes a significant difference in repair success.
Apply silicone glue around the grooved areas of the torn plug. Work slowly and carefully. Use just enough adhesive to fill the damaged sections without creating excess. Silicone glue remains flexible after drying, which prevents new cracks from forming when you insert and remove the plug.
Allow proper cure time before using your tracker. Most silicone adhesives need 24 hours to set completely. Check the specific product instructions for exact timing. Rushing this step compromises your repair.
Test the connection gently after the adhesive cures. Insert the plug slowly and smoothly into the port. Avoid forcing it, as this can re tear the rubber. Movement should feel smooth and natural.
For future prevention, handle your tracker carefully during installation and removal. Never kick or snag the plug area. Insert the connector straight into the port at the correct angle. Gentle, deliberate movements protect your rubber port plug from damage.
If the tear is severe or the repair fails, replacement rubber plugs are available for most GPS tracker models. Check your device’s manual or manufacturer’s website for compatible replacement parts specific to your tracker model.
Proper Installation Techniques to Prevent Future Tearing
Proper installation prevents most rubber port plug damage from happening in the first place. The key is understanding how these plugs work and treating them with care from day one.
Start with a gentle approach. When connecting your GPS tracker to the OBD port, never force the plug into the slot. Apply steady, even pressure until you feel it seat naturally. Forcing causes immediate tearing and misalignment that compromises the seal.
Locate the port correctly before inserting anything. Take time to identify your vehicle’s OBD port. It’s usually under the dashboard on the driver’s side. Familiarize yourself with the port opening size and shape. This prevents fumbling and reduces the risk of accidental damage during connection.
Handle removal with the same care you use for installation. Grip the connector body, not the rubber plug itself. Pull straight out using steady pressure rather than twisting or yanking. Never kick or snag the plug accidentally while moving around your vehicle.
Use compatible charging cables every time. Faulty or incompatible cables create tension on the rubber port plug during charging sessions. This repeated stress causes small tears that grow larger over time. Always verify your cable matches your tracker model before connecting.
Create a stable installation routine. Designate a specific location for your tracker installation. Keep the area clean and dry. Avoid installing or removing your tracker in awkward positions where you might slip or apply uneven pressure.
Allow full battery charging before removing the device. Removing a tracker while it’s still charging creates unnecessary tension on the connection. Wait until the battery reaches full charge before disconnecting.
These installation practices significantly extend your rubber port plug’s lifespan. You’ll avoid most common tears simply by treating the connection with respect and patience.
Common Mistakes to Avoid During Repair and Use
Forcing plugs into slots is the number one mistake people make. Your GPS tracker’s rubber port plug tears easily when you push too hard. Stop if you feel resistance. The plug should slide in smoothly without extra pressure.
Kicking or snagging the plug during installation causes immediate damage. Your foot or clothing can catch the rubber as you bend down to connect the tracker. Be aware of your surroundings when working near the OBD port. Move slowly and deliberately around your vehicle’s dashboard area.
Using faulty or incompatible charging cables puts strain on the rubber port. A damaged cable forces the connection to sit at an angle. This angle creates tension on the plug material. Always inspect your charging cable before connecting it to the tracker.
Repeated removal without proper grip technique wears down the rubber over time. Grabbing the plug itself instead of the connector body stretches the material. Hold the connector firmly while gently twisting and pulling away from the port. This protects the rubber from unnecessary stress.
Inserting the plug while the area is wet or dirty leads to poor seating. Moisture prevents the connection from sitting flush in the port. Dirt particles create gaps that force the plug to stretch. Clean and dry everything before connecting your tracker.
Skipping the cure time after repair causes the adhesive to fail. Some people try using their tracker before the silicone glue fully hardens. Wait the full recommended time. Premature use reopens the tear and wastes your repair effort.
Ignoring small tears allows them to become major problems. A tiny rip grows larger each time you connect and disconnect the tracker. Address damage immediately when you first notice it. Early repairs are simpler and more effective than waiting.
Charging your battery fully before troubleshooting power issues prevents confusion. A weak battery can cause connection problems that seem like port damage. Test with a full charge first before assuming the plug is torn.
Troubleshooting Persistent Plug or Power Issues
When your GPS tracker’s rubber port plug tears, power and connection problems follow quickly. Persistent issues often stem from damage you can’t see at first glance. Understanding what causes these problems helps you fix them the right way.
Start by checking your battery charge level completely. A fully charged battery eliminates confusion about whether power problems come from the torn plug or a dead battery. Connect your tracker to a power source and wait several hours before testing anything else.
Next, examine the rubber plug itself under good lighting. Look for visible tears, cracks, or separation from the connector body. Small tears sometimes hide in the grooved areas where the plug connects to the port. Run your finger gently around these grooves to feel for damage you might miss visually.
If you find a tear, clean the entire area thoroughly before attempting repair. Remove dirt, dust, and debris from the ball grooves and socket surfaces. Dry everything completely with a soft cloth. Moisture prevents adhesive from bonding properly and causes repairs to fail.
Apply silicone glue around the damaged grooves carefully. Don’t oversaturate the area. Let the adhesive cure for the full time the manufacturer recommends, usually 24 hours. Rushing this step guarantees failure.
After the adhesive cures, test your connection gently. Insert the plug slowly and listen for a solid click that indicates proper seating. If power still doesn’t flow, try a different charging cable. Faulty cables create tension on the rubber port and cause persistent power problems even after you repair the plug.
If the tear is severe or your repair doesn’t hold, replacement rubber plugs exist for most GPS tracker models. Contact your device manufacturer to find the correct replacement part for your specific model. Replacement often costs less than a new tracker.
Final Thoughts
Fixing a torn rubber port plug does not need to be complicated. Clean the area, apply silicone glue to the grooves, and let it cure fully. This simple process solves most tearing problems.
Your GPS tracker depends on this small piece of rubber more than you might think. It shields the OBD port from moisture, dust, and physical damage. A torn plug leaves your device vulnerable to bigger issues.
Prevention truly is your best strategy here. Handle the plug gently every time you connect or disconnect your tracker. Small habits protect the rubber from unnecessary stress.
Remember that quality matters just as much as care. Using the right charging cables and proper connection techniques keeps your equipment working smoothly. These small choices add up over time.
If a tear does happen, do not panic. You now know the exact steps to repair it yourself. Clean, glue, cure, and test is an easy sequence to remember.
Sometimes repairs do not hold, especially with larger tears. That is okay too. Replacement plugs exist for many GPS tracker models, giving you another option.
The key takeaway is simple: act quickly when you spot damage. Small tears grow into bigger problems if you ignore them. Address issues as soon as you notice them.
Your GPS tracker plays an important role in your safety and peace of mind. Taking a few minutes to maintain the rubber port plug protects that investment. It also saves you from frustrating power or connection failures later.
With the right approach, you can keep your tracker functioning properly for years. Careful handling and quick repairs make all the difference. Your device will thank you with reliable, consistent performance.
Frequently Asked Questions
Why does my GPS tracker’s rubber port plug tear so easily?
Rubber port plugs tear for a few main reasons. Repeated insertion and removal wears down the material over time. Forcing the plug into the slot too hard causes immediate damage. Dirt or moisture on the connector prevents proper seating, which puts extra stress on the rubber.
Environmental factors matter too. Heat, cold, and UV exposure make rubber brittle. Kicking or snagging the plug during use snaps the material instantly.
Can I repair a torn rubber port plug myself?
Yes, you can fix a torn plug at home. Start by cleaning the grooved areas completely. Remove all dirt and debris with a dry cloth. Apply silicone glue around the damaged sections carefully. Let the adhesive cure fully before you use the tracker again.
This method works best for small tears. Large tears may need replacement instead. The repair holds better when you avoid tugging on the plug for several hours after gluing.
What’s the best way to prevent port plug damage?
Handle your tracker gently during installation and removal. Avoid forcing the plug into any slot. Keep the connector area dry and clean before you connect it. Use a steady grip when you insert or remove the plug.
Store your tracker in a protected location. This reduces accidental kicks or snags. Check your port regularly for early signs of wear.
Should I replace the rubber plug if repair fails?
If your repair does not hold after proper cure time, replacement plugs are your next step. Different GPS tracker models use different plug designs. Check your device’s manual for the correct replacement part.
Installation is straightforward. Simply remove the old plug and seat the new one firmly in place.

Hi, I’m Minnie Cole, the creator of The Output Lab — a space where I share my passion for all things tech. I spend my days exploring the latest gadgets, devices, and electronics on Amazon, putting them through real-world testing so you don’t have to.