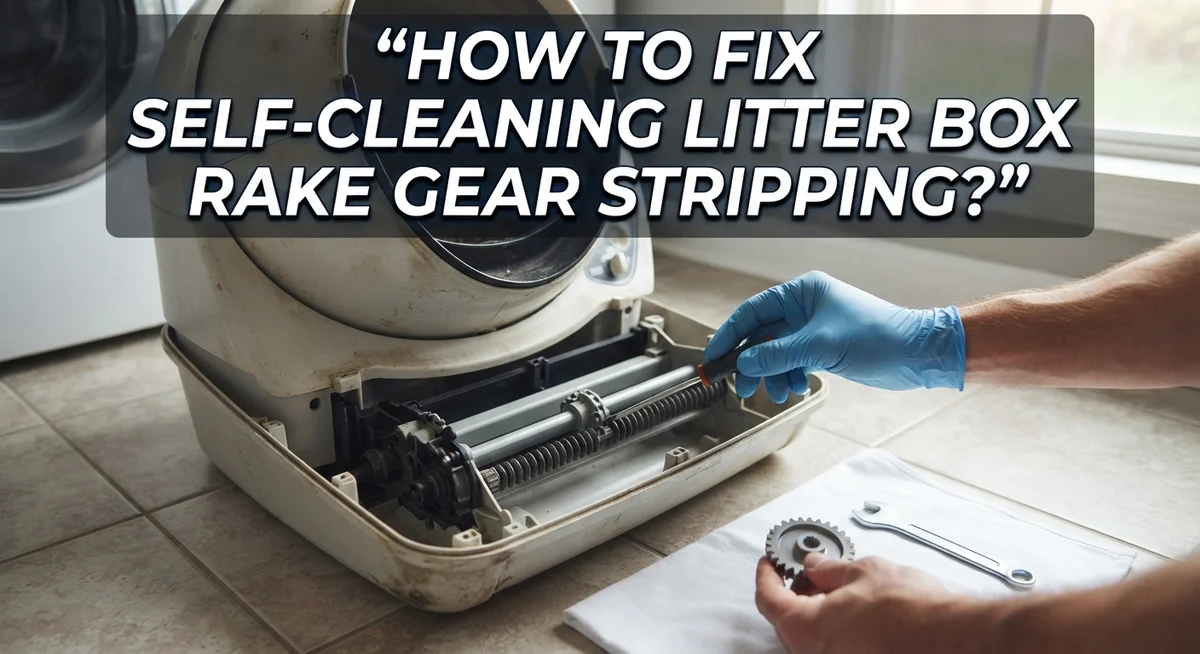
How To Fix Self-Cleaning Litter Box Rake Gear Stripping?
Does your self-cleaning litter box suddenly stop raking? You hear a strange grinding noise, and the rake barely moves. This usually means the gears are stripping inside the unit.
Gear stripping happens when teeth wear down or become misaligned. Loose gears and hidden debris are often the real culprits behind this issue.
The good news is that you can often fix this problem yourself. You do not need to buy a new machine right away.
In a Nutshell
- Power cycle the unit first. Turn it off and unplug it for five minutes. This simple step often resolves minor glitches.
- Open the bonnet and inspect the gear. Look for the black spur gear near the control panel. Check if it looks loose or misaligned.
- Clear away any debris. Use an air duster to blast away litter stuck in the rake path. Small clumps often cause big jams.
- Check your waste drawer. An overflowing drawer can block the rake from moving. Empty it and put it back correctly.
- Clean the sensors carefully. Dirty sensors often trick the system into thinking something is stuck. A quick wipe can restore normal function.
- Press the gear to reseat it. This helps realign the teeth properly. Test the rake movement afterward to confirm it works.
Understanding Rake Gear Stripping: What It Is and Why It Happens
Rake gear stripping is a common issue that stops your self-cleaning litter box from working properly. The rake is the part that moves through the litter to scoop waste. When the gear that controls this rake becomes damaged, the teeth wear down or break off completely.
This damage prevents the rake from moving smoothly across the litter box. You might hear grinding or clicking sounds coming from the unit. The rake may get stuck in one position or move very slowly.
Why does this happen? Several factors cause gear stripping. Loose gears can slip and lose their grip over time. Debris like clumped litter or foreign objects can jam the rake mechanism, forcing the gear teeth to slip. If the waste drawer overflows, pressure builds up and blocks the rake from moving freely.
Motor strain is another cause. When the rake gets stuck, the motor keeps pushing hard against the blockage. This extra force damages the gear teeth until they strip completely.
The danger of continued use Running your litter box with a stripped gear causes more damage. The motor works harder and hotter when gears don’t mesh properly. This can burn out the motor entirely, making the unit unusable.
Early warning signs Listen for unusual noises during the cleaning cycle. Watch if the rake moves slower than normal. Notice if waste isn’t being scooped into the drawer properly.
Understanding these causes helps you act quickly. The sooner you stop the unit and investigate, the better. Most gear stripping problems can be fixed with basic inspection and cleaning. Taking action immediately prevents expensive motor damage and keeps your litter box running smoothly.
Signs Your Litter Box Rake Gear Is Stripping
Your self-cleaning litter box will show clear signs when the rake gear starts stripping. Learning to recognize these warnings helps you catch the problem early and prevent expensive damage.
Listen for grinding or clicking sounds during the cleaning cycle. A normal litter box operates quietly. If you hear loud grinding, clicking, or scraping noises, the gear teeth are likely damaged or misaligned. These sounds mean the rake is struggling to move through the litter.
Watch the rake movement carefully. A healthy rake glides smoothly across the litter box bottom. If the rake moves slowly, jerks, or stops partway through a cycle, gear stripping is happening. The rake might also fail to return to its starting position.
Check if the rake gets stuck completely. When you press the cycle button, does the rake refuse to move at all? This is a serious sign that teeth have worn away or the gear has become severely misaligned.
Notice any burning smells coming from the unit. When gears strip, the motor works much harder to push the damaged teeth. This extra strain creates heat and sometimes a burnt plastic odor.
Look for visible gear damage when you open the bonnet. The black spur gear near the control panel should have intact teeth around its edge. Missing teeth or deep gouges indicate active stripping.
Pay attention to cycle failures. If your litter box starts and stops randomly during cleaning, the gear may be slipping. The motor loses grip on the damaged teeth and cannot complete full rotations.
These signs tell you to stop using the unit immediately. Continuing operation with a stripped gear will damage the motor beyond simple repair.
Step-by-Step Guide to Diagnosing the Gear Issue
Start your diagnosis by turning off the unit completely. Unplug it from the wall outlet and wait at least 5 minutes. This power cycle clears temporary errors and gives the system a fresh restart.
Next, plug the unit back in and listen carefully during the next cleaning cycle. Pay attention to any grinding, clicking, or unusual sounds coming from the motor area. These noises often indicate gear problems before visible damage appears.
Remove the bonnet or globe cover to access the internal components. Look for the black spur gear located near the control panel. Examine it closely for missing teeth, cracks, or visible wear patterns. Even small damage can prevent smooth operation.
Check the waste drawer immediately. Remove it and inspect for litter overflow or blockage. An overfilled drawer forces the rake to work harder, which strains the gear system. Empty and clean the drawer thoroughly before continuing.
Clean both sensors on your unit using a soft, dry cloth. Dirty sensors often cause the rake to get stuck, which mimics gear stripping symptoms. Sensor blockage creates unnecessary motor strain that damages gears over time.
Press the black spur gear gently with your finger to check if it reseats properly. The gear should click into place without resistance. If it moves freely and the rake responds, your issue may have been sensor related.
Clear any litter debris from the rake path using an air duster. Position the box vertically while doing this to prevent litter from spreading. Debris buildup restricts rake movement and causes the motor to work harder than necessary.
Test the unit again after completing these steps. The rake should move smoothly across the litter without grinding sounds. If problems persist, the gear may need professional replacement or repair.
How to Fix a Stripped or Loose Rake Gear
When your rake gear becomes stripped or loose, the litter box cannot complete its cleaning cycle properly. This issue requires immediate attention to prevent further motor damage.
Start by powering down your unit completely. Unplug it from the electrical outlet and wait at least five minutes. This cooling period allows any internal components to settle and resets the system. Plug the unit back in and listen during the next cycle to identify the exact problem.
Access the internal components carefully. Remove the bonnet or globe cover from your litter box. Look for the black spur gear positioned near the control panel. This gear is responsible for moving the rake across the litter box.
Check for debris blocking the mechanism. Use an air duster to remove litter particles from around the rake path. Position your box vertically while doing this to let debris fall away naturally. Debris accumulation often causes gears to jam or slip.
Inspect your waste drawer next. Remove it completely and check for overflow. A full drawer prevents the rake from moving backward properly, which strains the gear.
Clean both sensors with a soft, dry cloth. Dirty sensors cause the unit to malfunction and keep the rake stuck in place. This constant pressure strips teeth off the gear over time.
Press the gear gently with your finger to see if it reseats into proper position. The gear may simply need repositioning rather than replacement. Test your unit again after completing these steps.
If the rake still does not move smoothly or you hear grinding sounds, the gear teeth may be permanently damaged. Contact the manufacturer for replacement parts or professional service options.
Clearing Debris and Cleaning Sensors for Smooth Operation
Clearing debris from your self-cleaning litter box is essential for smooth rake operation. Litter particles accumulate around the rake mechanism and block movement. This buildup forces the motor to work harder and can damage gears faster.
Start by positioning your litter box upright on a flat surface. Use an air duster to blow away loose litter from the rake path. Hold the duster nozzle close to the mechanism but avoid direct contact with gears. Work slowly and let the air push debris out naturally.
Pay special attention to corners where litter clumps form. These tight spaces trap particles that jam the rake during cycles. Compressed air reaches areas your hands cannot access easily. Repeat this process every few weeks to prevent buildup.
Sensors play a critical role in rake operation. Dirty sensors prevent your unit from detecting when cleaning cycles complete. This causes the rake to stay stuck in one position. Clean both sensors using a soft, dry cloth with gentle pressure.
Locate sensors near the waste drawer opening and motor area. Wipe each sensor carefully to remove dust and litter residue. Test your unit after cleaning to confirm sensors work properly.
Check your waste drawer regularly for overflow. A full drawer prevents the rake from moving through its complete cycle. Remove the drawer and empty it completely. Inspect the drawer opening for stuck litter pieces.
Once you’ve cleared debris and cleaned sensors, run a test cycle. Listen for smooth motor sounds without grinding noises. Watch the rake move through its complete path without stopping. Proper maintenance prevents gear stripping and keeps your litter box running reliably for years.
Common Mistakes That Worsen Gear Damage
Continuing to run your self-cleaning litter box when the rake is stuck causes serious damage. The motor works overtime trying to move a jammed mechanism. This extra strain burns out the motor much faster than normal wear.
Ignoring sensor blockage is another costly mistake. Dirty sensors send wrong signals to the control panel. Your unit thinks the rake is in the wrong position when it’s actually stuck. The system keeps trying to cycle, which damages gears further.
Not checking your waste drawer regularly leads to overflow problems. When the drawer fills completely, litter backs up into the rake mechanism. This backup blocks the gear from moving smoothly. The gear teeth catch on debris and strip away.
Many people skip the power cycle step entirely. A simple restart often fixes temporary glitches. Skipping this means you move straight to taking apart your unit. You might find the problem was just a sensor error all along.
Forcing the rake gear back into place without clearing debris first causes immediate re-stripping. The gear reseats, but litter particles still jam the path. The teeth strip again within one or two cleaning cycles.
Using the wrong tools to access internal components creates additional damage. Screwdrivers can slip and puncture important parts. Pliers can bend gear teeth or crack plastic housings. Always use the correct removal method for your specific model.
Waiting too long to address the problem makes repairs more expensive. Early intervention saves your motor and control panel. A small gear issue becomes a full motor replacement if ignored. Act immediately when you notice rake problems or unusual sounds during cycles.
Preventive Maintenance to Avoid Future Gear Stripping
Regular maintenance stops gear stripping before it starts. Your self-cleaning litter box needs consistent care to keep all parts working smoothly.
Clean your litter box weekly to prevent litter buildup inside the mechanism. Remove clumped litter from corners and crevices where particles hide. A buildup of litter particles creates friction that wears down gears over time.
Empty your waste drawer frequently. Check it every two to three days, depending on how many cats use the box. An overflowing drawer forces the rake to work harder, putting extra stress on gears. This strain causes teeth to wear down faster.
Wipe sensors clean every week. Dirty sensors trigger false signals that make the rake move incorrectly. Improper movement damages gears and teeth. Use a soft, dry cloth to gently clean sensor surfaces.
Run test cycles regularly. After cleaning, power on your unit and watch the rake complete one full cycle. Listen for unusual sounds or grinding noises. These sounds warn you that something needs attention.
Check for debris blockage monthly. Use an air duster to blow out dust and litter particles from inside the motor area. Remove the bonnet cover and inspect the rake path carefully. Clear any obstacles you find.
Store your litter box away from moisture. Humidity causes rust on metal gears. Place your unit in a dry location away from bathrooms or humid areas.
Replace litter regularly. Fresh litter clumps better and creates less dust. Dusty litter particles accumulate in the mechanism and cause premature wear.
Following these simple steps keeps your rake gear healthy and prevents costly repairs down the road.
Troubleshooting Persistent Rake Problems
When your rake gear keeps stripping despite your efforts, you need a systematic approach to find the root cause. Start by unplugging your unit and waiting five minutes. This power cycle clears temporary errors in the control system that might trigger false rake movements.
Next, remove the bonnet or globe to access the internal components. Look for the black spur gear positioned near your control panel. Gently press this gear to reseat it properly. Sometimes gears slip out of alignment during normal operation. If the gear feels loose or damaged, this explains your persistent problems.
Inspect the entire rake path for hidden litter blockage. Even small clumps stuck in corners prevent smooth gear rotation. Use an air duster to blow out debris from tight spaces around the motor and gears. Position your box vertically while doing this so particles fall away from internal components.
Check your waste drawer for overflow. A full drawer creates backpressure that forces litter into the rake mechanism. This blockage causes the gear to work harder and strip faster. Empty the drawer completely and inspect it for damage or warping.
Run a test cycle after each step you complete. Plug in your unit and watch the rake move through one full rotation. Listen for grinding sounds or unusual noises. These indicate ongoing mechanical problems.
If the rake still sticks after clearing debris and reseating the gear, your motor might have internal damage. Continuing to operate a damaged motor causes permanent failure. Stop using the unit and assess whether professional repair or replacement makes sense for your situation.
Final Thoughts
Fixing rake gear stripping does not need to be hard. Most problems come from simple things like debris or loose sensors.
You can solve many issues yourself. Power cycling, clearing blockages, and reseating the gear fix most stripping problems fast.
The black spur gear near your control panel plays a big role. A gentle press often restores its grip and stops the stripping.
Regular care makes the biggest difference over time. Weekly cleaning and sensor checks keep your rake moving smoothly.
Your waste drawer needs attention too. An overflowing drawer puts extra strain on the rake and gears.
Think of maintenance as a habit, not a chore. A few minutes each week saves you from bigger headaches later.
If your rake still sticks after these steps, do not force it. Forcing a damaged gear only creates more problems.
Sometimes motor damage lies behind repeated stripping. This happens when the unit keeps running while the rake is stuck.
Catching problems early always helps. A quick fix today prevents a costly repair tomorrow.
Your litter box works hard every day. Giving it small amounts of care keeps it working longer.
Simple habits protect your investment and your cat’s comfort. Clean sensors, empty drawers, and clear debris regularly.
Testing after each fix matters too. Watching one full rake cycle confirms your repair worked.
Trust your observations. If something looks or sounds different, address it right away.
Self-cleaning litter boxes make pet care easier. But they still need your attention to work their best.
With steady care, gear stripping becomes rare. Your rake will run smoothly, and your cat will thank you for it.
Frequently Asked Questions
Why does my rake gear keep stripping even after I fix it?
Repeated gear stripping usually signals motor damage or ongoing debris blockage. When you force a stuck rake, internal motor components wear down faster. Stop using the unit immediately if the rake feels stuck. Check your waste drawer for overflow, as a full drawer prevents the rake from cycling properly. Clean sensors thoroughly since dirty sensors trigger incorrect rake movements.
What should I do if the rake gets stuck mid cycle?
Power off and unplug your unit right away. Leaving it running damages the motor further. Wait five minutes before plugging back in. Remove the bonnet to inspect the rake path for litter clumps or debris. Use an air duster to clear any blockage around the motor area. Press the black spur gear near the control panel to reseat it. Run a test cycle to see if the rake moves freely.
How do I know if my gear is actually stripped versus just stuck?
A stuck rake feels resistance but may move with effort. A stripped gear won’t move at all because teeth are missing. Inspect the black spur gear visually. Look for broken or missing teeth on the gear surface. If teeth look intact but the rake still won’t budge, debris or sensor issues are likely culprits. Clean sensors and clear the waste drawer first before assuming gear damage.
Can I prevent gear stripping from happening again?
Yes. Clean your litter box weekly to stop litter from packing inside the mechanism. Empty your waste drawer every two to three days. Wipe sensors clean weekly so they read correctly. Run monthly test cycles and use an air duster to blow out dust. These simple habits catch problems early and keep your unit running smoothly.

Hi, I’m Minnie Cole, the creator of The Output Lab — a space where I share my passion for all things tech. I spend my days exploring the latest gadgets, devices, and electronics on Amazon, putting them through real-world testing so you don’t have to.